|
|
| (16 intermediate revisions by 6 users not shown) |
| Line 1: |
Line 1: |
| {{Dungeon Boss | | {{NPCInfobox |
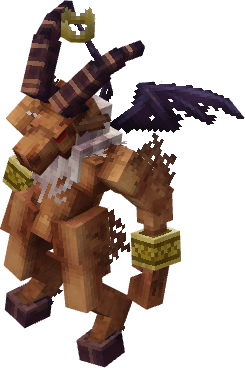
| | title = Asmodeus | | |title= Asmodeus; Posessor of Raph |
| | | |image= 3DAsmodeus.png;AsmodeusBossbar |
| Posessor of Onyx | | |Health= 15400 |
| | image = [[File:Asmodeus.png|968px]] | | |Fame= 3000 |
| | Health = 13000 | | |Bloodshot= |
| | Treasure = No | | Abilities; Visage Of The Night ;Ut-VisageOfTheNight.png;0.8, |
| | | Abilities; Baphomet's Bomb;Ut-Baphomet'sBomb.png;0.8, |
| <!--TIERED SECTION START-->
| | Abilities; Blood Of The Heretics;Ut-BloodOfTheHeretics.png;0.8, |
| | | |Required=66 |
| | Tiered = [[Loot | T11 Equipment]][[File:T11HeavyChestplate.png|30px]]<br> | | |Solo=78 |
| | | }} |
| <!--TIERED SECTION END-->
| | {{NPCInfobox |
| <!--BLOODSHOT SECTION START-->
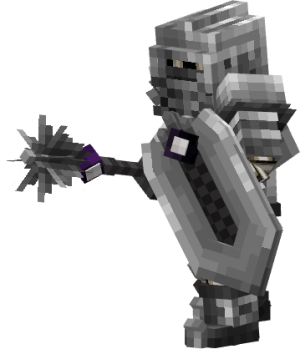
| | |title= Deimos |
| | | |image= 3DDeimos.png |
| | BChance = 1/150
| | |Health= 1210x6 |
| | Bloodshot = [[Abilities | Visage of the Night]][[File:VisageOfTheNight.png|30px]]<br>
| | |Fame= 250x6 |
| | | |Bloodshot= |
| [[Abilities | Baphomet's Bomb]][[File:BaphometBomb.png|30px]]<br>
| | Armours; Repentance ;Ut-Repentance.png;0.15, |
| | | |Required=66 |
| [[Abilities | Blood of the Heretics]][[File:BloodOfTheHeretics.png|30px]]
| | |Solo=78 |
| <!--BLOODSHOT SECTION END-->
| |
| <!--FRAGMENT & TIER POINT SECTION START--><!----------------------------------------------------------------- PICK THE CORRECT FRAG TYPE IF APPLICABLE ----------------------------->
| |
| | |
| | Fragment = [[Exalting | Bloodshot Forge Fragment]][[File:Forge2.png|30px]] | |
| | |
| | TP = 66 TP | |
| | SoloTP = 78 TP | |
| | |
| <!--FRAGMENT & TIER POINT SECTION END-->
| |
| | |
| }} | | }} |
|
| |
|
| <!-------------------------------------Short Dungeon Description Below-----------------------------------> | | <div class="hoverbox"> |
| | | == Dungeon Data == |
| Summoned by the presence of those who enter his sigil, Asmodeus shows invaders hell. | | Summoned by the presence of those who enter his sigil, Asmodeus shows invaders hell. |
|
| |
|
| ==Asmodeus, Posessor of Onyx==
| | This dungeon is dropped by [[Defender]] in the [[Shadowlands]], and it is a singular dungeon split into two ([[Celestial's Province: Part 2]]); however, after defeating Asmodeus, the player is given the option to leave through a return portal. |
| <div style="width: 100%;">
| |
| <div style="float: left;">
| |
| </div> | | </div> |
| <div style="float: left; margin-left: 2%; width: 40%;">
| |
|
| |
|
| ==Boss Patterns== <!------------------Make sure to indent a space for each pattern------------> | | <div class="hoverbox"> |
| | | <div class="dungeon-clear"> |
| 100% to 75% | Asmodeus summons meteors across the arena, with the impact zone indicated by a sigil on the floor. Asmodeus kicks any player who gets too close to him while flying.
| | == Dungeon Clear == |
| | | * In order to reach Asmodeus, the player must first fight off Deimos. |
| 75% to 50% | Asmodeus jumps onto the target player, dealing AoE damage in a small area and launching bouncing projectiles across the arena.
| | </div> |
| | | </div> |
| 75% to 50% | Asmodeus fires 3 sets of hellflame from himself that bounce on impact with a wall and do not disappear until the end of the phase.
| |
|
| |
|
| 50% to 20% | Asmodeus swings his axe around him, dealing contact damage and firing bouncing projectiles across the arena.
| | <div class="hoverbox"> |
| | <div class="pre-dungeon"> |
| | == (Deimos) Miniboss Behaviour == |
| | <!------------------Make sure to indent a space for each pattern------------> |
| | '''(Special)''' | Deimos is able to switch between his other forms six times, meaning the player must fight him six total times to finish the dungeon clear. |
|
| |
|
| ===Boss Phases===
| | '''(Attack 1)''' | Deimos leaps into the air before marking an area to land. Upon landing, he sends out an expanding vortex that deals contact damage followed by eight radial-like, rotating lines of cogs which deal a high amount of DPS. |
|
| |
|
| 75% | Invincibility Phase.
| | '''(Attack 2)''' | Deimos leaps into the air while throwing down two or three fire-like projectiles. He then marks an area to land, and upon landing, sends out an expanding vortex that deals contact damage. When the first thrown projectiles land, they release projectiles in all directions which deal contact damage. |
|
| |
|
| 50% | Invincibility Phase.
| | '''(Attack 3)''' | Deimos slams the ground with his mace, dealing AoE damage in a small radius infront of him, summoning four lines of flames in a plus-shape ahead of him which deal massive DPS, as well as releases cogs in all directions three times. |
|
| |
|
| 20% | Asmodeus triggers his final phase, separating the arena into four moving quadrants that are divided by a beam that instantly kills the player if touched.
| | '''(Attack 4)''' | Deimos teleports to the player before freezing for a second. He then begins walking forward while releasing ten sets of cogs in all directions. |
|
| |
|
| | '''(Attack 5)''' | Deimos dashes backwards before indicating his line of action. After a brief delay, he dashes quickly forward, releasing two sets of normal slashes in all directions; the third being exalted. |
|
| |
|
| | '''100% to 0% (Phase 1)''' | Deimos cycles through his main attacks listed above in order to damage the player. |
| </div> | | </div> |
| </div> | | </div> |
|
| |
|
| | <div class="hoverbox"> |
| | <div class="pre-dungeon"> |
| | == (Asmodeus) Boss Behaviour == |
| | <!------------------Make sure to indent a space for each pattern------------> |
|
| |
|
| {{Navbox
| | '''(Arena Hazard)''' | Permanent zone indicator around the arena. |
| | name = Dungeon Navbox | |
| | title = Dungeons
| |
| | listclass = hlist
| |
| | state = {{{state|collapsed}}}
| |
|
| |
|
| | group1 = 6 Tier Points | | '''(Attack 1)''' | Asmodeus leaps into the air and hovers above the ground. He then begins raining down meteors from the sky which land and break into four more projectiles released in a plus shape. Both the large and fragmented meteors do damage on contact. |
| | list1 = [[Pirate Cove]]
| |
|
| |
|
| | group2 = 12 Tier Points | | '''(Attack 2)''' | Asmodeus begins slowly walking across the arena and then releases three sets of hell-like projectiles in all directions. He then begins controlling the speed of these projectiles; randomly slowing and speeding them up in order to confuse the player. |
| | list2 = [[Thornwood Wargrove]] • [[Goblin Lair]]
| |
|
| |
|
| | group3 = 18 Tier Points | | '''100% to 75% (Phase 1)''' | Asmodeus cycles through his main attacks listed above in order to damage the player. |
| | list3 = [[Sakura Shrine]] • [[Secluded Woodland]] • [[Desert Temple]] | | |
| | '''75% to 50% (Phase 2)''' | Asmodeus summons a massive tornado in the centre of the arena which releases smaller projectiles in all directions periodically. Asmodeus then summons two sets of plus-shaped projectiles across the arena; one moving clockwise & the other anti-clockwise. Asmodeus then begins targeting a player and dashing towards them; dealing both contact damage from the dash as well as his smaller, zone indicator. |
|
| |
|
| | group4 = 24 Tier Points | | '''50% to 20% (Phase 3)''' | Asmodeus begins swinging his axe around him, dealing contact damage to the player if the blade hits them, as well as periodically summoning projectiles in all directions from the tip of the blade which can bounce on the arena walls. |
| | list4 = [[Abyss Of Demons]] • [[Dwarven Frostkeep]] • [[Undead Lair]] • [[Treasure Cave]] • [[Ice Cave]]
| |
|
| |
|
| | group5 = 30 Tier Points | | '''20% to 0% (Phase 4)''' | Asmodeus separates the arena into four moving quadrants that are divided by beams which deal extremely high DPS on contact. He then begins summoning rocket-like projectiles from himself which move away from him as well as from the walls of the arena which move toward him. |
| | list5 = [[Depths Of Purgatory]] • [[Peaks Of Purgatory]] • [[Kobold's Den]] • [[Corvus Crypt]]
| | </div> |
| | </div> |
|
| |
|
| | group6 = 40 Tier Points
| |
| | list6 = [[Omnipotent's Citadel]] • [[Corsair's Conductorium]] • [[Fungal Cavern]] • [[Onyx's Castle]]
| |
|
| |
|
| | group7 = 45 Tier Points | | <div class="hoverbox"> |
| | list7 = [[Freddy's Pizzeria]] • [[Anubis Lair]] • [[Chronos]] | | == Dungeon Enemies == |
| | <div class="dungeon-enemies"> |
| | {{NPCInfobox |
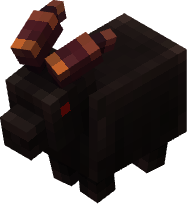
| | | title = Phillip |
| | | image = 3DPhillip.png |
| | | SpecialInfo = Asmodeus transforms Phillip into a beastly amalgamation upon getting close. |
| | }} |
| | </div> |
| | </div> |
|
| |
|
| | group8 = 52 Tier Points
| | <div class="hoverbox"> |
| | list8 = [[Cultist's Hideout]] • [[Void]] • [[Illarius' Hideout]] | | <div class="lore"> |
| | == Lore == |
| | <!------------------Do not touch unless authorized by lorers------------> |
| | {{DLog||Asmodeus|So that's where he's run off to. It's funny how cowardly a Celestial of his stature can be.}} |
|
| |
|
| | group9 = 60 Tier Points
| |
| | list9 = [[Shattered Kingdom: Part 1]] • [[Onyx's Chamber]] • [[Shattered Kingdom: Part 2]]
| |
|
| |
|
| | group10 = 60 Tier Points | | <!--Boss Dialogue Drop Down--> |
| | list10 = [[Celestial's Province]] • [[Shattered Kingdom: Part 3]] | | {{ButtonHeader |
| | |type=Dialogue |
| | |text=Boss & Dungeon Dialogue |
| | |img= |
| | |content= |
| | <tabber> |
| | English Dialogue= |
| | {| class="wikitable" |
| | |+ Clear |
| | |- |
| | ! Trigger !! Dialogue |
| | |- |
| | | Entrance || [Deimos] "All these years… and still I stand here, untested." {{Sound|VA-Celestial'sProvinceDeimos1.ogg}} <br /> [Deimos] "A guardian in name, a failure in truth." {{Sound|VA-Celestial'sProvinceDeimos2.ogg}} <br />[Deimos] "My spirit persists… yet what has it granted me? Silence. Regret. A purpose unfulfilled." {{Sound|VA-Celestial'sProvinceDeimos3.ogg}} |
| | |- |
| | | Deimos Killed 2 Times || [Deimos] "Trained and moulded to maul my enemies. Not even death permits me to evade the ways of bloodshed." {{Sound|VA-Celestial'sProvinceDeimos4.ogg}} |
| | |- |
| | | Deimos Killed 4 Times || [Deimos] "My words shall fade. This battle shall be forgotten. No one will remember me." {{Sound|VA-Celestial'sProvinceDeimos5.ogg}} |
| | |- |
| | | Deimos Killed 6 Times || [Deimos] "Your strings of fate remain in the hands of Asmodeus." {{Sound|VA-Celestial'sProvinceDeimos6.ogg}} |
| | |} |
| | {| class="wikitable" |
| | |+ Bossfight |
| | |- |
| | ! Trigger !! Dialogue |
| | |- |
| | | Arrival || [Asmodeus] "baaaaaAAARGH-YOU DARE SHOW YOUR FACES? PATHETIC. INSECTS." {{Sound|VA-Celestial'sProvinceAsmodeus1.ogg}} |
| | |- |
| | | Phase 1 End || [Asmodeus] "Your world is DONE. Raphael can't save you from destiny!" {{Sound|VA-Celestial'sProvinceAsmodeus2.ogg}} |
| | |- |
| | | Phase 2 End || [Asmodeus] "God’s glory will bathe these lands. But you will not live to see it." {{Sound|VA-Celestial'sProvinceAsmodeus3.ogg}} |
| | |- |
| | | Phase 3 End || [Asmodeus] "ENOUGH. COLLAPSE BEFORE ME." {{Sound|VA-Celestial'sProvinceAsmodeus4.ogg}} |
| | |- |
| | | Boss Death || [Asmodeus] "N-NO…I…CAN’T…how…" {{Sound|VA-Celestial'sProvinceAsmodeus5.ogg}} <br />[Asmodeus] "NO. I JUST NEED MORE POWER. GIVE ME ONE MORE CHANCE." {{Sound|VA-Celestial'sProvinceAsmodeus6.ogg}} |
| | |} |
| | </tabber> |
| | }} |
| | </div> |
| | </div> |
|
| |
|
| | below = [[Main Page | Home]]
| | <div class="hoverbox"> |
| }} | | == Tips and Tricks == |
| | <div class="tipstricks"> |
| | *N/A |
| | </div> |
| | </div> |
| | |
| | {{Dungeon Navbox}} |