|
|
| (25 intermediate revisions by 10 users not shown) |
| Line 1: |
Line 1: |
| {{Dungeon Boss | | {{NPCInfobox |
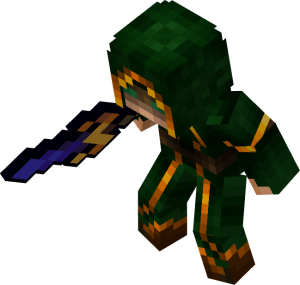
| | title = FILL | | | title = Omnipotent;Follower of the Void |
| | image = [[File:.png|968px]] | | | image = 3DOmnipotent.png;OmnipotentBossbar |
| | Health = FILL | | | Health = 3100 |
| | Treasure = FILL | | | Fame = 250 |
| | | | Tiered = 7-8 |
| <!--TIERED SECTION START-->
| | | Bloodshot = |
| | | Abilities; Blackhole Singularity; Ut-BlackHoleSingularity.png; 0.8 |
| | Tiered = [[Loot | T Equipment]][[File:.png|30px]]<br> | | | Royal = |
| | | Weapons; Sceptre of Gloom; Ut-SceptreOfGloom.png; 3, |
| [[Loot | T Equipment]][[File:.png|30px]]
| | Armours; Omnipotent Robe; Ut-OmnipotentRobe.png; 3, |
| | | Armours; Omnipotent Leggings; Ut-OmnipotentLeggings.png; 3 |
| <!--TIERED SECTION END-->
| | | Companion = |
| <!--COMPANION SECTION START-->
| | Pets; Mini Archmage; 2DMiniArchmage.png; 0.4, |
| | CChance = 1/FILL | | Mounts; Etherealmare; 2DEtherrealmare.png; 0.4 |
| | Companion = [[Pets | ]][[File:.png|30px]]<br>
| | | Rune = |
| | | Runes; Rune Of The Mage; Rune-Omnipotent'sCitadel.png; 3 |
| [[Mounts | ]][[File:.png|30px]]
| | | Frag = Royal;20 |
| | | | Required = 40 |
| <!--COMPANION SECTION END-->
| | | Solo= 54 |
| <!--IRRADIATED SECTION START-->
| |
| | |
| | IChance = 1/FILL | |
| | Irradiated = [[Weapons | ]][[File:.png|30px]]<br>
| |
| | |
| [[Abilities | ]][[File:.png|30px]]
| |
| | |
| [[Armours | ]][[File:.png|30px]]
| |
| | |
| <!--IRRADIATED SECTION END-->
| |
| <!--ROYAL SECTION START-->
| |
| | |
| | RChance = 1/FILL | |
| | Royal = [[Weapons | ]][[File:.png|30px]]<br>
| |
| | |
| [[Abilities | ]][[File:.png|30px]]
| |
| | |
| [[Armours | ]][[File:.png|30px]]
| |
| | |
| <!--ROYAL SECTION END-->
| |
| <!--BLOODSHOT SECTION START-->
| |
| | |
| | BChance = 1/FILL | |
| | Bloodshot = [[Weapons | ]][[File:.png|30px]]<br>
| |
| | |
| [[Abilities | ]][[File:.png|30px]]
| |
| | |
| [[Armours | ]][[File:.png|30px]]
| |
| | |
| <!--BLOODSHOT SECTION END-->
| |
| <!--FRAGMENT & TIER POINT SECTION START--><!----------------------------------------------------------------- PICK THE CORRECT FRAG TYPE IF APPLICABLE ----------------------------->
| |
| | |
| | Fragment = [[Exalting | Irradiated Forge Fragment]][[File:Forge3.png|30px]] [[Exalting | Bloodshot Forge Fragment]][[File:Forge2.png|30px]] [[Exalting | Royal Forge Fragment]][[File:Forge1.png|30px]]
| |
| | |
| | TP = FILL TP | |
| | SoloTP = FILL TP | |
| | |
| <!--FRAGMENT & TIER POINT SECTION END-->
| |
| | |
| }} | | }} |
|
| |
|
| <!-------------------------------------Short Dungeon Description Below-----------------------------------> | | <div class="hoverbox"> |
| | == Dungeon Data == |
| | A master of manipulation of the void's power, Omnipotent seeks to further his knowledge by testing invaders. |
|
| |
|
| DUNGEON DESCRIPTION
| | This dungeon is dropped by [[Lotil]] in the [[Permafrost]]. |
| | </div> |
|
| |
|
| ==BOSS NAME==
| | <div class="hoverbox"> |
| <div style="width: 100%;"> | | <div class="dungeon-clear"> |
| <div style="float: left;"> | | == Dungeon Clear == |
| | * Kill the 2 Cursed Swordsmen and Cursed Bowsmen to open the portal to the boss arena. |
| </div> | | </div> |
| <div style="float: left; margin-left: 2%; width: 40%;"> | | </div> |
| BOSS DESCRIPTION
| | |
| | <div class="hoverbox"> |
| | <div class="pre-dungeon"> |
| | == Boss Behaviour == |
| | <!------------------Make sure to indent a space for each pattern------------> |
| | '''(Attack 1)''' | Omnipotent levitates into the air and unleashes a barrage of dark matter projectiles toward the player, each dealing contact damage. |
|
| |
|
| ==Boss Patterns== <!------------------Make sure to indent a space for each pattern------------>
| | '''(Attack 2)''' | Omnipotent circles the arena from above, summoning a tornado in its center. Each time he fires a projectile into the vortex, it bursts outward, spawning projectiles in all directions. |
|
| |
|
| PATTERN
| | '''(Attack 3)''' | Omnipotent channels the void’s energy to summon a black hole that, after a short delay, hurtles toward the player. If the player is sucked into the black hole, it teleports them back to spawn. |
|
| |
|
| PATTERN
| | '''(Attack 4)''' | Omnipotent conjures a purple cloud above him, causing waves of dark matter to rain down across the arena on to impact zones clearly marked by red circles. |
|
| |
|
| PATTERN
| | '''100% to 50% (Phase 1)''' | Omnipotent cycles through his main attacks listed above in order to damage the player. |
|
| |
|
| | '''50% to 0% (Phase 2)''' | Omnipotent enters an enraged state, channeling the void’s chaos. He continues cycling through his main attacks listed above while also firing additional dark matter projectiles that inflict slowness and ricochet off floors and walls. |
| </div> | | </div> |
| </div> | | </div> |
|
| |
|
| <div style="float: left; width: 100%;"> | | <div class="hoverbox"> |
| ==Dungeon Enemies== | | == Dungeon Enemies == |
| | | <div class="dungeon-enemies"> |
| <div style="float: left;"> | | {{NPCInfobox |
| {{Dungeon Enemy | | | title = Cursed Swordsman |
| | title = | | | image = 3DCursedSwordsman.png |
| | image = .png | | | Attack = Rolls toward the player, dealing melee damage on impact if far, or slashes the player in close range. |
| | Attack = | | | Health = 550 |
| | Health = | | | Fame = 50 |
| }} | | }} |
| </div>
| | {{NPCInfobox |
| <div style="float: left;">
| | | title = Cursed Bowsman |
| {{Dungeon Enemy | | | image = 3DCursedBowsman.png |
| | title = | | | Attack = Shoots three arrows at the player if nearby, or leaps into the air to create distance, firing three arrows at the peak of the jump. |
| | image = .png | | | Health = 358 |
| | Attack = | | | Fame = 50 |
| | Health = | |
| }} | | }} |
| </div> | | </div> |
| <div style="float: left;">
| |
| {{Dungeon Enemy
| |
| | title =
| |
| | image = .png
| |
| | Attack =
| |
| | Health =
| |
| }}
| |
| </div> | | </div> |
|
| |
|
| | <div class="hoverbox"> |
| | <div class="lore"> |
| | == Lore == |
| | <!------------------Do not touch unless authorized by lorers------------> |
| | {{DLog||Omnipotent|???}} |
|
| |
|
| <div style="float: left; width: 100%;"> | | <!--Boss Dialogue Drop Down--> |
| | {{ButtonHeader |
| | |type=Dialogue |
| | |text=Boss & Dungeon Dialogue |
| | |img= |
| | |content= |
| | <tabber> |
| | English Dialogue= |
| | {| class="wikitable" |
| | |+ Clear |
| | |- |
| | ! Trigger !! Dialogue |
| | |- |
| | | Entrance || [Omnipotent] "Oh Lotil... The epitome of wasted potential!" {{Sound|VA-Omnipotent'sCitadel1.ogg}} |
| | |} |
| | {| class="wikitable" |
| | |+ Bossfight |
| | |- |
| | ! Trigger !! Dialogue |
| | |- |
| | | Arrival || [Omnipotent] "No matter! The void was to be mine and mine alone!" {{Sound|VA-Omnipotent'sCitadel2.ogg}} |
| | |- |
| | | 75% Boss HP || [Omnipotent] "Who are you to disrupt my quest?" {{Sound|VA-Omnipotent'sCitadel3.ogg}} |
| | |- |
| | | Phase 1 End || [Omnipotent] "YOU! CANNOT COMPREHEND MY PLANS" {{Sound|VA-Omnipotent'sCitadel4.ogg}} |
| | |- |
| | | 25% Boss HP || [Omnipotent] "I, the rightful heir to the Void, will save this decaying realm!" {{Sound|VA-Omnipotent'sCitadel5.ogg}} |
| | |- |
| | | Boss Death || [Omnipotent] "Ha..ha. I already won... Raphael will fall... and I will return, stronger..." {{Sound|VA-Omnipotent'sCitadel6.ogg}} |
| | |} |
| | </tabber> |
| | }} |
| | </div> |
| | </div> |
|
| |
|
| {{Navbox
| | <div class="hoverbox"> |
| | name = Dungeon Navbox
| | == Tips and Tricks == |
| | title = Dungeons
| | <div class="tipstricks"> |
| | listclass = hlist
| | * When he levitates in the air to summon the black hole, if you have low speed, immediately start running away from him; otherwise, the black hole will catch up to you very quickly. |
| | state = {{{state|collapsed}}}
| | * When he starts summoning tornados, you can DPS omnipotent the whole time and ignore the projectiles completely if your survivability is decent. Just follow him as he travels around the arena. |
| | | </div> |
| | group1 = 6 Tier Points
| | </div> |
| | list1 = [[Pirate Cove]]
| |
| | |
| | group2 = 12 Tier Points
| |
| | list2 = [[Thornwood Wargrove]] • [[Goblin Lair]]
| |
| | |
| | group3 = 18 Tier Points
| |
| | list3 = [[Sakura Shrine]] • [[Secluded Woodland]] • [[Desert Temple]]
| |
| | |
| | group4 = 24 Tier Points
| |
| | list4 = [[Abyss Of Demons]] • [[Dwarven Frostkeep]] • [[Undead Lair]] • [[Treasure Cave]] • [[Ice Cave]]
| |
|
| |
|
| | group5 = 30 Tier Points
| | {{Dungeon Navbox}} |
| | list5 = [[Depths Of Purgatory]] • [[Peaks Of Purgatory]] • [[Kobold's Den]] • [[Corvus Crypt]]
| |
| | |
| | group6 = 40 Tier Points
| |
| | list6 = [[Omnipotent's Citadel]] • [[Corsair's Conductorium]] • [[Fungal Cavern]] • [[Onyx's Castle]]
| |
| | |
| | group7 = 45 Tier Points
| |
| | list7 = [[Freddy's Pizzeria]] • [[Anubis Lair]] • [[Chronos]]
| |
| | |
| | group8 = 52 Tier Points
| |
| | list8 = [[Cultist's Hideout]] • [[Void]] • [[Illarius' Hideout]]
| |
| | |
| | group9 = 60 Tier Points
| |
| | list9 = [[Shattered Kingdom: Part 1]] • [[Onyx's Chamber]] • [[Shattered Kingdom: Part 2]]
| |
| | |
| | group10 = 60 Tier Points
| |
| | list10 = [[Celestial's Province]] • [[Shattered Kingdom: Part 3]]
| |
| | |
| | below = [[Main Page | Home]]
| |
| }} | |


