|
|
| (7 intermediate revisions by 3 users not shown) |
| Line 1: |
Line 1: |
| <!-------------------------------------Short Dungeon Description Below----------------------------------->
| |
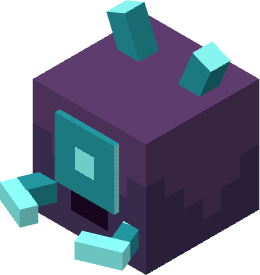
| A deep roaring sound fills the cavern as Prismara activates her crystals that prevent intruders from entering her domain.
| |
|
| |
| This dungeon is dropped by [[Glumi]].
| |
| {{NPCInfobox | | {{NPCInfobox |
| |title= Prismara;Crystal Worm Mother | | | title = Prismara;Crystal Worm Mother |
| |image= 3DPrismara.png;PrismaraBossBar | | | image = 3DPrismara.png;PrismaraBossBar |
| |Health= 2475 | | | Health = 2475 |
| |Fame= 400 | | | Fame = 400 |
| |Biome= [[Jungle]] | | | Tiered = 7-8 |
| |Tiered= 7-8 | | | Bloodshot = |
| | Weapons; Amethyst Wormpiercer; Ut-AmethystWormpiercer.png; 0.8 |
| | | Royal = |
| | Abilities; Crystal Shield; Ut-CrystalShield.png; 3, |
| | Abilities; Crystal Trap; Ut-CrystalTrap.png; 3, |
| | Armours; Crystal Boots; Ut-CrystalBoots.png; 3 |
| | | Companion = |
| | Pets; Minobi; 2DMinobi.png; 0.4, |
| | Mounts; Mycohawk; 2DMycohawk.png; 0.4 |
| | | Rune = |
| | Runes; Rune Of The Crystal; Rune-FungalCavern.png; 3 |
| | | Frag = Royal;20 |
| | | Required = 40 |
| | | Solo = 54 |
| | }} |
|
| |
|
| |Bloodshot= Weapons;Amethyst Wormpiercer;Ut-AmethystWormpiercer.png;0.8
| | <div class="hoverbox"> |
| | == Dungeon Data == |
| | A deep roaring sound fills the cavern as Prismara activates her crystals that prevent intruders from entering her domain. |
|
| |
|
| |Royal=
| | This dungeon is dropped by [[Glumi]] in the [[Swamp]]. |
| Abilities;Crystal Shield;Ut-CrystalShield.png;2.5,
| | </div> |
| Abilities;Crystal Trap;Ut-CrystalTrap.png;2.5,
| |
| | |
| Armours;Crystal Boots;Ut-CrystalBoots.png; 2.5
| |
| | |
| |Companion= Pets;Minobi;2DMinobi.png;0.4,
| |
| Mounts;Mycohawk;2DMycohawk.png;0.4
| |
| | |
| |Rune= runes;Rune Of The Crystal;Rune-Crystal.png;3
| |
| |Frag= Royal;20
| |
| | |
| |Required=40
| |
| |Solo=54
| |
| }}
| |
|
| |
|
| | <div class="hoverbox"> |
| <div class="dungeon-clear"> | | <div class="dungeon-clear"> |
| ==Dungeon Clear== | | == Dungeon Clear == |
| * Clear the dungeon's rooms while looking for the highlighted crystals, and break them. | | * Clear the dungeon's rooms while looking for the highlighted crystals, and break them. |
| * Do not move to the lower level of the dungeon until all the crystals on the upper layer have been broken, as you cannot go back. | | * Do not move to the lower level of the dungeon until all the crystals on the upper layer have been broken, as you cannot go back. |
| * After breaking all upper level crystals, find the entrance to the lower level, and continue breaking the remaining crystals. | | * After breaking all upper level crystals, find the entrance to the lower level, and continue breaking the remaining crystals. |
| * The last crystal will be found in a big room where the boss arena's teleport portal will spawn. | | * The last crystal will be found in a big room where the boss arena's teleport portal will spawn. |
| | </div> |
| </div> | | </div> |
|
| |
|
| | <div class="hoverbox"> |
| <div class="pre-dungeon"> | | <div class="pre-dungeon"> |
| ==Boss Behaviour== | | == Boss Behaviour == |
| <!------------------Make sure to indent a space for each pattern------------> | | <!------------------Make sure to indent a space for each pattern------------> |
| | '''100% to 75% (Phase 1)''' | Prismara circles the arena, continuously releasing purple crystal projectiles in every direction. Each time the player damages her, one of her crystal segments shatters. Once all segments are broken, Prismara’s health drops to 75%. |
|
| |
|
| 100% to 75% (Phase 1) | Prismara circles her arena while shooting out purple crystals in every direction. Whenever the player hits her, she loses one of her segments, which after all have been broken, will get her to 75% HP.
| | '''75% to 35% (Phase 2)''' | Prismara burrows beneath the ground, leaping out before diving back below. Each impact creates six waves of crystal bursts that spread outward. During this phase, players can only damage her by striking her last segment. After six segments are destroyed, her health drops to 35%. |
| | |
| 75% to 35% (Phase 2) | Prismara burrows into the ground, leaping outwards and back into the ground. When Prismara hits the ground, she releases a flurry of crystals in 6 waves. Players must hit her last segment in order to do damage to her. After breaking 6 segments, she will get to 35% HP. | |
|
| |
|
| 35% (Phase 3) | Prismara splits into 8 segments that circle around the edges of the arena and are connected to Prismara. Players must kill these segments to break her invulnerability barrier. While the segments are circling, Prismara releases blue crystals in all directions. | | '''35% (Phase 3)''' | Prismara splits into eight crystal segments that orbit the arena’s edges, each connected to her at the centre by glowing beams. Players must destroy these segments to remove her invulnerability barrier. While they circle, Prismara releases blue crystal projectiles in all directions. |
| | |
| 35% to 0% (Phase 4) | Prismara releases magenta crystals in all directions.
| |
|
| |
|
| | '''35% to 0% (Phase 4)''' | Prismara unleashes volleys of magenta crystals in every direction. |
| </div> | | </div> |
|
| |
| <!------------------Do not touch unless authorized by lorers------------>
| |
| <div class="dlog>
| |
| <b>[D̷̛͖̲̜̤̭̤̬̏͑́̌̇̽͛̊́̕̚͜'s LOG: ???] BYPASS STATE:</b> ???
| |
| </div> | | </div> |
|
| |
|
| | <div class="hoverbox"> |
| == Dungeon Enemies == | | == Dungeon Enemies == |
| <div class="dungeon-enemies"> | | <div class="dungeon-enemies"> |
| {{NPCInfobox | | {{NPCInfobox |
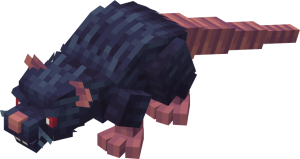
| |title= Fungal Spider | | | title = Fungal Rat |
| |image= 3DFungalSpider.png | | | image = 3DFungalRat.png |
| |Attack= Hops into the air and shoots 3 white projectiles at the player, inflicting damage and slowness to the player on contact. | | | Attack = Moves toward the player and deals melee damage. |
| |Health= 93 | | | Health = 110 |
| |Fame= 30 | | | Fame = 30 |
| }} | | }} |
| {{NPCInfobox | | {{NPCInfobox |
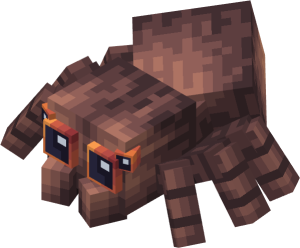
| |title= Fungal Rat | | | title = Fungal Spider |
| |image= 3DFungalRat.png | | | image = 3DFungalSpider.png |
| |Attack= Moves towards the player and does melee damage. | | | Attack = Hops into the air and fires three white projectiles, inflicting slowness and damage on contact. |
| |Health= 110 | | | Health = 93 |
| |Fame= 30 | | | Fame = 30 |
| }} | | }} |
| {{NPCInfobox | | {{NPCInfobox |
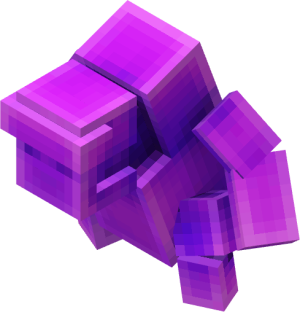
| |title= Amethyst Shardling | | | title = Amethyst Shardling |
| |image= 3DAmethystShardling.png | | | image = 3DAmethystShardling.png |
| |Attack= Throws an amethyst crystal projectile at the player, causing contact damage. | | | Attack = Throws an amethyst crystal projectile that deals contact damage. |
| |Health= 93 | | | Health = 93 |
| |Fame= 30 | | | Fame = 30 |
| }} | | }} |
| {{NPCInfobox | | {{NPCInfobox |
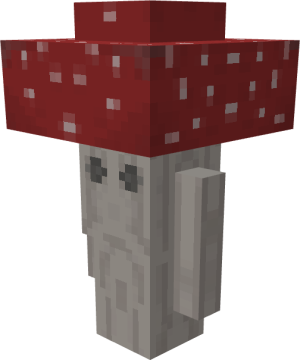
| |title= Live Shroom (Red) | | | title = Live Shroom (Red) |
| |image= 3DRLiveShroom.png | | | image = 3DRLiveShroom.png |
| |Attack= Shoots out red projectiles from the top of the shroom, inflicting damage to the player on contact. | | | Attack = Shoots red projectiles from the top of the shroom, inflicting damage on contact. |
| |Health= 104 | | | Health = 104 |
| |Fame= 30 | | | Fame = 30 |
| }} | | }} |
| {{NPCInfobox | | {{NPCInfobox |
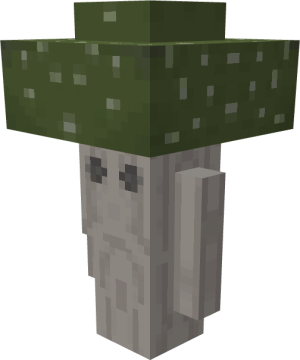
| |title= Live Shroom (Green) | | | title = Live Shroom (Green) |
| |image= 3DGLiveShroom.png | | | image = 3DGLiveShroom.png |
| |Attack= Shoots out green projectiles from the bottom of the shroom, inflicting damage and blindness to the player on contact. | | | Attack = Shoots green projectiles from the bottom of the shroom, inflicting damage and blindness on contact. |
| |Health= 104 | | | Health = 104 |
| |Fame= 30 | | | Fame = 30 |
| }} | | }} |
| {{NPCInfobox | | {{NPCInfobox |
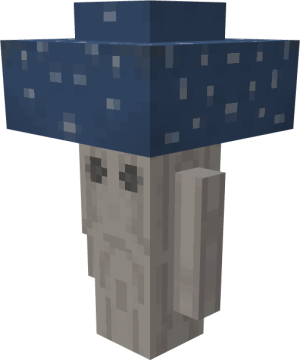
| |title= Live Shroom (Blue) | | | title = Live Shroom (Blue) |
| |image= 3DBLiveShroom.png | | | image = 3DBLiveShroom.png |
| |Attack= Shoots out yellow projectiles from the bottom of the shroom, inflicting damage and slowness to the player on contact. | | | Attack = Shoots blue projectiles from the bottom of the shroom, inflicting damage and slowness on contact. |
| |Health= 104 | | | Health = 104 |
| |Fame= 30 | | | Fame = 30 |
| }} | | }} |
| {{NPCInfobox | | {{NPCInfobox |
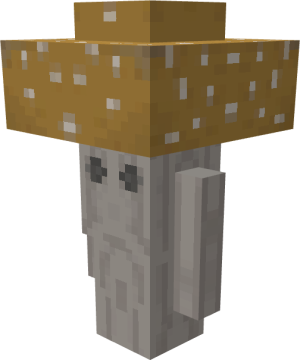
| |title= Live Shroom (Yellow) | | | title = Live Shroom (Yellow) |
| |image= 3DYLiveShroom.png | | | image = 3DYLiveShroom.png |
| |Attack= Shoots out yellow projectiles from the centre of the shroom, inflicting damage and nausea to the player on contact. | | | Attack = Shoots yellow projectiles from the center of the shroom, inflicting damage and nausea on contact. |
| |Health= 104 | | | Health = 104 |
| |Fame= 30 | | | Fame = 30 |
| }} | | }} |
| | </div> |
| </div> | | </div> |
|
| |
|
| | <div class="hoverbox"> |
| | <div class="lore"> |
| | == Lore == |
| | <!------------------Do not touch unless authorized by lorers------------> |
| | {{DLog||Prismara|???}} |
|
| |
|
| ==Tips and Tricks== | | <!--Boss Dialogue Drop Down--> |
| | {{ButtonHeader |
| | |type=Dialogue |
| | |text=Boss & Dungeon Dialogue |
| | |img= |
| | |content= |
| | <tabber> |
| | English Dialogue= |
| | {| class="wikitable" |
| | |+ Clear |
| | |- |
| | ! Trigger !! Dialogue |
| | |- |
| | | Crystal Broken || A Crystal has been destroyed! |
| | |- |
| | | All Crystals Broken || A portal to Prismara's arena has appeared! |
| | |} |
| | {| class="wikitable" |
| | |+ Bossfight |
| | |- |
| | ! Trigger !! Dialogue |
| | |- |
| | | Breaking a segment in Phase 1 || [Prismara] "..." |
| | |- |
| | | Breaking a segment in Phase 2 || [Prismara] "Enough! Leave my cavern!" |
| | |- |
| | | Phase 2 End || [Prismara] "Separate!" |
| | |- |
| | | Phase 3 End || [Prismara] "My crystal fragments will cut through you!" |
| | |} |
| | </tabber> |
| | }} |
| | </div> |
| | </div> |
| | |
| | <div class="hoverbox"> |
| | == Tips and Tricks == |
| <div class="tipstricks"> | | <div class="tipstricks"> |
| *During the clear, try to stay away from the Live Shrooms, as they inflict different effects when you get hit. | | * During the clear, try to stay away from the Live Shrooms, as they inflict different effects when you get hit. You can also get hit by all of the projectiles released if you stand on the Shroom itself. |
| *For Prismara, having a decently ranged and fast weapon lets you do the phases much easier. | | * For Prismara, having a decently ranged and fast weapon lets you do the phases much easier. |
| *During Prismara's burrowing stage, you need to hit the last segment to break it. | | * During Prismara's burrowing stage, you need to hit the last segment to break it. |
| | </div> |
| </div> | | </div> |
|
| |
|
| {{Dungeon Navbox}} | | {{Dungeon Navbox}} |