|
|
| (18 intermediate revisions by 7 users not shown) |
| Line 1: |
Line 1: |
| {{Dungeon Boss | | {{NPCInfobox |
| | title = FILL | | | title = Silex;Leader of the Cult |
| | image = [[File:.png|968px]] | | | image = 3DSilex.png;SilexBossBar |
| | Health = FILL | | | Health = 3960 |
| | Treasure = FILL | | | Fame = 600 |
| | | Tiered = 9-10 |
| | | Bloodshot = |
| | Abilities; Souls of the Cult; Ut-SoulsOfTheCult.png; 0.8 |
| | | Royal = |
| | Weapons; Soulrend Ravager; Ut-SoulrendRavager.png; 3, |
| | Weapons; Staff Of Unholy Sacrifice; Ut-StaffOfUnholySacrifice.png; 3, |
| | Armours; Cultist Hood; Ut-HoodOfTheCultist.png; 3, |
| | | Companion = |
| | Pets;Lil' Monk; 2DLil'Monk.png; 0.2, |
| | Mounts;Dusk Manticultist;2DDuskManticultist.png; 0.2, |
| | | Rune = |
| | Runes; Rune Of Cult; Rune-Cultist'sHideout.png; 3 |
| | | Frag = Royal;20 |
| | | Required = 52 |
| | | Solo = 66 |
| | }} |
|
| |
|
| <!--TIERED SECTION START--> | | <div class="hoverbox"> |
| | == Dungeon Data == |
| | The Cultist's Hideout is home to the Leader of the cult, Silex. |
|
| |
|
| | Tiered = [[Loot | T Equipment]][[File:.png|30px]]<br>
| | This dungeon is dropped by [[Valus]] in [[Necropolis]]. |
| | </div> |
|
| |
|
| [[Loot | T Equipment]][[File:.png|30px]]
| | <div class="hoverbox"> |
| | <div class="dungeon-clear"> |
| | == Dungeon Clear == |
| | * Go through the dungeon while trying your best to dodge attacks until you find the drop to the Silex boss arena. |
| | </div> |
| | </div> |
|
| |
|
| <!--TIERED SECTION END--> | | <div class="hoverbox"> |
| <!--COMPANION SECTION START-->
| | <div class="pre-dungeon"> |
| | CChance = 1/FILL | | == Boss Behaviour == |
| | Companion = [[Pets | ]][[File:.png|30px]]<br>
| | <!------------------Make sure to indent a space for each pattern------------> |
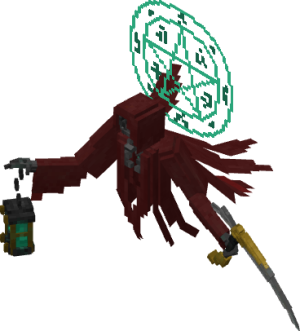
| | '''(Arena Hazard)''' | Throughout the entire fight, Silex spreads the souls of the cult across the arena floor. After one second, these souls explode, dealing AoE damage in a small radius around their point of detonation. |
|
| |
|
| [[Mounts | ]][[File:.png|30px]]
| | '''(Attack 1)''' | Silex targets the player and unleashes a sharp slash that flies forward, dealing damage upon impact. |
|
| |
|
| <!--COMPANION SECTION END-->
| | '''(Attack 2)''' | Silex performs a three-wave attack, releasing slashes in all directions. The final wave doubles in intensity, sending out twice as many slashes. |
| <!--IRRADIATED SECTION START-->
| |
|
| |
|
| | IChance = 1/FILL | | '''(Attack 3)''' | Silex channels his attack before sending multiple rapid slashes in a single direction, each dealing damage to any player caught in their path. |
| | Irradiated = [[Weapons | ]][[File:.png|30px]]<br>
| |
|
| |
|
| [[Abilities | ]][[File:.png|30px]]
| | '''100% to 80% (Phase 1)''' | Silex cycles through his main attacks listed above to damage the player. |
|
| |
|
| [[Armours | ]][[File:.png|30px]]
| | '''80% (Phase 2)''' | Silex summons Crinx to aid him in battle and calls forth purple beams that pull players inward, dealing damage to any caught within. During this phase, Silex becomes immune to damage until Crinx is defeated. |
|
| |
|
| <!--IRRADIATED SECTION END-->
| | '''80% to 55% (Phase 3)''' | Silex periodically releases smaller blue slashes between his main attacks alongside his main attacks listed above. |
| <!--ROYAL SECTION START-->
| |
|
| |
|
| | RChance = 1/FILL | | '''55% (Phase 4)''' | Silex summons Tharms and Arahji, vanishing from the arena until both are killed. |
| | Royal = [[Weapons | ]][[File:.png|30px]]<br>
| |
|
| |
|
| [[Abilities | ]][[File:.png|30px]]
| | '''55% to 30% (Phase 5)''' | Using the souls of Crinx, Tharms, and Arahji, Silex conjures waves of slashes in radial bursts across the entire arena, whilst also cycling through his main attacks listed above to damage the player. |
|
| |
|
| [[Armours | ]][[File:.png|30px]]
| | '''30% to 0% (Phase 6)''' | Silex teleports to the player’s location, firing radial waves of projectiles each time he appears for a few seconds before repeating. |
| | | </div> |
| <!--ROYAL SECTION END--> | | </div> |
| <!--BLOODSHOT SECTION START--> | |
| | |
| | BChance = 1/FILL
| |
| | Bloodshot = [[Weapons | ]][[File:.png|30px]]<br>
| |
| | |
| [[Abilities | ]][[File:.png|30px]]
| |
| | |
| [[Armours | ]][[File:.png|30px]]
| |
| | |
| <!--BLOODSHOT SECTION END-->
| |
| <!--FRAGMENT & TIER POINT SECTION START--><!----------------------------------------------------------------- PICK THE CORRECT FRAG TYPE IF APPLICABLE ----------------------------->
| |
| | |
| | Fragment = [[Exalting | Irradiated Forge Fragment]][[File:Forge3.png|30px]] [[Exalting | Bloodshot Forge Fragment]][[File:Forge2.png|30px]] [[Exalting | Royal Forge Fragment]][[File:Forge1.png|30px]]
| |
| | |
| | TP = FILL TP
| |
| | SoloTP = FILL TP
| |
| | |
| <!--FRAGMENT & TIER POINT SECTION END-->
| |
|
| |
|
| | <div class="hoverbox"> |
| | == Dungeon Enemies == |
| | <div class="dungeon-enemies"> |
| | {{NPCInfobox |
| | | title = Crinx |
| | | image = 3DCrinx.png |
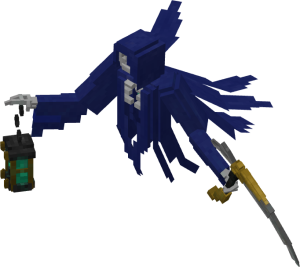
| | | SpecialInfo = Summoned by Silex to assist in battle in Phase 1.5. |
| | | Attack = Throws blue souls of the cult that explode after a second, dealing AoE damage in a small radius. |
| | | Health = 825 |
| | | Fame = 100 |
| | }} |
| | {{NPCInfobox |
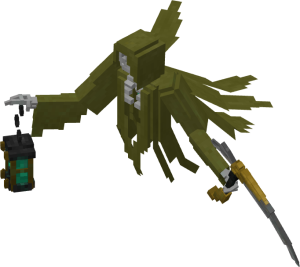
| | | title = Arahji |
| | | image = 3DArahji.png |
| | | SpecialInfo = Summoned by Silex to assist in battle in Phase 2.5. |
| | | Attack = Throws yellow souls of the cult that explode after a second, dealing AoE damage in a small radius. |
| | | Health = 825 |
| | | Fame = 100 |
| | }} |
| | {{NPCInfobox |
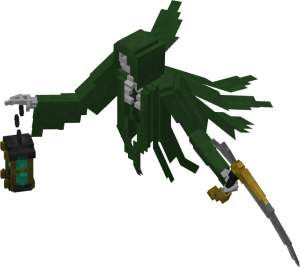
| | | title = Tharms |
| | | image = 3DTharms.png |
| | | SpecialInfo = Summoned by Silex to assist in battle in Phase 2.5. |
| | | Attack = Throws green souls of the cult that explode after a second, dealing AoE damage in a small radius. |
| | | Health = 825 |
| | | Fame = 100 |
| | }} |
| | {{NPCInfobox |
| | | title = Scribe of the Cult |
| | | image = 3DScribeoftheCult.png |
| | | Attack = Fires a barrage of four projectiles or slams the ground to release projectiles in all directions. |
| | | Health = 143 |
| | | Fame = 45 |
| | }} |
| | {{NPCInfobox |
| | | title = Ravager of the Cult |
| | | image = 3DRavageroftheCult.png |
| | | Attack = Strikes with a melee slash when close. |
| | | Health = 143 |
| | | Fame = 45 |
| | }} |
| | {{NPCInfobox |
| | | title = Sorcerer of the Cult |
| | | image = 3DSorcereroftheCult.png |
| | | Attack = Slams the ground to unleash circular magic projectiles in all directions. |
| | | Health = 143 |
| | | Fame = 45 |
| | }} |
| | {{NPCInfobox |
| | | title = Brawler of the Cult |
| | | image = 3DBrawleroftheCult.png |
| | | Attack = Slams the ground near the player, creating a small AoE explosion. |
| | | Health = 132 |
| | | Fame = 45 |
| }} | | }} |
|
| |
| <!-------------------------------------Short Dungeon Description Below----------------------------------->
| |
|
| |
| DUNGEON DESCRIPTION
| |
|
| |
| ==BOSS NAME==
| |
| <div style="width: 100%;">
| |
| <div style="float: left;">
| |
| </div> | | </div> |
| <div style="float: left; margin-left: 2%; width: 40%;"> | | </div> |
| BOSS DESCRIPTION
| |
|
| |
|
| ==Boss Patterns== <!------------------Make sure to indent a space for each pattern------------> | | <div class="hoverbox"> |
| | | <div class="lore"> |
| PATTERN
| | == Lore == |
| | | <!------------------Do not touch unless authorized by lorers------------> |
| PATTERN
| | {{DLog||Silex|???}} |
| | |
| PATTERN
| |
|
| |
|
| | <!--Boss Dialogue Drop Down--> |
| | {{ButtonHeader |
| | |type=Dialogue |
| | |text=Boss & Dungeon Dialogue |
| | |img= |
| | |content= |
| | <tabber> |
| | English Dialogue= |
| | {| class="wikitable" |
| | |+ Bossfight |
| | |- |
| | ! Trigger !! Dialogue |
| | |- |
| | | Arrival || [Silex] "Let us worship in peace!" <br />[Silex] "Fine! I will add your souls to my collection!" |
| | |- |
| | | Phase 1 End || [Silex] "Crinx! Protect your master!" <br />[Crinx] "A fatal mistake!" |
| | |- |
| | | Phase 2 End || [Silex] "Show them no mercy!" <br />[Tharms] "Protect our leader at all costs!" <br />[Arahji] "You will be sacrificed!" |
| | |- |
| | | Phase 2.5 End || [Silex] "Your worthless souls shall perish this instant!" |
| | |- |
| | | Phase 3 End || [Silex] "DEATH AWAITS!" |
| | |} |
| | </tabber> |
| | }} |
| </div> | | </div> |
| </div> | | </div> |
|
| |
|
| <div style="float: left; width: 100%;"> | | <div class="hoverbox"> |
| ==Dungeon Enemies== | | == Tips and Tricks == |
| | | <div class="tipstricks"> |
| <div style="float: left;"> | | *N/A |
| {{Dungeon Enemy
| |
| | title =
| |
| | image = .png
| |
| | Attack =
| |
| | Health =
| |
| }}
| |
| </div>
| |
| <div style="float: left;">
| |
| {{Dungeon Enemy
| |
| | title =
| |
| | image = .png
| |
| | Attack =
| |
| | Health =
| |
| }}
| |
| </div> | | </div> |
| <div style="float: left;">
| |
| {{Dungeon Enemy
| |
| | title =
| |
| | image = .png
| |
| | Attack =
| |
| | Health =
| |
| }}
| |
| </div> | | </div> |
|
| |
|
| | | {{Dungeon Navbox}} |
| <div style="float: left; width: 100%;">
| |
| | |
| {{Navbox | |
| | name = Dungeon Navbox
| |
| | title = Dungeons
| |
| | listclass = hlist
| |
| | state = {{{state|collapsed}}}
| |
| | |
| | group1 = 6 Tier Points
| |
| | list1 = [[Pirate Cove]]
| |
| | |
| | group2 = 12 Tier Points
| |
| | list2 = [[Thornwood Wargrove]] • [[Goblin Lair]]
| |
| | |
| | group3 = 18 Tier Points
| |
| | list3 = [[Sakura Shrine]] • [[Secluded Woodland]] • [[Desert Temple]]
| |
| | |
| | group4 = 24 Tier Points
| |
| | list4 = [[Abyss Of Demons]] • [[Dwarven Frostkeep]] • [[Undead Lair]] • [[Treasure Cave]] • [[Ice Cave]]
| |
| | |
| | group5 = 30 Tier Points
| |
| | list5 = [[Depths Of Purgatory]] • [[Peaks Of Purgatory]] • [[Kobold's Den]] • [[Corvus Crypt]]
| |
| | |
| | group6 = 40 Tier Points
| |
| | list6 = [[Omnipotent's Citadel]] • [[Corsair's Conductorium]] • [[Fungal Cavern]] • [[Onyx's Castle]]
| |
| | |
| | group7 = 45 Tier Points
| |
| | list7 = [[Freddy's Pizzeria]] • [[Anubis Lair]] • [[Chronos]]
| |
| | |
| | group8 = 52 Tier Points
| |
| | list8 = [[Cultist's Hideout]] • [[Void]] • [[Illarius' Hideout]]
| |
| | |
| | group9 = 60 Tier Points
| |
| | list9 = [[Shattered Kingdom: Part 1]] • [[Onyx's Chamber]] • [[Shattered Kingdom: Part 2]]
| |
| | |
| | group10 = 60 Tier Points
| |
| | list10 = [[Celestial's Province]] • [[Shattered Kingdom: Part 3]]
| |
| | |
| | below = [[Main Page | Home]]
| |
| }} | |


