|
|
| (5 intermediate revisions by 3 users not shown) |
| Line 1: |
Line 1: |
| <!-------------------------------------Short Dungeon Description Below----------------------------------->
| |
| ===Spawning Sylvaris===
| |
| Upon spawning in the arena the player must chose to go down a path to attempt a puzzle. Upon completing OR failing a puzzle the player will be teleported into sylvaris' arena and will have the chance to spawn a royal chest which will drop [[Armours| Decaying Sollrelet]]s. When 2 out of the 3 path's puzzles are completed all players will be teleported into Sylvaris' arena and the bossfight will begin.
| |
| {{NPCInfobox | | {{NPCInfobox |
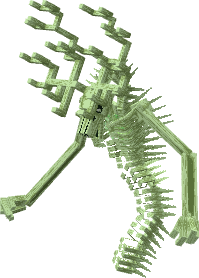
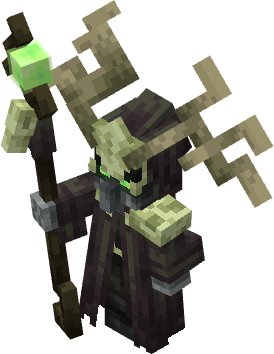
| |title= Sylvaris;Ancient Forest Spirit | | | title = Sylvaris;Ancient Forest Spirit |
| |image=3DSylvaris.png;SylvarisBossBar | | | image = 3DSylvaris.png;SylvarisBossBar |
| |Health= 13750 | | | Health = 13750 |
| |Fame= 2000 | | | Fame = 2000 |
| |Biome= [[Shadowlands]] | | | Bloodshot = |
| | Abilities; Scripture Of The Totem Master; Ut-ScriptureOfTheTotemMaster.png; 0.8, |
| | Armours; Nature's Gift; Ut-Nature'sGift.png; 0.8, |
| | Armours; Spiritbloom Gown; Ut-SpiritbloomGown.png; 0.8 |
| | | Royal = |
| | Armours; Decaying Sollerets*; Ut-DecayingSollerets.png; 3.5 |
| | | Companion = |
| | Pets; Mosslight; 2DMosslight.png; 0.2, |
| | Mounts; Vinegleam; 2DVinegleam.png; 0.2 |
| | | Rune = |
| | Runes; Rune Of Dread; Rune-DreadwoodThicket.png; 3 |
| | | Required = 62 |
| | | Solo = 72 |
| | }} |
|
| |
|
| |Bloodshot=
| | <div class="hoverbox"> |
| Armours;Spiritbloom Gown ;Ut-SpiritbloomGown.png;0.8,
| | == Dungeon Data == |
| | Lying in the ancient forest, Sylvaris the Forest Spirit protects its domain from trespassers. |
|
| |
|
| Armours;Nature's Gift ;Ut-Nature'sGift.png;0.8,
| | This dungeon is dropped by [[Ram Rider]], [[Necrotic Spirit]], and [[Feral Spirit]] in the [[Shadowlands]]. |
| | </div> |
|
| |
|
| Abilities;Scripture Of The Totem Master ;Ut-ScriptureOfTheTotemMaster.png;0.8
| | <div class="hoverbox"> |
| | | <div class="dungeon-clear"> |
| |Royal= Armours;Decaying Sollrelets ;Ut-DecayingSollerets.png;3
| | ==Dungeon Clear== |
| | | * Go through the dungeon while clearing the pathways until you reach the ends of the pathways. |
| |Companion = Pets;Mosslight ;2DMosslight.png;0.2,
| | * You must then complete at least 2 of the 3 puzzles at the end of each pathway. |
| | | * After completing 2 puzzles, you are teleported to the boss arena again, and the boss battle begins. |
| Mounts;Vinegleam ;2DVinegleam.png;0.2,
| | </div> |
| | | </div> |
| |Rune=Runes;Rune Of Dread ;Rune-Dread.png;3
| |
|
| |
|
| |Required=62
| |
| |Solo= 72
| |
| }}
| |
| <div class="dungeon-clear">
| |
| <div class="pre-dungeon"> | | <div class="pre-dungeon"> |
| ==Dungeon Puzzles== | | <div class="hoverbox"> |
| | == Dungeon Puzzles == |
| | ('''Demon Room''') | To complete the Demon Room, the player must reflect a green beam into the demon five times. |
| | <br />When the room begins, diagonal lines of arrows will be fired from the demon’s side of the room toward the opposite wall. These arrow lines will have gaps that players can move through. To damage the demon, right-click the green beam projectile it shoots before it reaches the floor, reflecting it back at the demon. |
|
| |
|
| ('''Demon Room''') | To beat the Demon Room the player must reflect a green beam into the demon 5 times. | | ('''Bullet Hell Room''') | To complete the Bullet Hell Room, the player must survive for 30 seconds without being hit, for a maximum of five times. |
| Once the demon room begins, a diagonal line of arrows will be shot from the side where the demon is to the opposite side of the room. These lines of arrows will have gaps in them.
| | <br />When the room starts, the central lantern will begin firing projectiles in all directions, and the outer ring will periodically do the same. These projectiles move slowly but increase in number as the player nears the full 30-second mark, gradually scaling the difficulty, where some different coloured projectiles will spawn that are faster. |
| To kill the demon you need to simply right click the green beam projectile he shoots out before it reaches the floor.
| |
|
| |
|
| ('''Bullet Hell Room''') | To beat the Bullet Hell Room the player must survive 30 seconds without getting hit a total of 5 times. | | ('''Wave Room''') | To complete the Wave Room, the player must defeat all mobs within 50 seconds. |
| Once the room begins the lantern in the middle will begin to spray out projectiles and the outside ring will randomly do the same in all directions. These projectiles will move slowly. The room scales in difficulty with extra projectiles spawning the closer you are to surviving the full 30 seconds.
| | <br />Throughout the puzzle, dungeon enemies such as Ram Rider, Feral Spirit, and Necrotic Spirit will spawn randomly. A unique enemy, Wendigo, is exclusive to this puzzle and will always spawn three times during the challenge. |
|
| |
|
| ('''Wave Room''') | To beat the wave room the player must kill all mobs inside the room within the timeframe of 50 seconds. During this time dungeon enemies such as: Ram Rider, Feral Spirit and Necrotic Spirit will randomly spawn. Another dungeon enemy is exclusively found in this room "Wendigo" which will always spawn 3 times during the puzzle. | | ('''Colour Room''') | To complete the Colour Room, the player must input the correct sequence of colours three times within a 30-second timeframe. |
| | <br />This is a colour memorisation puzzle where the player must remember the order of colours shown (Red, Blue, or Green) and then input them correctly from left to right. The difficulty increases as the sequence gets longer, starting from three colours, then five, and finally seven. To input a colour, right-click the corresponding floating colour block after the memorisation phase ends. |
| | </div> |
|
| |
|
| ('''Colour Room''') | To beat the colour room the player must imput the correct colours according to the ones shown 3 times in the timeframe of 30 seconds. The colour room is a colour memorization puzzle where the player need to memorize the colours that appear ('''Red, Blue or Green''') and input them correctly when shown in left to right order. The difficulty of the puzzle will increase going from 3 colours at the start to 5 then 7. To input a colour simply right click the corresponding floating colour blocks once the memorization ends. | | <div class="hoverbox"> |
| | == Boss Behaviour == |
| | <!------------------Make sure to indent a space for each pattern------------> |
| | (Arena Hazard) | Sylvaris summons Chompers from beneath the ground at random locations throughout the arena. Standing on them deals damage. These hazards will not spawn during Phase 2. |
|
| |
|
| ==Boss Behaviour==
| | '''(Attack 1: Slime Blocks)''' | Sylvaris marks a player with fire particles. After a short delay, Sylvaris hurls a volley of slime blocks at the targeted player’s position, dealing damage upon impact. |
| <!------------------Make sure to indent a space for each pattern------------>
| |
|
| |
|
| 100% to 75% and 50% to 25% (Phase 1 and 3) | Sylvaris comes up from the ground in the centre of the arena and creates a small damage circle around you quickly damaging you if you step inside it. Alongside this he spawns chompers all around the arena at regular intervals. He will then randomly cycle through 4 attack patterns. When a pattern ends Sylvaris will shoot four sets of thorns which continue until hitting the edge of the arena. The four patterns are listed below.
| | '''(Attack 2: Bats)''' | When landing, Sylvaris spawns skeletal bats around the arena. Upon expiring, each bat explodes, releasing eight slime balls outward. This pattern repeats three times, each wave spawning a new set of bats. |
|
| |
|
| 100% to 75% and 50% to 25% (Phase 1 and 3: Slimeblocks) | Sylvaris will target a player which will be indicated by fire particles appearing around the targeted players feet. After a few seconds he will throw a set of slime blocks which fall onto the player hes targeting.
| | '''(Attack 3: Soul Fire)''' | Sylvaris marks a player with blue fire particles. After a brief delay, Sylvaris throws a soul-infused orb that detonates upon landing, releasing four sets of vertical green slashes in cardinal directions from the point of impact. |
|
| |
|
| 100% to 75% and 50% to 25% (Phase 1 and 3: Bats) | Upon hitting the ground sylvaris will spawn bats randomly around the arena. When the bats expire they will explode and shoot out 8 slime balls. Sylvaris will then spawn another set of bats upon expiration. He will spawn the bats 3 times until the pattern ends.
| | '''(Attack 4: Dive)''' | Sylvaris burrows underground, marking a random player with soul fire particles. Moments later, Sylvaris bursts from the ground beneath the marked player, dealing a massive amount of damage as well as releasing slime blocks in all directions. Afterward, Sylvaris targets a player and dives down from the sky, creating a second burst of slime balls upon impact. |
|
| |
|
| 100% to 75% and 50% to 25% (Phase 1 and 3: Soul Fire) | Sylvaris will target a player which will be indicated by the soul fire particles around the targeted players feet. After a few seconds Sylvaris will throw a ball which will explode shooting out 4 sets of shots which come from where the ball lands. | | '''100% to 75% (Phase 1)''' | Sylvaris cycles through its main attacks, but never beginning with Attack 4. A circular ring surrounds Sylvaris, damaging any player who steps within it. After each attack, tree roots rise from the ground in the four cardinal directions, impaling and damaging any player caught in their path. |
|
| |
|
| 100% to 75% and 50% to 25% (Phase 1 and 3: Dive) | Sylvaris will tunnel into the ground. After a few seconds a random player will be targeted which will be indicated by soul fire partices indicated around the targeted players feet. He will then appear from the ground creating a shotgun of slime blocks from where he came from. After a few seconds Sylvaris will target a player and come from the sky diving back into the ground again creating a shotgun of slimeballs where he dove into the ground from
| | '''75% to 50% (Phase 2: Shulker)''' | Sylvaris teleports to the arena’s center, creating a large circular zone that indicates the safe area for players to stand. The arena is divided into four quadrants by beams that deal massive damage to any player who touches them. Sylvaris then marks four spots in each of the quadrants that indicates another safe zone, afterwhich rotating beams with a gap in them will spawn that players must dodge. Sylvaris then begins firing slime block projectiles in all directions. |
|
| |
|
| 75% to 50% (Phase 2: Shulker) | Sylvaris teleports to the centre and pulls the player(s) along. Sylvaris creates a ring which players must stay inside or else they'll take damage. He will then summon small circles in the middle of the 4 quadrants of the ring which dictate where you should stand. Quickly following this green beams will appear which deal high damage upon contact every tick. The circles will then disappear and will then disapear and be replaced with rotating shulker boxes with gaps in them. After the shulker boxes begin rotating he will begin to consistently shoot out slime balls at regular intervals. This pattern will continue until Sylvaris reaches 50% health.
| | '''50% to 25% (Phase 3)''' | Sylvaris resumes cycling through its main attacks, but never beginning with Attack 4. The damaging ring around Sylvaris remains, and after each attack, tree thorns rise from the ground in the four cardinal directions, impaling any player in their path. |
|
| |
|
| 25% to 0% (Phase 4: Arrows) | Upon reaching 25% Sylvaris will jump into the air and come back into the middle of the arena. He will then create a damage circle and begin shooting bouncing slime balls randomly around the arena. Upon contact with the ground the slime balls will spawn arrows which will randomly fly across the arena. This pattern will continue untill Sylvaris dies. The chompers continue in this phase but thorns do not spawn. | | '''25% to 0% (Phase 4: Arrows)''' | Sylvaris leaps into the air before crashing back into the arena’s center, creating a large damaging circle. Sylvaris then begins throws slime balls throughout the arena; when these projectiles strike the ground, they spawn arrows that ricochet randomly across the arena. |
| </div> | | </div> |
| </div>
| |
| <!------------------Do not touch unless authorized by lorers------------>
| |
| <div class="dlog>
| |
| <b>[D̷̛͖̲̜̤̭̤̬̏͑́̌̇̽͛̊́̕̚͜'s LOG: ???] BYPASS STATE:</b> The ones that survived the tragedy thought the thicket could save them. No matter how powerful a spirit of a forest can be, it will always end up charred in an inferno of holy fire.
| |
| </div> | | </div> |
|
| |
|
| ==Dungeon Enemies== | | == Dungeon Enemies == |
| <div class="dungeon-enemies"> | | <div class="dungeon-enemies"> |
| {{NPCInfobox | | {{NPCInfobox |
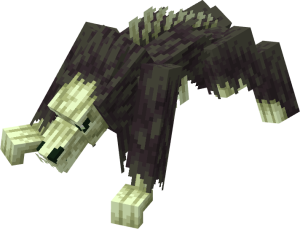
| |title= Ram Rider | | | title = Wendigo |
| |image= 3DRamRider.png | | | image = 3DWendigo.png |
| |Attack= | | |SpecialInfo = This mob can only spawn in the Wave Puzzle Room. |
| |Health= 165 | | | Attack = Rams the player with their head or fires five projectiles. |
| |Fame= 55 | | | Health = 468 |
| | | Fame = 0 |
| }} | | }} |
| {{NPCInfobox | | {{NPCInfobox |
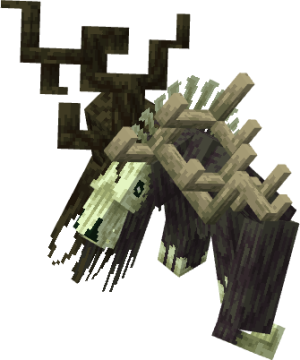
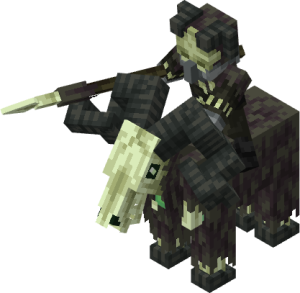
| |title= Feral Spirit | | | title = Ram Rider |
| |image= 3DFeralSpirit.png | | | image = 3DRamRider.png |
| |Attack= | | | Attack = Throws their spear at the player, charges forward to bash any in their path, or summons three spectral steeds that deal damage on contact. |
| |Health= 148 | | | Health = 165 |
| |Fame= 55 | | | Fame = 55 |
| }} | | }} |
| {{NPCInfobox | | {{NPCInfobox |
| |title= Necrotic Spirit | | | title = Necrotic Spirit |
| |image= 3DNecroticSpirit.png | | | image = 3DNecroticSpirit.png |
| |Attack= | | | Attack = Summons three arrows that are shot toward the player, fires a wide magical projectile, slams their sceptre into the ground causing knockback in a small radius, or turns invisible and teleports behind the player. |
| |Health= 149 | | | Health = 149 |
| |Fame= 55 | | | Fame = 55 |
| }} | | }} |
| {{NPCInfobox | | {{NPCInfobox |
| |title= Wendigo | | | title = Feral Spirit |
| |image= 3DWendigo.png | | | image = 3DFeralSpirit.png |
| |Attack= | | | Attack = Dashes toward the player and slashes upon contact. |
| |Health= 468 | | | Health = 148 |
| |Fame= ??? | | | Fame = 55 |
| }} | | }} |
| | </div> |
| </div> | | </div> |
|
| |
|
| | <div class="hoverbox"> |
| | <div class="lore"> |
| | == Lore == |
| | <!------------------Do not touch unless authorized by lorers------------> |
| | {{DLog||Sylvaris|The ones that survived the tragedy thought the thicket could save them. No matter how powerful a spirit of a forest can be, it will always end up charred in an inferno of holy fire.}} |
| | |
| | <!--Boss Dialogue Drop Down--> |
| | {{ButtonHeader |
| | |type=Dialogue |
| | |text=Boss & Dungeon Dialogue |
| | |img= |
| | |content= |
| | <tabber> |
| | English Dialogue= |
| | {| class="wikitable" |
| | |+ Clear |
| | |- |
| | ! Trigger !! Dialogue |
| | |- |
| | | Entrance || [Dreadwood Civilian] "Welcome to our forest.." <br />[Dreadwood Civilian] "For centuries, the animals and civilians here shared the forest together all thanks to the forest spirit" <br />[Dreadwood Civilian] "Until one day a celestial being corrupted the spirit turning all the animals hostile" <br />[Dreadwood Civilian] "I too am corrupted by this power, but I was lucky, I am somewhat able to resist its violent control" <br />[Dreadwood Civilian] "I am the final survivor and we don't have much time" <br />[Dreadwood Civilian] "You are our only hope. Defeat Sylvaris and allow the forest to be restored!" |
| | |- |
| | | Puzzle Attempt || [Dreadwood Civilian] "<player> is attempting the <puzzle> Room!" |
| | |- |
| | | Failed Puzzle || [Dreadwood Civilian] "The <puzzle> Room has reset!" |
| | |- |
| | | Completed Puzzle || [Dreadwood Civilian] "<player> has completed the <puzzle> Room!" |
| | |} |
| | {| class="wikitable" |
| | |+ Bossfight |
| | |- |
| | ! Trigger !! Dialogue |
| | |- |
| | | Arrival || [Dreadwood Civilian] "Sylvaris has been summoned!" <br />[Sylvaris] "Your greed has awakened me; I shall be the harbinger of your demise!" |
| | |- |
| | | Phase 1 End || [Sylvaris] "Your arrogance is a blight upon this realm! I shall cleanse it! <br />[Sylvaris] From decay, new life shall spring! But first, I shall feast on your despair!" |
| | |- |
| | | Phase 2 End || [Sylvaris] "Nature's wrath is upon you! Your end is as inevitable as the changing seasons!" |
| | |- |
| | | Phase 3 End || [Sylvaris] "The forest has seen the rise and fall of empires. You are but a fleeting shadow!" <br />[Sylvaris] "My branches reach to the heavens, and my roots delve into the abyss!" |
| | |- |
| | | Boss Death || [Sylvaris] "The thicket shall not forgive your trespass..." |
| | |} |
| | </tabber> |
| | }} |
| | </div> |
| | </div> |
| | |
| | <div class="hoverbox"> |
| ==Tips and Tricks== | | ==Tips and Tricks== |
| <div class="tipstricks"> | | <div class="tipstricks"> |
| *The fight becomes easier if you turn on hitboxes, as this makes the Chompers much easier to see. | | * The fight becomes easier if you turn on hitboxes, as this makes the Chompers much easier to see. |
| *If you see particles appearing around you, keep running around in a circle. If you stand still, you will get heavily damaged with his attacks. | | * If you see particles appearing around you, keep running around in a circle. If you stand still, you will get heavily damaged with his attacks. |
| *When Sylvaris does the bat attack, simply hold jump and you will dodge most of the shots. | | * When Sylvaris does the bat attack, simply hold jump and you will dodge most of the shots. |
| *During the last phase (arrow phase), hold jump around the middle of the arena close to the boss to avoid most of the arrows. | | * During the last phase (arrow phase), hold jump around the middle of the arena close to the boss to avoid most of the arrows. |
| | </div> |
| </div> | | </div> |
|
| |
|
| |
|
| |
|
| |
|
| {{Dungeon Navbox}} | | {{Dungeon Navbox}} |