|
|
| (11 intermediate revisions by 2 users not shown) |
| Line 1: |
Line 1: |
| | __NOTOC__ |
| | <div class="dungeon-page"> |
| {{NPCInfobox | | {{NPCInfobox |
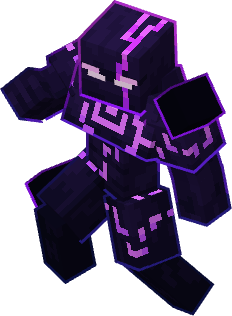
| | title = Voided Omnipotent; Master of the Void | | | title = Voided Omnipotent;Master of the Void |
| | image = 3DVoidedOmnipotent.png;VomniBossbar | | | image = Boss-3DVoidedOmnipotent.png;Bossbar-Vomni |
| | Health = 19250 | | | Health = 19250 |
| | Fame = 5000 | | | Fame = 5000 |
| | | Glory = 5000 |
| | Tiered = 11 | | | Tiered = 11 |
| | Voidbound = | | | Companion = Pets;Shadow Chirp;Pet-2DShadowChirp.png;0.2, |
| Loot; Fractured Nihility; Item-FracturedNihility.gif; 1.5 | | Mounts;Dreadspire Drake;Mount-2DDreadspireDrake.png;0.2 |
| | Bloodshot = | | | Voidbound = Loot;Fractured Nihility;Item-FracturedNihility.gif;1.5 |
| Abilities; Oblivion's Reach; Ut-Oblivion'sReach.png; 0.8, | | | Bloodshot = Abilities;Oblivion's Reach;Ut-Oblivion'sReach.png;0.4, |
| Abilities; Event Horizon; Ut-EventHorizon.png; 0.8, | | Abilities;Event Horizon;Ut-EventHorizon.png;0.4, |
| Armours; Shadow Silk; Ut-ShadowSilk.png; 0.8 | | Armours;Shadow Silk;Ut-ShadowSilk.png;0.4 |
| | Companion =
| | | Frag = Bloodshot;120 |
| Pets; Shadow Chirp; 2DShadowChirp.png; 0.2,
| | | Required = 66 |
| Mounts; Dreadspire Drake; 2DDreadspireDrake.png; 0.2
| | | Solo = 72 |
| | Rune =
| |
| Runes; Rune of Eternal Maw; Rune-Maw.png; 3
| |
| | Frag = Bloodshot;25 | |
| | Required = 68 | |
| | Solo = 80 | |
| }} | | }} |
|
| |
|
| <div class="hoverbox"> | | <div class="hoverbox"> |
| == Dungeon Data ==
| | The '''Tenebris''' is a 66 [[Game Mechanics#Tier Points|Tier Point]] [[Dungeons|dungeon]], ruled by '''Voided Omnipotent, the Master of the Void'''. Omnipotent is found chained up by the Celestials. After breaking the chains, he decides to show his gratitude by engaging the Silverlings in combat. |
| Omnipotent is found chained up by the Celestials. After breaking the chains, he decides to show his gratitude by engaging the Silverlings in combat. | |
|
| |
|
| This dungeon is dropped by completing [[Raphael's Chamber]]. | | This dungeon is dropped by completing [[Raphael's Chamber]]. |
| Line 32: |
Line 29: |
| ==Boss Behaviour== | | ==Boss Behaviour== |
| <!------------------Make sure to indent a space for each pattern------------> | | <!------------------Make sure to indent a space for each pattern------------> |
| (Attack 1) | Voided Omnipotent teleports to a player and spawns a vortex that can be avoided by jumping. He then releases three sets of projectiles in eight directions, each moving in a snake-like pattern and dealing damage on contact. Afterwards, he shoots out a final circular wave of projectiles outward from himself. He repeats this multiple times. | | '''(Attack 1: Snakes)''' | Voided Omnipotent teleports to a player and spawns a vortex that can be avoided by jumping. He then releases three sets of projectiles in eight directions, each moving in a snake-like pattern and dealing damage on contact. Afterwards, he shoots out a final circular wave of projectiles outward from himself. He repeats this multiple times. |
|
| |
|
| (Attack 2) | Voided Omnipotent teleports to a player and summons void pillars while releasing massive bursts of projectiles in all directions. He repeats this four times, with all projectiles and pillars dealing damage on contact. | | '''(Attack 2: Pillars)''' | Voided Omnipotent teleports to a player and summons void pillars while releasing massive bursts of projectiles in all directions. He repeats this four times, with all projectiles and pillars dealing damage on contact. |
|
| |
|
| (Attack 3) | Voided Omnipotent moves all players closer to himself and summons two black holes that rotate around him. The black holes continuously spawn small carpet-like void projectiles that deal damage. During this attack, Voided Omnipotent moves toward the aggroed player while limiting movement by creating a zone which players can't pass. | | '''(Attack 3: Black Holes)''' | Voided Omnipotent moves all players closer to himself and summons two black holes that rotate around him. The black holes continuously spawn small carpet-like void projectiles that deal damage. During this attack, Voided Omnipotent moves toward the aggroed player while limiting movement by creating a zone which players can't pass. |
|
| |
|
| 100% (Phase 1: Unchaining) | Omnipotent is chained. The player must approach the chain platforms to be teleported into a voided box, where they must land a floating sword on the central cube three times. Projectiles are also fired which deal damage, however the sword itself does not deal damage. | | '''100% (Phase 1: Unchaining)''' | Omnipotent is chained. The player must approach the chain platforms to be teleported into a voided box, where they must land a floating sword on the central cube three times. Projectiles are also fired which deal damage, however the sword itself does not deal damage. |
|
| |
|
| 100% to 85% (Phase 2) | Upon being unchained, Voided Omnipotent targets a random player, teleporting slightly away before teleporting back to them and unleashing a wave of projectiles which deal damage on contact. Throughout this phase, golden rings periodically appear, and players must stand in them or they will be damaged and get blinded. | | '''100% to 85% (Phase 2)''' | Upon being unchained, Voided Omnipotent targets a random player, teleporting slightly away before teleporting back to them and unleashing a wave of projectiles which deal damage on contact. Throughout this phase, golden rings periodically appear, and players must stand in them or they will be damaged and get blinded. |
|
| |
|
| 85% to 65% (Phase 3) | Voided Omnipotent summons a black cube at the center of the arena that emits rotating beams. Depending on beam height, players must either jump over or sneak beneath them to avoid damage. Voided Omnipotent circles the arena while throwing black projectiles into the central cube, causing high velocity damaging cubes to be sent outward in all directions. Portions of the floor are marked with red wool that will be targeted and turn purple after, and remaining on them when they are transformed will deal damage. | | '''85% to 65% (Phase 3: Chase)''' | Voided Omnipotent summons a black cube at the center of the arena that emits rotating beams. Depending on beam height, players must either jump over or sneak beneath them to avoid damage. Voided Omnipotent circles the arena while throwing black projectiles into the central cube, causing high velocity damaging cubes to be sent outward in all directions. Portions of the floor are marked with red wool that will be targeted and turn purple after, and remaining on them when they are transformed will deal damage. |
|
| |
|
| 65% to 30% (Phase 4) | Voided Omnipotent cycles through his main attacks listed above in order to damage the player. | | '''65% to 30% (Phase 4)''' | Voided Omnipotent cycles through his main attacks listed above in order to damage the player. |
|
| |
|
| 30% to 15% (Phase 5: Bells) | Voided Omnipotent drags all players to the center of the arena and begins summoning cubes that move both inward and outward which can be dodged by moving in a zig-zag pattern. Raphael then manifests bells across the arena, where players must strike these bells three times to end the phase. | | '''30% to 15% (Phase 5: Bells)''' | Voided Omnipotent drags all players to the center of the arena and begins summoning cubes that move both inward and outward which can be dodged by moving in a zig-zag pattern. Raphael then manifests bells across the arena, where players must strike these bells three times to end the phase. |
|
| |
|
| 15% to 0% (Phase 6) | The Void erupts from Omnipotent in a form that is akin to the Wither Storm. The arena becomes flooded with lasers that deal damage once they darken, alongside projectiles which are fired from the center. The Void randomly pulls players toward its eyes three times, and the targeted players must right click them in order to resist the pull of the Void. To end this phase, players must repeat this three times. | | '''15% to 0% (Phase 6)''' | The Void erupts from Omnipotent in a form that is akin to the Wither Storm. The arena becomes flooded with lasers that deal damage once they darken, alongside projectiles which are fired from the center. The Void randomly pulls players toward its eyes three times, and the targeted players must right click them in order to resist the pull of the Void. To end this phase, players must repeat this three times. |
| </div> | | </div> |
| </div> | | </div> |
| Line 64: |
Line 61: |
| |img= | | |img= |
| |content= | | |content= |
| '''Dialogue'''
| | <tabber> |
| *Coming soon
| | English Dialogue= |
| | {| class="wikitable" |
| | |+ Bossfight |
| | |- |
| | ! Trigger !! Dialogue |
| | |- |
| | | Arrival || [Omnipotent] "Breaking the celestial chains, are we? How unexpected that the TRAITORS of Telos are my salvation!" {{Sound|VA-TenebrisOmni1.ogg}} |
| | |- |
| | | Phase 1 End || [Omnipotent] "The many-faced champion has failed his duties." {{Sound|VA-TenebrisOmni2.ogg}} <br />[Voided Omnipotent] "And so, Telos shall witness the beauty of endless darkness!" {{Sound|VA-TenebrisVomni1.ogg}} <br />[Voided Omnipotent] "Playing “hero” won’t save this world. You cannot stop this." {{Sound|VA-TenebrisVomni2.ogg}} |
| | |- |
| | | Phase 2 End || [Voided Omnipotent] "Heed the Void’s lullaby. And slumber with the Observer!" {{Sound|VA-TenebrisVomni3.ogg}} |
| | |- |
| | | Phase 3 End || [Voided Omnipotent] "I’ll absorb your essence. AND NO ONE WILL CROSS ME AGAIN." {{Sound|VA-TenebrisVomni4.ogg}} |
| | |- |
| | | Phase 4 End || [Voided Omnipotent] "The Voided King was WEAK. I’ll be the one to save this realm!" {{Sound|VA-TenebrisVomni5.ogg}} <br />[Raphael] "Thank Loa, it worked! Silverlings! Strike the bells and make Telos ours!" {{Sound|VA-TenebrisRaphael1.ogg}} |
| | |- |
| | | 1st Bell Struck || [Raphael] "Twice more. For the Sanguine Lord!" {{Sound|VA-TenebrisRaphael2.ogg}} |
| | |- |
| | | 2nd Bell Struck || [Raphael] "The Nexus calls me. So with this final toll, I bid thee farewell." {{Sound|VA-TenebrisRaphael3.ogg}} |
| | |- |
| | | 3rd Bell Struck || [Voided Omnipotent] "N-no…I CONTROL YOU. YOU WILL OBEY ME!" {{Sound|VA-TenebrisVomni6.ogg}} |
| | |- |
| | | Phase 5 End || [The Void] "Obey…a pathetic whelp?" {{Sound|VA-TenebrisVoid1.ogg}} |
| | |- |
| | | 1st Pull Call || [The Void] "Where do you think you’re going, Silverling?" {{Sound|VA-TenebrisVoid2.ogg}} |
| | |- |
| | | 2nd Pull Call || [The Void] "Spawn of a broken promise. You are to blame." {{Sound|VA-TenebrisVoid3.ogg}} |
| | |- |
| | | 3rd Pull Call || [The Void] "The Rustborn have not forgiven you." {{Sound|VA-TenebrisVoid4.ogg}} |
| | |- |
| | | Boss Death || [The Void] "Revel in your victories. Mourn your dead. But the heavens are collapsing. And the abyss will rise up to salvage the shattered." {{Sound|VA-TenebrisVoid5.ogg}} |
| | |} |
| | </tabber> |
| }} | | }} |
| </div> | | </div> |
| | </div> |
| | <br> |
| | <div class="hoverbox"> |
| | == Dungeon Guide == |
| | {{ButtonHeader |
| | |type=Guide |
| | |text=Boss Guide |
| | |img= |
| | |content= |
| | Voided Omnipotent Guide provided by '''Neilruae'''. |
| | == Gearing up == |
| | Before entering Tenebris dungeon you will need for this fight to swap between a long distance weapon and a short range weapon to optimize your DPS, and between your current set of gear and tankier armor/abilities. <br> |
| | Typically you want to have a weapon that has more than 8 range and another one with less than 6 range. <br> |
| | As for the armors and gear swap-outs, prioritize stats like health, armor, vitality and evasion. |
| | |
| | <div class="pre-dungeon"> |
| | == Strategies == |
| | |
| | '''(Attack 1: Snakes)''' {{!}} You have to jump over the shockwave at the time he slams the ground and then stay near him around 3-4 blocks distance and try some left-right movements to avoid getting hit by all the bullet, don't be static as if you take the whole sequence of projectile you will get low on health, and after the 3 bullets sequence has been shot you have to jump again to avoid the fourth cycle of projectile. don't go too far away from your group during this attack as it can put others in danger and slow the DPS. Toggling player off during this phase as you will still be able to see which person Voided Omnipotent decides to teleports to. Short range weapon is recommended for this attack. |
| | |
| | '''(Attack 2: Pillars)''' {{!}} This attack is the most dangerous one, you have to run away as fast as possible when he does this attack as if you stay in the middle you will be hit by a flurry of projectile one shotting you. Ideally you want to run for about 2-3 seconds and then look back to dodge both pillars and projectiles. The pillar are marked on the floor so you can see where they spawn. |
| | |
| | '''(Attack 3: Black Holes)''' {{!}} Try to stay near the person he has the focus onto, it's the person he is facing and walking towards during the attack, it is easier for you to DPS him with your long distance weapon. Focus on dodging the tiny bullets as they deal quite a lot of damage if you get hit a lot by them. |
| | |
| | '''100% to 85% (Phase 2)''' {{!}} For this phase you have to know that the wave of projectile despite looking dangerous only hit once, so focusing on getting in the yellow circles is your top priority as if you start to miss one due to the blind crown control you will be off tempo and start taking a lot of damage. You want to stay pretty close to him and rush towards the nearest circle before the flame reaches the ground, a little trick to help you is to stay on the edge of the circle so Voided Omnipotent teleports inside it and you can go around him to dodge his attack and still be in the circle, it gets pretty annoying in groups if everyone scatter so its important to stay grouped you can use your short range weapon for this phase as he gets near you every time he teleports. |
| | |
| | '''85% to 65% (Phase 3: Chase)''' {{!}} The ideal strategy once you are comfortable with the fight is to enter first person and follow Voided Omnipotent around while hitting him and properly avoiding the lasers and floor, it is important to toggle player off during this phase. The projectiles that shoot out from the center for the most part don't have to be focused on, as they don't do huge damage. You need to focus on mainly dodging the floor attack and avoiding the lasers, as both do heavy damage and can kill you extremely fast. Just remember that you can stop following him if you are in a bad spot, it's ok to stop chasing him and waiting for him to come around to get back in cycle. If you're completely new to the boss, i suggest to keep your 3rd POV and focus only on dodging and let the other people of the group do the phase. If you're doing this in first POV, use a short range weapon, if you're in third POV, use a long range one. |
| | |
| | '''65% to 30% (Phase 4)''' {{!}} It is the phase where Voided Omnipotent will switch between the 3 specified attacks at the beginning of the Guide, refer to them to see how to deal with them. |
| | |
| | '''30% to 15% (Phase 5)''' {{!}} For this phase equip all your tank swap-outs, you can also turn on hitboxes if you feel more comfortable with them. This phase if you're alone is quite difficult as you will need to travel across each side to reach each bell. Crouch during this phase and go slowly while fitting in the gaps. If you're in a group, each one of you can cover a side to already be in position when the bell will spawn, you can stay in the same spot by doing a rectangle pattern between the bullets each one of them only hit once. To hit the bells you just have to stay on the particle circle. |
| | |
| | '''15% to 0% (Phase 6)''' {{!}} Keep your tank swap-outs and you can also use supportive abilities if your class has some. The finale is by far the easiest phase all you to do is dodge the lasers and bullets he shoot that are not too fast but the bullets can be covered by the lasers so be aware of that. During this phase you are being attracted by the center so you have to always walk towards the edge of arena. If you're chosen you will be attracted to its head and you can spam right click to hit the head so you don't miss it. |
| </div> | | </div> |
| | | }} |
| <div class="hoverbox">
| |
| == Tips and Tricks ==
| |
| <div class="tipstricks">
| |
| * It's recommended to chase after Voided Omnipotent during Phase 3, as with standing in 1 spot you only have a short window of time to deal dps before Voided Omnipotent comes back around.
| |
| * During Phase 4 (Vortex) it is better to stay closer to Voided Omnipotent as the 'Snakes' move faster the further away they get.
| |
| * In Phase 5&6 it's wise to equip EHP Gear, as you do not need to damage the boss yourself anymore and just have to survive.
| |
| </div> | | </div> |
| </div> | | </div> |
|
| |
|
| {{Dungeon Navbox}} | | {{Dungeon Navbox}} |