
| Reward | Chance |
|---|---|
| Common Soul Point Potion | 20% |
| Common Dungeon Key | 40% |
| Uncommon Crate Key | 39% |
| Usual Crate Key | 1% |
No edit summary |
m fixed a typo in stickers |
||
| (9 intermediate revisions by 3 users not shown) | |||
| Line 1: | Line 1: | ||
{{#description2:The Nexus is the central hub for the players in Telos Realms! It is home to many entities and stations to help the players.}} | {{#description2:The Nexus is the central hub for the players in Telos Realms! It is home to many entities and stations to help the players.}} | ||
[[File:DNexus.png|centre]] | [[File:DNexus.png|centre]] | ||
| Line 14: | Line 13: | ||
|type=RealmsGlobe | |type=RealmsGlobe | ||
|text=Realms Globe | |text=Realms Globe | ||
|img=3DGlobeArea | |img=Hub-3DGlobeArea | ||
|content= | |content= | ||
<div class="hoverbox" id="Globe"> | <div class="hoverbox" id="Globe"> | ||
| Line 21: | Line 20: | ||
<div class="pre-dungeon"> | <div class="pre-dungeon"> | ||
===Functionality=== | ===Functionality=== | ||
Various realm | Various realm globes orbit around the Eye of Nexus. The more Silverlings in a realm, the brighter and bigger the globe! To get into a realm right-click on a realm globe or the Eye of Nexus to get sent to the largest Realm. | ||
Use /locations to change the region you are in (Europe, North America, Asia). | Use /locations to change the region you are in (Europe, North America, Asia). | ||
</div> | </div> | ||
===Gallery=== | ===Gallery=== | ||
{{InlineImage|file=Gif-RealmEntry.gif|size=720px|caption=Entering the | {{InlineImage|file=Gif-RealmEntry.gif|size=720px|caption=Entering the realm of Telos via the Eye of Nexus.}} | ||
</div> | </div> | ||
}} | }} | ||
| Line 33: | Line 32: | ||
|type=ButtonHeaderDojo | |type=ButtonHeaderDojo | ||
|text=Dojo | |text=Dojo | ||
|img=3DDojoArea | |img=Hub-3DDojoArea | ||
|content= | |content= | ||
<div class="hoverbox" id="Dojo"> | <div class="hoverbox" id="Dojo"> | ||
| Line 40: | Line 39: | ||
<div class="pre-dungeon"> | <div class="pre-dungeon"> | ||
===Functionality=== | ===Functionality=== | ||
The Dojo is where you can find various | The Dojo is where you can find various training dummies. These are near-invincible entities that deal no damage and serve as a way for players to test their gear and abilities. Upon hitting a Training Dummy, three lines of text will appear above its head displaying the total damage dealt, damage per second, and time passed. <br> | ||
The test will end shortly after you stop hitting the dummy. | The test will end shortly after you stop hitting the dummy. | ||
</div> | </div> | ||
| Line 52: | Line 51: | ||
|type=ButtonHeaderCrates | |type=ButtonHeaderCrates | ||
|text=Crates | |text=Crates | ||
|img=3DCrateArea | |img=Hub-3DCrateArea | ||
|content= | |content= | ||
<div class="hoverbox" id="Crates"> | <div class="hoverbox" id="Crates"> | ||
| Line 59: | Line 58: | ||
<div class="pre-dungeon"> | <div class="pre-dungeon"> | ||
===Functionality=== | ===Functionality=== | ||
There's five kinds of Crates: | There's five kinds of Crates: common, uncommon, rare, epic, and legendary. The drop-tables for every crate are listed below. Each crate has its own key linked to it, for example, the Epic Crate is opened using the Epic Crate Key. | ||
Every [[Seasons|season]]. unique pet or mount reskin(s) get added to the Legendary Crate, and the reskin(s) from the previous season will no longer be available. Stash Extenders and Character Slots serve to permanently upgrade your account, doing exactly as their name says, adding +1 | Every [[Seasons|season]]. unique pet or mount reskin(s) get added to the Legendary Crate, and the reskin(s) from the previous season will no longer be available. Stash Extenders and Character Slots serve to permanently upgrade your account, doing exactly as their name says, adding +1 slot to either your Characters or Stash. Mystery items from Crates have an equal chance of getting any of the items inside. For example, each individual forge fragment from the Mystery Forge Fragment reward will be a 33.3% chance! Dungeon keys can be used to open a bonus chest at the end of a dungeon. Soul point potions serve to speed up your transcendence progression. They add the listed amount of soul points to the character you consume them on. | ||
To view a | To view a crate's rewards, click on the crate with an empty hand. To open a crate you need a key of the same tier as the crate. Keys can be obtained from earlier crates, quests, the [[Seasons#Seasonpass|Season Pass]], or the [https://store.telosrealms.com/ store]. | ||
</div> | </div> | ||
| Line 75: | Line 74: | ||
| Common Soul Point Potion || 20% | | Common Soul Point Potion || 20% | ||
|- | |- | ||
| Common | | Common Dungeon Key || 40% | ||
|- | |- | ||
| Uncommon Crate Key || 39% | | Uncommon Crate Key || 39% | ||
| Line 103: | Line 102: | ||
! Reward !! Chance | ! Reward !! Chance | ||
|- | |- | ||
| Rare Soul Point Potion || 20% | |||
| Rare Soul Point Potion || | |||
|- | |- | ||
| Mystery Fragment || 15% | | Mystery Fragment || 15% | ||
|- | |- | ||
| Rare | | Rare Dungeon Key || 50% | ||
|- | |- | ||
| Epic Crate Key || 14% | | Epic Crate Key || 14% | ||
| Line 121: | Line 118: | ||
! Reward !! Chance | ! Reward !! Chance | ||
|- | |- | ||
| Epic Soul Point Potion || 15% | |||
| Epic Soul Point Potion || | |||
|- | |- | ||
| Mystery Fragment || | | Mystery Fragment || 20% | ||
|- | |- | ||
| Epic | | Epic Dungeon Key || 35% | ||
|- | |- | ||
| Epic Crate Key | | Epic Crate Key 2x || 20% | ||
|- | |- | ||
| Exotic Crate Key || 1% | | Exotic Crate Key || 1% | ||
| Line 137: | Line 130: | ||
| Character Slot || 2% | | Character Slot || 2% | ||
|- | |- | ||
| Stash | | Stash Page Slot || 2% | ||
|- | |- | ||
| Legendary Crate Key || 5% | | Legendary Crate Key || 5% | ||
| Line 151: | Line 144: | ||
| Legendary Soul Point Potion || 20% | | Legendary Soul Point Potion || 20% | ||
|- | |- | ||
| Legendary Crate Key | | Legendary Crate Key 2x || 5% | ||
|- | |- | ||
| Character Slot || 15% | | Character Slot || 15% | ||
|- | |- | ||
| Stash | | Stash Page Slot || 15% | ||
|- | |- | ||
| Exotic Crate Key || 10% | | Exotic Crate Key || 10% | ||
|- | |- | ||
| Supporter | | Supporter Rank || 10% | ||
|- | |||
| Seasonal Crate Key || 4% | |||
|- | |- | ||
| Legendary Skin | | Legendary Companion Skin || 1% | ||
|} | |} | ||
</tabber> | </tabber> | ||
{{InlineImage|file=Gif-LegendaryCrateShowcase.gif|size=720px|caption=Demonstration of | {{InlineImage|file=Gif-LegendaryCrateShowcase.gif|size=720px|caption=Demonstration of the Legendary Crate's functionality.}} | ||
</div> | </div> | ||
}} | }} | ||
| Line 172: | Line 167: | ||
|type=CompanionsArea | |type=CompanionsArea | ||
|text=Companion Area | |text=Companion Area | ||
|img=3DCompanionArea | |img=Hub-3DCompanionArea | ||
|content= | |content= | ||
<div class ="hoverbox" id="Companions"> | <div class ="hoverbox" id="Companions"> | ||
[[File:Image-CinematicCompanions.png|frame|centre|The Companions Area has a variety of | [[File:Image-CinematicCompanions.png|frame|centre|The Companions Area has a variety of companion crates for Silverlings to test their luck at.]] | ||
<div class="pre-dungeon"> | <div class="pre-dungeon"> | ||
===Functionality=== | ===Functionality=== | ||
There's four kinds of companion crates: | There's four kinds of companion crates: usual, strange, fabled, and exotic. The drop-tables for every companion crate are listed below. Each companion crate has its own key linked to it; for example, the Exotic Companion Crate is opened using the Exotic Crate key. Additionally, companion crates are split into [[Pets]] and [[Mounts]]; however, both use the same keys. | ||
To view a companion | To view a companion crate's rewards, click on the crate with an empty hand. To open a companion crate, you'll need a key of the same tier as the crate. Keys can be obtained from earlier crates, companion crates, [[quests]], the [[Seasons#Seasonpass|Season Pass]], or bought from Gorrum or the [https://store.telosrealms.com/ store]. | ||
Any mounts of the | Any mounts of the fabled and above rarity can fly. However, some mount skins also allow for permanent flight with ''any mount''. Pets can either damage enemies or heal the player, while mounts are used to get around the [[Biomes|realm]]. | ||
</div> | </div> | ||
| Line 204: | Line 199: | ||
|type=ButtonHeaderBlacksmith | |type=ButtonHeaderBlacksmith | ||
|text=Blacksmith | |text=Blacksmith | ||
|img=3DBlacksmithArea | |img=Hub-3DBlacksmithArea | ||
|content= | |content= | ||
<div class="hoverbox" id="Blacksmith"> | <div class="hoverbox" id="Blacksmith"> | ||
[[File:Image-CinematicBlacksmith.png|frame|centre|The Blacksmith is | [[File:Image-CinematicBlacksmith.png|frame|centre|The Blacksmith is Wulfer’s home, who assists the players via gear upgrades and crafts!]] | ||
<div class="pre-dungeon"> | <div class="pre-dungeon"> | ||
===Functionality=== | ===Functionality=== | ||
At the Blacksmith you can upgrade your items by either | At the Blacksmith you can upgrade your items by either by rerolling or crafting. Rerolling changes the traits of an item using forge fragments and glory, which might improve the item's ability and/or its stats. Crafting is done with crafting components; this drastically changes the item into a new one. More information on rerolling and crafting individual UT items can be found in the individual tabs of the [[Loot]] page. | ||
The | The UT Reroll Forge is found at the top left and Crafting Stations at the bottom of the GUI. | ||
Depending on the rarity of the item that is being | Depending on the rarity of the item that is being rerolled, it can cost more or less glory to reroll. | ||
</div> | </div> | ||
===Gallery=== | ===Gallery=== | ||
{{InlineImage|file=Image-BlacksmithUI.png|size=720px|caption=All stations in | {{InlineImage|file=Image-BlacksmithUI.png|size=720px|caption=All stations in Wulfer's GUI}} | ||
{{InlineImage|file=Gif-VoidboundMaelstromCrafting.gif|size=720px|caption=Crafting a Voidbound UT}} | {{InlineImage|file=Gif-VoidboundMaelstromCrafting.gif|size=720px|caption=Crafting a Voidbound UT}} | ||
</div> | </div> | ||
| Line 228: | Line 222: | ||
|type=ButtonHeaderSkillTree | |type=ButtonHeaderSkillTree | ||
|text=Skill Tree | |text=Skill Tree | ||
|img=3DSkillTreeArea | |img=Hub-3DSkillTreeArea | ||
|content= | |content= | ||
<div class="hoverbox" id="Skill Tree"> | <div class="hoverbox" id="Skill Tree"> | ||
[[File:Image-CinematicSkillTree.png|frame|centre|The Voided Tree is home to Moloch and | [[File:Image-CinematicSkillTree.png|frame|centre|The Voided Tree is home to Moloch and skill trees for the Silverlings’ abilities.]] | ||
<div class="pre-dungeon"> | <div class="pre-dungeon"> | ||
===Functionality=== | ===Functionality=== | ||
Moloch offers you levels of [[Transcendence]] in return for | Moloch offers you levels of [[Transcendence]] in return for soul points. There are a total of ten levels of transcendence, each costing more and more soul points to unlock. For every level of transcendence you'll also get buffs like an increase in base [[stats]], loot boost, and more! skill points for the [[Skill Tree]] are obtained from transcending. | ||
Soul | Soul points are earned whenever you gain fame, at a 1:1 ratio which means Fame Boost also affects soul point gain. During the Soulpoint Day your soul point gain will be increased by 25%. The other way to get soul points is via soul point potions which can be acquired from quests, crates, companion rewards, and more. | ||
Skill Tree abilities are called Nodes. When speaking of specific nodes, they are abbreviated in order of: Node (n), Tier (1-6), Position(a/b/c). For Example: n6b, which means the middle node on the highest tier of the Skill Tree. Every | Skill Tree abilities are called Nodes. When speaking of specific nodes, they are abbreviated in order of: Node (n), Tier (1-6), Position(a/b/c). For Example: n6b, which means the middle node on the highest tier of the Skill Tree. Every skill tree has two rows and six tiers of nodes. The fourth and sixth tier also have middle nodes, and the first tier has only one node making every skill tree have 13 nodes in total. | ||
To view | To view nodes, right-click them, and this will lock the description in place. Right-clicking again will unlock the description. | ||
To select a | To select a node, left-click while looking at it. | ||
To reset your | To reset your skill tree, press the R button on the floor between the two skill trees. | ||
More information on skill trees can be found in the [[Skill Trees]] page. | More information on skill trees can be found in the [[Skill Trees]] page. | ||
| Line 257: | Line 251: | ||
|type=ButtonHeaderPersonalArea | |type=ButtonHeaderPersonalArea | ||
|text=Personal Area | |text=Personal Area | ||
|img=3DPersonalArea | |img=Hub-3DPersonalArea | ||
|content= | |content= | ||
<div class="hoverbox" id="Personal Area"> | <div class="hoverbox" id="Personal Area"> | ||
| Line 267: | Line 261: | ||
The Stash= | The Stash= | ||
<div class="pre-dungeon"> | <div class="pre-dungeon"> | ||
This is the player's permanent storage which is not lost on death. Each stash page has a total of 45 slots. By default the player only has one page; however, more can be obtained by consuming [[File:Item- | This is the player's permanent storage which is not lost on death. Each stash page has a total of 45 slots. By default the player only has one page; however, more can be obtained by consuming [[File:Item-StashSlot.png|16px|link=]] Stash Page Slots. Stash Page Slots can be obtained from the [https://store.telosrealms.com/ store], crates, companion rewards, and the [[Seasons|Season Pass]]. | ||
</div> | </div> | ||
| Line 275: | Line 269: | ||
Class Selector= | Class Selector= | ||
<div class="pre-dungeon"> | <div class="pre-dungeon"> | ||
Allows the player to view and select characters. To create more characters, the player can click on an empty slot, which will open up the Character Creation GUI. Right-clicking on a | Allows the player to view and select characters. To create more characters, the player can click on an empty slot, which will open up the Character Creation GUI. Right-clicking on a character will open up that character's GUI. Deleting a character is done by clicking on the trash-can icon. | ||
By default, 2 | By default, 2 character slots are unlocked. More can be obtained by consuming [[File:Item-CharacterSlot.png|16px|link=]] Character Slots, which can be obtained from the [https://store.telosrealms.com/ store], crates, companion rewards. and the [[Seasons|Season Pass]]. | ||
</div> | </div> | ||
| Line 286: | Line 280: | ||
Loot Filter= | Loot Filter= | ||
<div class="pre-dungeon"> | <div class="pre-dungeon"> | ||
Lets the player choose what drops they can pick up. Do note that this only applies to '''Tiered''' gear, as Untiered items will always be picked up. In the Loot Filter GUI, there's an icon for every class, clicking on one will toggle picking up drops for that class. To filter loot even more, click on the +/- buttons. These will either increase or decrease the minimum | Lets the player choose what drops they can pick up. Do note that this only applies to '''Tiered''' gear, as Untiered items will always be picked up. In the Loot Filter GUI, there's an icon for every class, clicking on one will toggle picking up drops for that class. To filter loot even more, click on the +/- buttons. These will either increase or decrease the minimum tier points gear has to be in order to be picked up. | ||
</div> | </div> | ||
| Line 294: | Line 288: | ||
Glow Selector= | Glow Selector= | ||
<div class="pre-dungeon"> | <div class="pre-dungeon"> | ||
This is used to apply glows to a character. Glows are displayed as a coloured outline around the player. Applying a glow can be done by clicking on one of the glow icons. Glows can be earnt from holding | This is used to apply glows to a character. Glows are displayed as a coloured outline around the player. Applying a glow can be done by clicking on one of the glow icons. Glows can be earnt from holding leaderboard positions and completing particular achievements, as well as purchasing [[Supporter]]. <br> | ||
</div> | </div> | ||
===Gallery=== | ===Gallery=== | ||
{| class="wikitable | {| class="wikitable" | ||
|+ Glows | |+ Glows | ||
|- | |- | ||
| Line 322: | Line 316: | ||
| Cyan || Top 1 Guild | | Cyan || Top 1 Guild | ||
|- | |- | ||
| Black || All [[Mounts]] Collected | | Black || All Exotic [[Mounts]] Collected | ||
|- | |- | ||
| White || All [[Pets]] Collected | | White || All Exotic [[Pets]] Collected | ||
|- | |- | ||
| Pink || Max [[Transcendence]] on | | Pink || Max [[Transcendence]] on All Classes | ||
|- | |- | ||
| Purple || Supporter Subscription | | Purple || Supporter/Supporter+ Subscription | ||
|} | |} | ||
| Line 335: | Line 329: | ||
Stats Viewer= | Stats Viewer= | ||
<div class="pre-dungeon"> | <div class="pre-dungeon"> | ||
Serves as the way to view stat values, where they come from, and their functionality! Stats are gained from | Serves as the way to view stat values, where they come from, and their functionality! Stats are gained from transcendence, gear, and guilds. For a detailed breakdown on all of the stats, view the [[Stats|Stats Page]]. | ||
</div> | </div> | ||
| Line 343: | Line 337: | ||
Sticker Selector= | Sticker Selector= | ||
<div class="pre-dungeon"> | <div class="pre-dungeon"> | ||
Used to pick what | Used to pick what sticker to display from your sticker collection. Stickers are obtained from the [[Seasons#Seasonpass|Season Pass]], Supporter subscription, and the [https://store.telosrealms.com/ store]. Stickers are displayed above the player's head by clicking the smiley button in your inventory's action menu. | ||
</div> | </div> | ||
{| class="wikitable mw-collapsible mw-collapsed" | {| class="wikitable mw-collapsible mw-collapsed" | ||
| Line 352: | Line 346: | ||
| [[File:Sticker-Supporter.png]] || Supporter || Active Supporter Subscription | | [[File:Sticker-Supporter.png]] || Supporter || Active Supporter Subscription | ||
|- | |- | ||
| [[File:Sticker- | | [[File:Sticker-SupporterPlus.png]] || Supporter Plus || Active Supporter+ Subscription | ||
|- | |- | ||
| [[File:Sticker- | | [[File:Sticker-Garen.png]] || Garen || Store (Currently Unavailable) | ||
|- | |- | ||
| [[File:Sticker- | | [[File:Sticker-Bobbe.png]] || Bobbe || Store (Currently Unavailable) | ||
|- | |- | ||
| [[File:Sticker-WarCat.png]] || War Cat || Store | | [[File:Sticker-Jonkler.png]] || Jonkler || Store (Currently Unavailable) | ||
|- | |||
| [[File:Sticker-WarCat.png]] || War Cat || Store (Currently Unavailable) | |||
|- | |- | ||
| [[File:Sticker-HellsKitchen.png]] || hellskitchenwaterphonesoundeffec || [[Seasons|Season]] 1 Pass Tier 23 | | [[File:Sticker-HellsKitchen.png]] || hellskitchenwaterphonesoundeffec || [[Seasons|Season]] 1 Pass Tier 23 | ||
| Line 367: | Line 363: | ||
|- | |- | ||
| [[File:Sticker-Bleh.png]] || Bleh || [[Seasons|Season]] 2 Pass Tier 40 | | [[File:Sticker-Bleh.png]] || Bleh || [[Seasons|Season]] 2 Pass Tier 40 | ||
|- | |||
| [[File:Sticker-ZAMN.png]] || Zamn || [[Seasons|Season]] 3 Pass Tier 28 | |||
|- | |||
| [[File:Sticker-Steamhappy.png]] || Steamhappy || [[Seasons|Season]] 3 Pass Tier 39 | |||
|- | |||
| [[File:Sticker-CluelessDog.png]] || Clueless Dog || [[Seasons|Season]] 4 Pass Tier 7 | |||
|- | |||
| [[File:Sticker-DisintegratingSquirrel.png]] || Disintegrating Squirrel || [[Seasons|Season]] 4 Pass Tier 13 | |||
|- | |||
| [[File:Sticker-VoidedDog.png]] || Voided Dog || [[Seasons|Season]] 4 Pass Tier 27 | |||
|- | |||
| [[File:Sticker-UhhhhMonkey.png]] || Uhhhh Monkey || [[Seasons|Season]] 4 Pass Tier 33 | |||
|} | |} | ||
| Line 374: | Line 382: | ||
Seasonal Glory Converter= | Seasonal Glory Converter= | ||
<div class="pre-dungeon"> | <div class="pre-dungeon"> | ||
Allows the conversion of | Allows the conversion of seasonal glory into glory at a 1:1 ratio. This is done by inputting the amount of seasonal glory into the textbar, and then by pressing on the confirmation button to finish the process. | ||
</div> | </div> | ||
| Line 382: | Line 390: | ||
Pet & Mount Stands= | Pet & Mount Stands= | ||
<div class="pre-dungeon"> | <div class="pre-dungeon"> | ||
Your own little companions, how cute! Pets serve as a way to deal extra DPS or heal the player, while mounts are used to traverse the [[Biomes|Realm]]. Selecting | Your own little companions, how cute! Pets serve as a way to deal extra DPS or heal the player, while mounts are used to traverse the [[Biomes|Realm]]. Selecting companions is done by clicking on the desired one. Companions are obtained from [[Dungeons]] at a very low drop rate, with no soft pity. To summon your mount in the realm, click on the saddle in your inventory's actions menu, or in the G-key interface. More information on companions can be found on the [[Companions|Companions Page]], and more information on companion bags can be found on the [[Loot|Loot Page]]. | ||
</div> | </div> | ||
===Gallery=== | ===Gallery=== | ||
{{InlineImage|file=Gif-PetAndMountStands.gif|size=720px|caption=Demonstration of the | {{InlineImage|file=Gif-PetAndMountStands.gif|size=720px|caption=Demonstration of the pet and mount stands}} | ||
|-| | |-| | ||
Guild Viewer= | Guild Viewer= | ||
<div class="pre-dungeon"> | <div class="pre-dungeon"> | ||
This is the central station for all guild-related features. A [[Game Mechanics#Guilds| | This is the central station for all guild-related features. A [[Game Mechanics#Guilds|guild]] can be created by paying 10,000 glory. To increase the guild's tier, more glory is required. | ||
To view the member list, click on the | To view the member list, click on the player head. In this GUI, you can also invite, kick and promote players. The guild vault is accessed by clicking on the ender chest. It has 45 slots per, and higher ranking members can also convert vaults into seasonal vaults. Additionally, (seasonal) glory can be deposited/withdrawn to the guild. To leave a guild, click on the leave button in the bottom right of the GUI. | ||
</div> | </div> | ||
| Line 403: | Line 411: | ||
|type=ButtonHeaderGraveyard | |type=ButtonHeaderGraveyard | ||
|text=Graveyard | |text=Graveyard | ||
|img=3DGraveyardArea | |img=Hub-3DGraveyardArea | ||
|content= | |content= | ||
<div class="hoverbox" id="Graveyard"> | <div class="hoverbox" id="Graveyard"> | ||
| Line 410: | Line 418: | ||
<div class="pre-dungeon"> | <div class="pre-dungeon"> | ||
===Functionality=== | ===Functionality=== | ||
Various Graves can be found in the Graveyard, these consist of the top | Various Graves can be found in the Graveyard, these consist of the top 8 most recent global deaths. Grave designs are dependent on rank. More information on this can be found on the [[Game Mechanics]] page. | ||
</div> | </div> | ||
| Line 420: | Line 428: | ||
|type=ButtonHeaderLeaderboards | |type=ButtonHeaderLeaderboards | ||
|text=Leaderboards | |text=Leaderboards | ||
|img=3DLeaderboardArea | |img=Hub-3DLeaderboardArea | ||
|content= | |content= | ||
<div class="hoverbox" id="Leaderboards"> | <div class="hoverbox" id="Leaderboards"> | ||
[[File:Image-CinematicLeaderboards.png|frame|centre|The | [[File:Image-CinematicLeaderboards.png|frame|centre|The leaderboards showcase the top 5 seasonal players.]] | ||
<div class="pre-dungeon"> | <div class="pre-dungeon"> | ||
===Functionality=== | ===Functionality=== | ||
The physical | The physical leaderboard displays the top 5 [[Rulesets|seasonal characters]] and their gear. Leaderboard position is calculated with score, which is determined with the formula "log10(sumOf(tierPoints × total item trait level) + 1) × level". Tier points are gained from gear and increase from higher quality items, while fame is obtained by killing enemies. Trait level ranges from 1 to 5 (D->S) per trait. More information on fame can be found on the [[Economy]] page, and more information on tier points can be found on the [[Game Mechanics]] page. | ||
To view other leaderboards, run the /leaderboards command. You can view your own leaderboard positions at the [https://oracle.telosrealms.com/oracle Oracle Leaderboard]! | To view other leaderboards, run the /leaderboards command. You can view your own leaderboard positions at the [https://oracle.telosrealms.com/oracle Oracle Leaderboard]! | ||
| Line 439: | Line 447: | ||
|type=ButtonHeaderAuctionHouse | |type=ButtonHeaderAuctionHouse | ||
|text=Auction House | |text=Auction House | ||
|img=3DAuctionHouseArea | |img=Hub-3DAuctionHouseArea | ||
|content= | |content= | ||
<div class="hoverbox" id="Auction House"> | <div class="hoverbox" id="Auction House"> | ||
| Line 446: | Line 454: | ||
<div class="pre-dungeon"> | <div class="pre-dungeon"> | ||
===Functionality=== | ===Functionality=== | ||
The [[Economy|Auction House]] displays all of the items that players on your [[Rulesets| | The [[Economy|Auction House]] displays all of the items that players on your [[Rulesets|ruleset]] are selling. Glory, the main currency, is generated into the economy from players killing enemies. The glory drop amount is the fame drop amount of the enemy with a random multiplier ranging from -20% to +20%. Scrapjack resides in the corner of the Auction House, buying tiered gear and forge fragments for a fixed glory price. | ||
Information on Auction House details such as buying & selling can be found on the Auction House section of the [[Economy]] page. | Information on Auction House details such as buying & selling can be found on the Auction House section of the [[Economy]] page. | ||
| Line 453: | Line 461: | ||
{{InlineImage|file=Gif-AuctionTutorialSell.gif|size=720px|caption=Demonstration of selling an item on the Auction House}} | {{InlineImage|file=Gif-AuctionTutorialSell.gif|size=720px|caption=Demonstration of selling an item on the Auction House}} | ||
{{InlineImage|file=Gif-AuctionTutorialBuy.gif|size=|caption=Demonstration of buying an item on the Auction House}} | {{InlineImage|file=Gif-AuctionTutorialBuy.gif|size=|caption=Demonstration of buying an item on the Auction House}} | ||
{{InlineImage|file=Gif-ScrapjackFunction.gif|size=|caption=Demonstration of Scrapping | {{InlineImage|file=Gif-ScrapjackFunction.gif|size=|caption=Demonstration of Scrapping tiered gear at Scrapjack}} | ||
</div> | </div> | ||
}} | }} | ||
| Line 460: | Line 468: | ||
|type=ButtonHeaderQuests | |type=ButtonHeaderQuests | ||
|text=Quest House | |text=Quest House | ||
|img=3DQuestArea | |img=Hub-3DQuestArea | ||
|content= | |content= | ||
<div class="hoverbox" id="Quests"> | <div class="hoverbox" id="Quests"> | ||
| Line 468: | Line 476: | ||
<div class="pre-dungeon"> | <div class="pre-dungeon"> | ||
===Functionality=== | ===Functionality=== | ||
Ragnar is the primary Quest-giving NPC in Telos. He offers weekly quests & daily missions. To claim | Ragnar is the primary Quest-giving NPC in Telos. He offers weekly quests & daily missions. To claim quest rewards, type /rewards. They will appear in either the character-specific rewards or the account wide rewards section upon completing a quest. | ||
More information on quests and missions can be found in the Quests tab of the [[Game Mechanics]] page. | More information on quests and missions can be found in the Quests tab of the [[Game Mechanics]] page. | ||
| Line 475: | Line 483: | ||
{{InlineImage|file=Gif-RagnarUI.gif|size=720px|caption=Demonstration of Ragnar's UI}} | {{InlineImage|file=Gif-RagnarUI.gif|size=720px|caption=Demonstration of Ragnar's UI}} | ||
</div> | </div> | ||
}} | }} | ||

The Nexus is D's Sanctuary outside the world of Telos, accesed via the Eye of Nexus.
It holds many entities and stations to help the players with their mission. One of them being Thorian, found near spawn. He holds the Season pass rewards! Furthermore, the Nexus is home to NPCs such as the Blacksmith to upgrade your gear, the Auction House to exchange items, and Ragnar to give a guiding hand.
[D̷̛͖̲̜̤̭̤̬̏͑́̌̇̽͛̊́̕̚͜'s Personal LOG: Nexus] BYPASS STATE: Collecting data...
 Realms Globe
Various realm globes orbit around the Eye of Nexus. The more Silverlings in a realm, the brighter and bigger the globe! To get into a realm right-click on a realm globe or the Eye of Nexus to get sent to the largest Realm.
Use /locations to change the region you are in (Europe, North America, Asia).
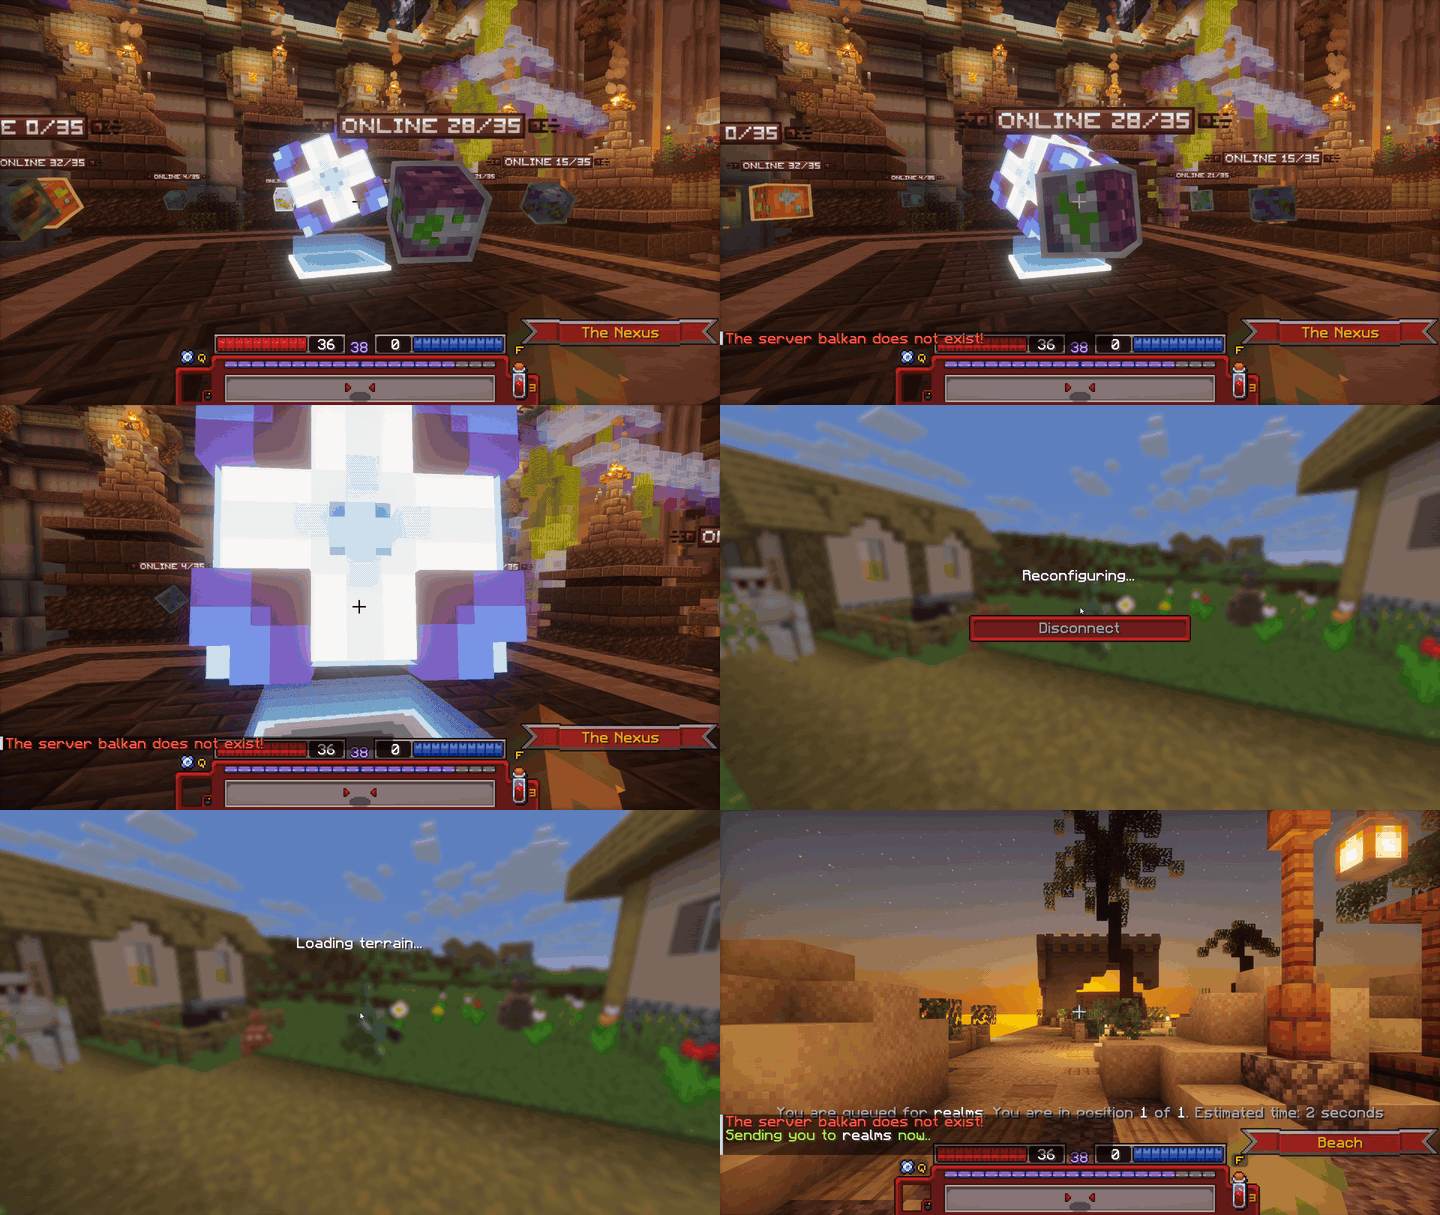
Entering the realm of Telos via the Eye of Nexus.
 Dojo
Dojo
The Dojo is where you can find various training dummies. These are near-invincible entities that deal no damage and serve as a way for players to test their gear and abilities. Upon hitting a Training Dummy, three lines of text will appear above its head displaying the total damage dealt, damage per second, and time passed.
The test will end shortly after you stop hitting the dummy.
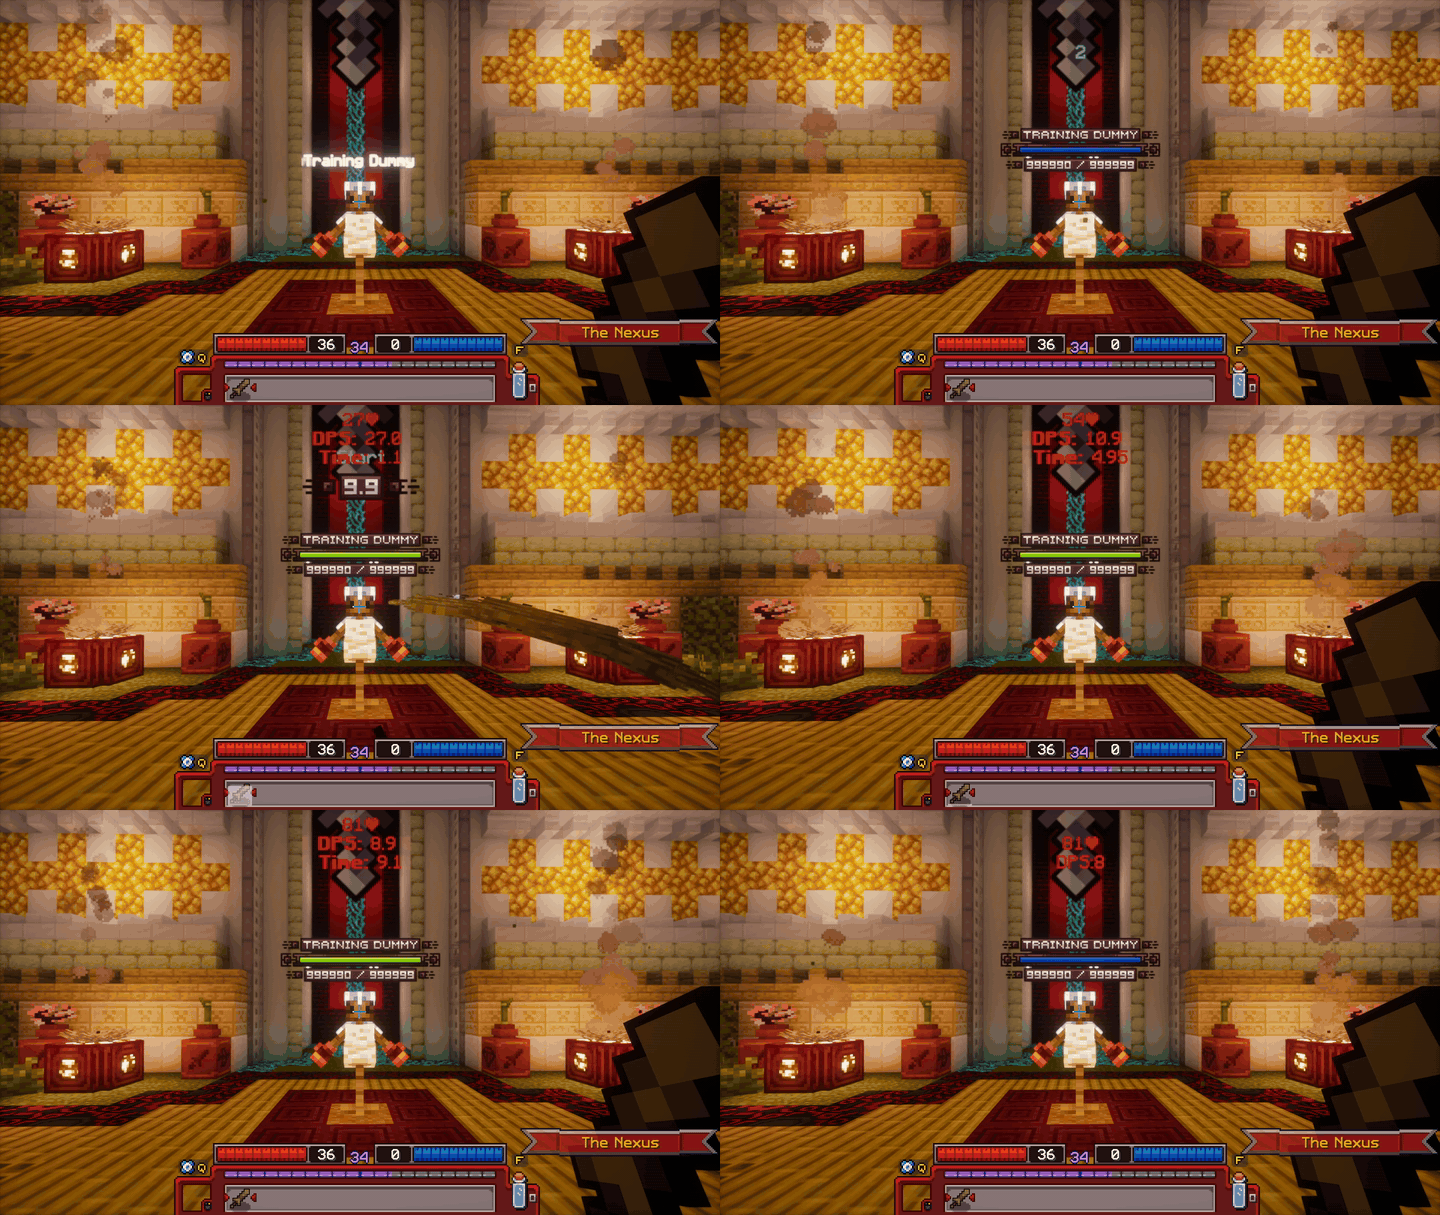
Showcase of a Training Dummy's functionality.
 Crates
There's five kinds of Crates: common, uncommon, rare, epic, and legendary. The drop-tables for every crate are listed below. Each crate has its own key linked to it, for example, the Epic Crate is opened using the Epic Crate Key.
Every season. unique pet or mount reskin(s) get added to the Legendary Crate, and the reskin(s) from the previous season will no longer be available. Stash Extenders and Character Slots serve to permanently upgrade your account, doing exactly as their name says, adding +1 slot to either your Characters or Stash. Mystery items from Crates have an equal chance of getting any of the items inside. For example, each individual forge fragment from the Mystery Forge Fragment reward will be a 33.3% chance! Dungeon keys can be used to open a bonus chest at the end of a dungeon. Soul point potions serve to speed up your transcendence progression. They add the listed amount of soul points to the character you consume them on.
To view a crate's rewards, click on the crate with an empty hand. To open a crate you need a key of the same tier as the crate. Keys can be obtained from earlier crates, quests, the Season Pass, or the store.
| Reward | Chance |
|---|---|
| Common Soul Point Potion | 20% |
| Common Dungeon Key | 40% |
| Uncommon Crate Key | 39% |
| Usual Crate Key | 1% |
| Reward | Chance |
|---|---|
| Uncommon Soul Point Potion | 15% |
| Mystery Fragment | 10% |
| Uncommon Dungeon Key | 55% |
| Rare Crate Key | 19% |
| Strange Crate Key | 1% |
| Reward | Chance |
|---|---|
| Rare Soul Point Potion | 20% |
| Mystery Fragment | 15% |
| Rare Dungeon Key | 50% |
| Epic Crate Key | 14% |
| Fabled Crate Key | 1% |
| Reward | Chance |
|---|---|
| Epic Soul Point Potion | 15% |
| Mystery Fragment | 20% |
| Epic Dungeon Key | 35% |
| Epic Crate Key 2x | 20% |
| Exotic Crate Key | 1% |
| Character Slot | 2% |
| Stash Page Slot | 2% |
| Legendary Crate Key | 5% |
| Reward | Chance |
|---|---|
| Legendary Dungeon Key | 20% |
| Legendary Soul Point Potion | 20% |
| Legendary Crate Key 2x | 5% |
| Character Slot | 15% |
| Stash Page Slot | 15% |
| Exotic Crate Key | 10% |
| Supporter Rank | 10% |
| Seasonal Crate Key | 4% |
| Legendary Companion Skin | 1% |
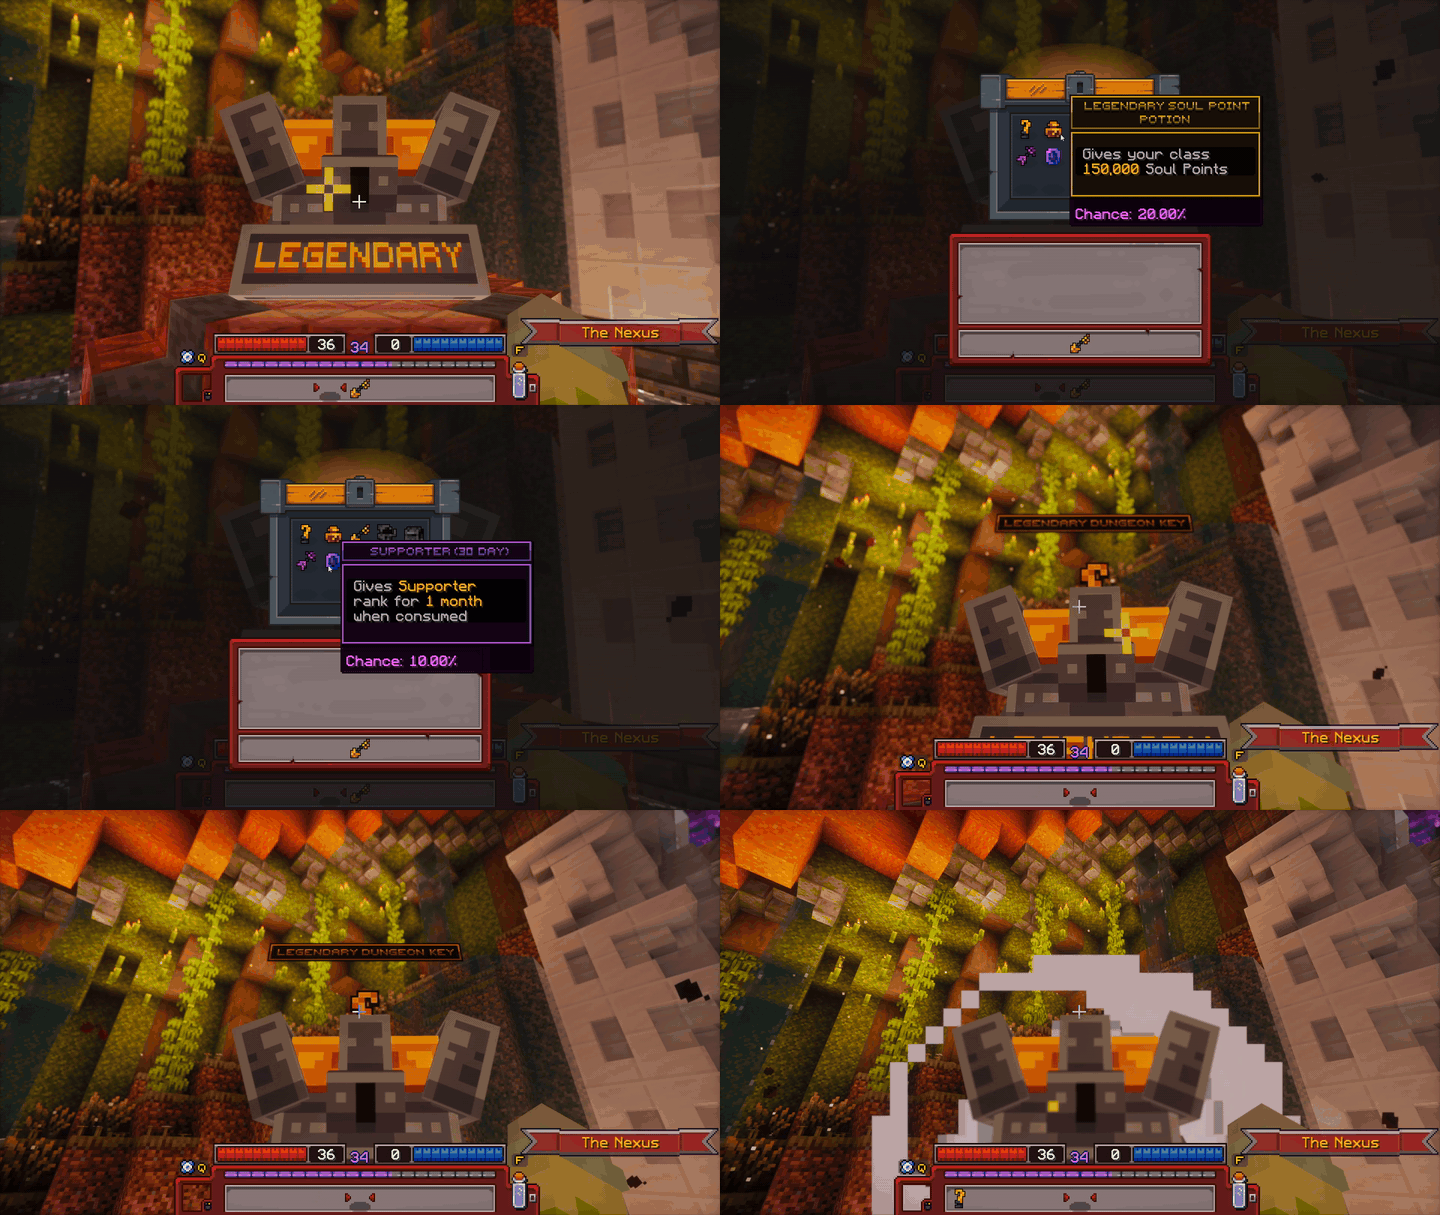
Demonstration of the Legendary Crate's functionality.
 Companion Area
There's four kinds of companion crates: usual, strange, fabled, and exotic. The drop-tables for every companion crate are listed below. Each companion crate has its own key linked to it; for example, the Exotic Companion Crate is opened using the Exotic Crate key. Additionally, companion crates are split into Pets and Mounts; however, both use the same keys.
To view a companion crate's rewards, click on the crate with an empty hand. To open a companion crate, you'll need a key of the same tier as the crate. Keys can be obtained from earlier crates, companion crates, quests, the Season Pass, or bought from Gorrum or the store.
Any mounts of the fabled and above rarity can fly. However, some mount skins also allow for permanent flight with any mount. Pets can either damage enemies or heal the player, while mounts are used to get around the realm.
| Reward | Chance |
|---|---|
| Slime Archer | 12.14% |
| Thornwood Druid | 12.14% |
| Shamanoid | 12.14% |
| Lost Cleric | 12.14% |
| Yin Yang | 12.14% |
| Undead Ent | 12.14% |
| Khufy | 12.14% |
| Strange Crate Key | 15% |
| Reward | Chance |
|---|---|
| Blazey | 9.44% |
| Dark Knight | 9.44% |
| Ice Penguin | 9.44% |
| Mini Dwarf | 9.44% |
| Golden Martial | 9.44% |
| Blade | 9.44% |
| Pryoc | 9.44% |
| Dark Alchemist | 9.44% |
| Thaily | 9.44% |
| Fabled Crate Key | 15.01% |
| Reward | Chance |
|---|---|
| Mini Archmage | 12.50% |
| Minobi | 12.50% |
| Mini Illusionist | 12.50% |
| Night Riser | 12.50% |
| Bard | 12.50% |
| Beast Master | 12.50% |
| Tartalink | 12.50% |
| Exotic Crate Key | 12.50% |
| Reward | Chance |
|---|---|
| Lil' Monk | 10.00% |
| Elder Ent | 10.00% |
| Dragon Warrior | 10.00% |
| Lumine | 10.00% |
| Exaltling | 10.00% |
| Thanatos | 10.00% |
| Mosslight | 10.00% |
| Shadow Chirp | 10.00% |
| Legion | 10.00% |
| Radle | 10.00% |
| Reward | Chance |
|---|---|
| Golden Stallion | 12.14% |
| Timberbeast | 12.14% |
| Gobblehop | 12.14% |
| Grumbleglob | 12.14% |
| Zenpanda | 12.14% |
| Thornscale | 12.14% |
| Shadow Scorpid | 12.14% |
| Strange Crate Key | 15% |
| Reward | Chance |
|---|---|
| Magma Runner | 9.44% |
| Necrofox | 9.44% |
| Frostfang | 9.44% |
| Glacial Runner | 9.44% |
| Midas Construct | 9.44% |
| Fireclaw | 9.44% |
| Hydroscorch | 9.44% |
| Shadowclaw | 9.44% |
| Winterbeast | 9.44% |
| Fabled Crate Key | 15.01% |
| Reward | Chance |
|---|---|
| Etherealmare | 12.50% |
| Mycohawk | 12.50% |
| Spectral Steed | 12.50% |
| Phantommare | 12.50% |
| Mechamajestic | 12.50% |
| Necrowyrm | 12.50% |
| Emberaptor | 12.50% |
| Exotic Crate Key | 12.50% |
| Reward | Chance |
|---|---|
| Dusk Manticultist | 10.00% |
| Woodland Mantibane | 10.00% |
| Sunflare | 10.00% |
| Astralflare | 10.00% |
| Celestial Serpent | 10.00% |
| Seraphix | 10.00% |
| Vinegleam | 10.00% |
| Dreadspire Drake | 10.00% |
| Echoraptor | 10.00% |
| Glowscale | 10.00% |
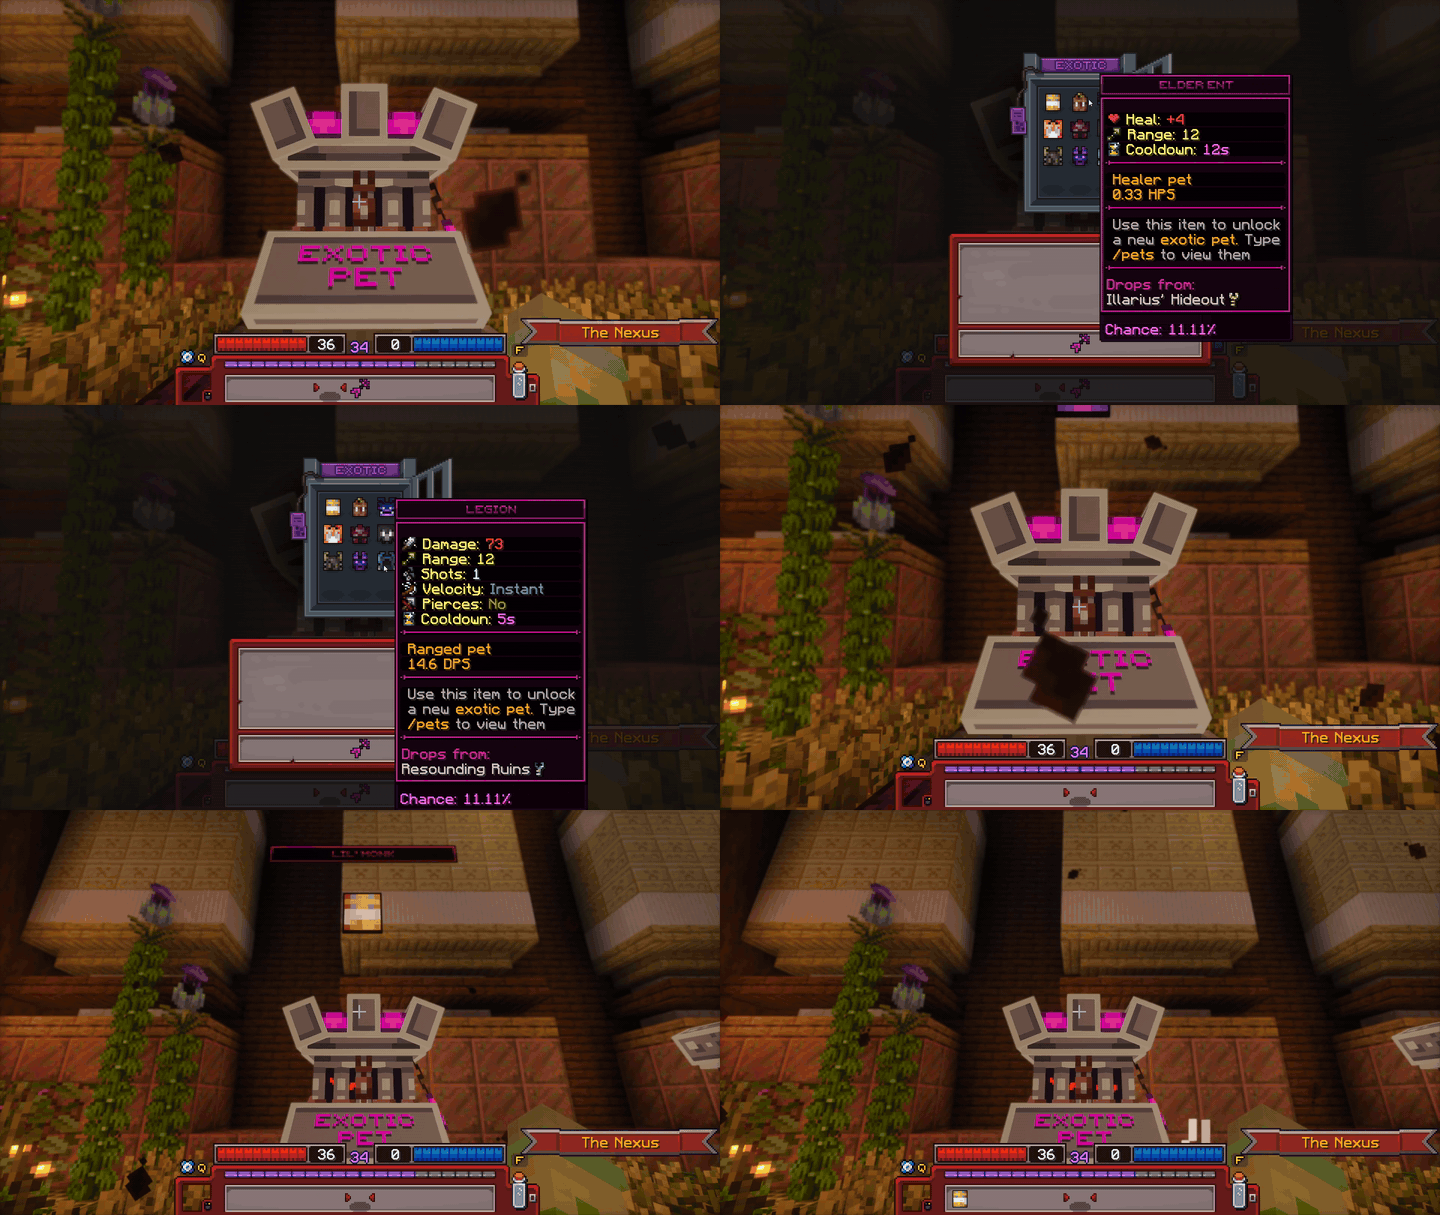
Demonstration of an Exotic Crate's functionality
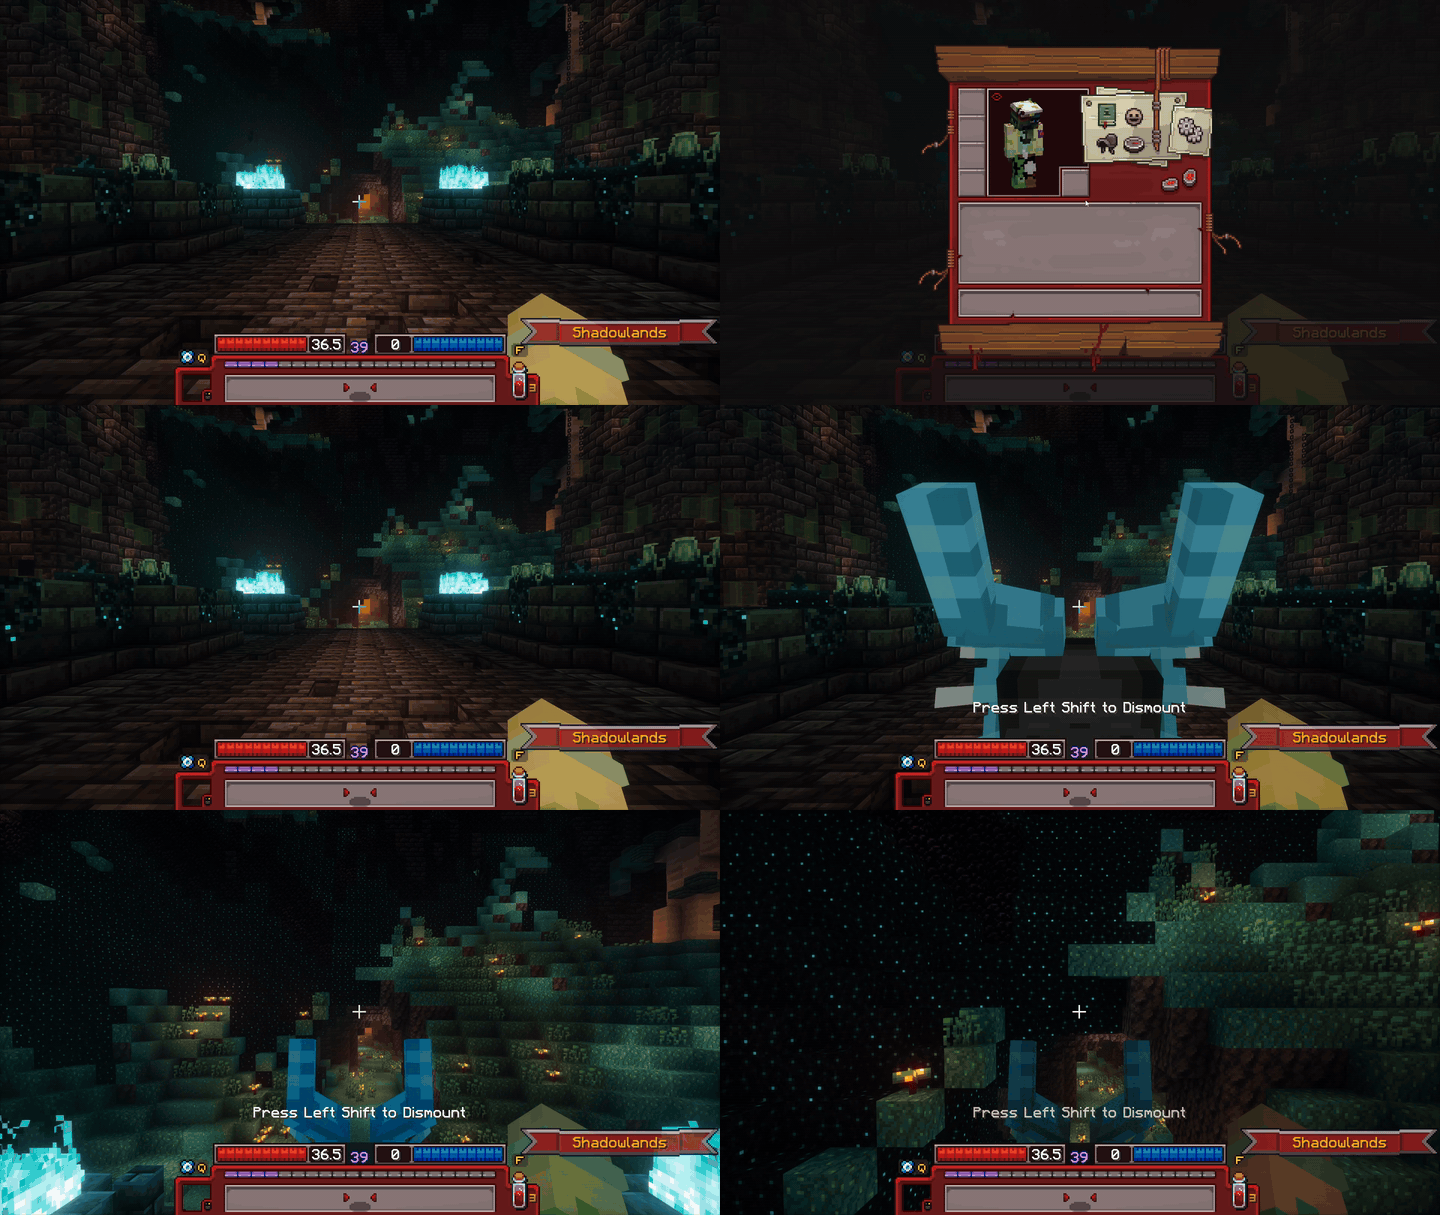
Demonstration of a mount's functionality
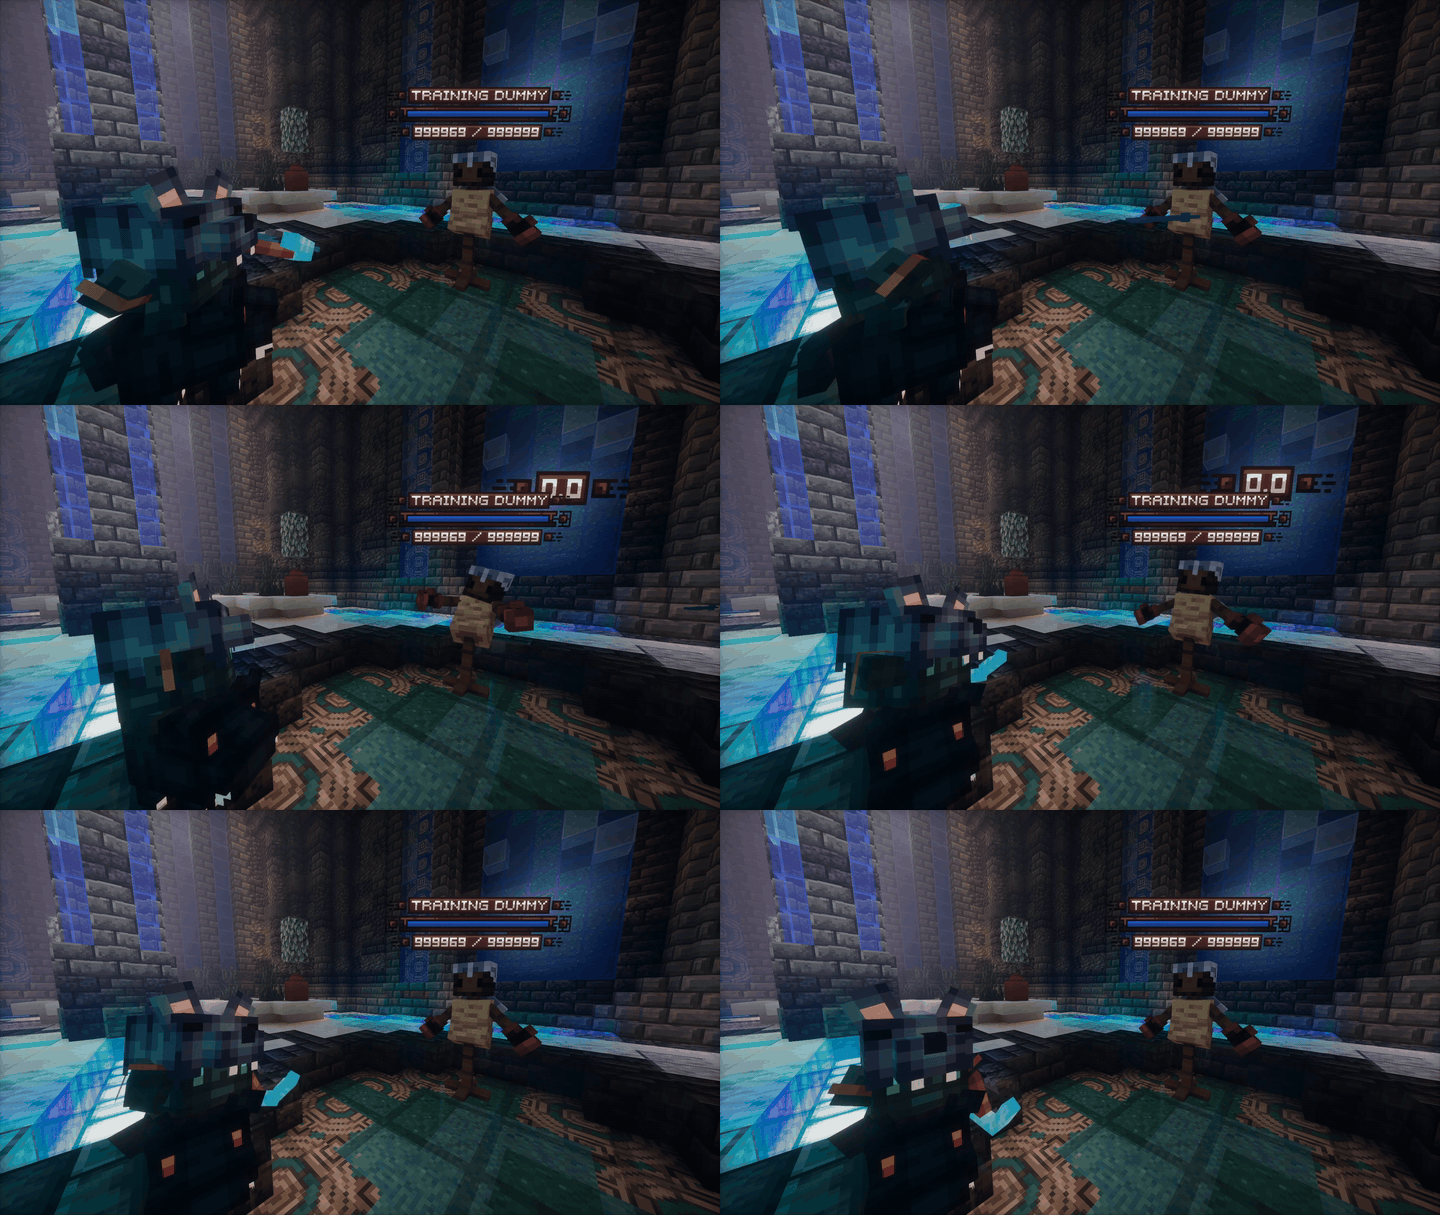
Demonstration of a pet dealing damage
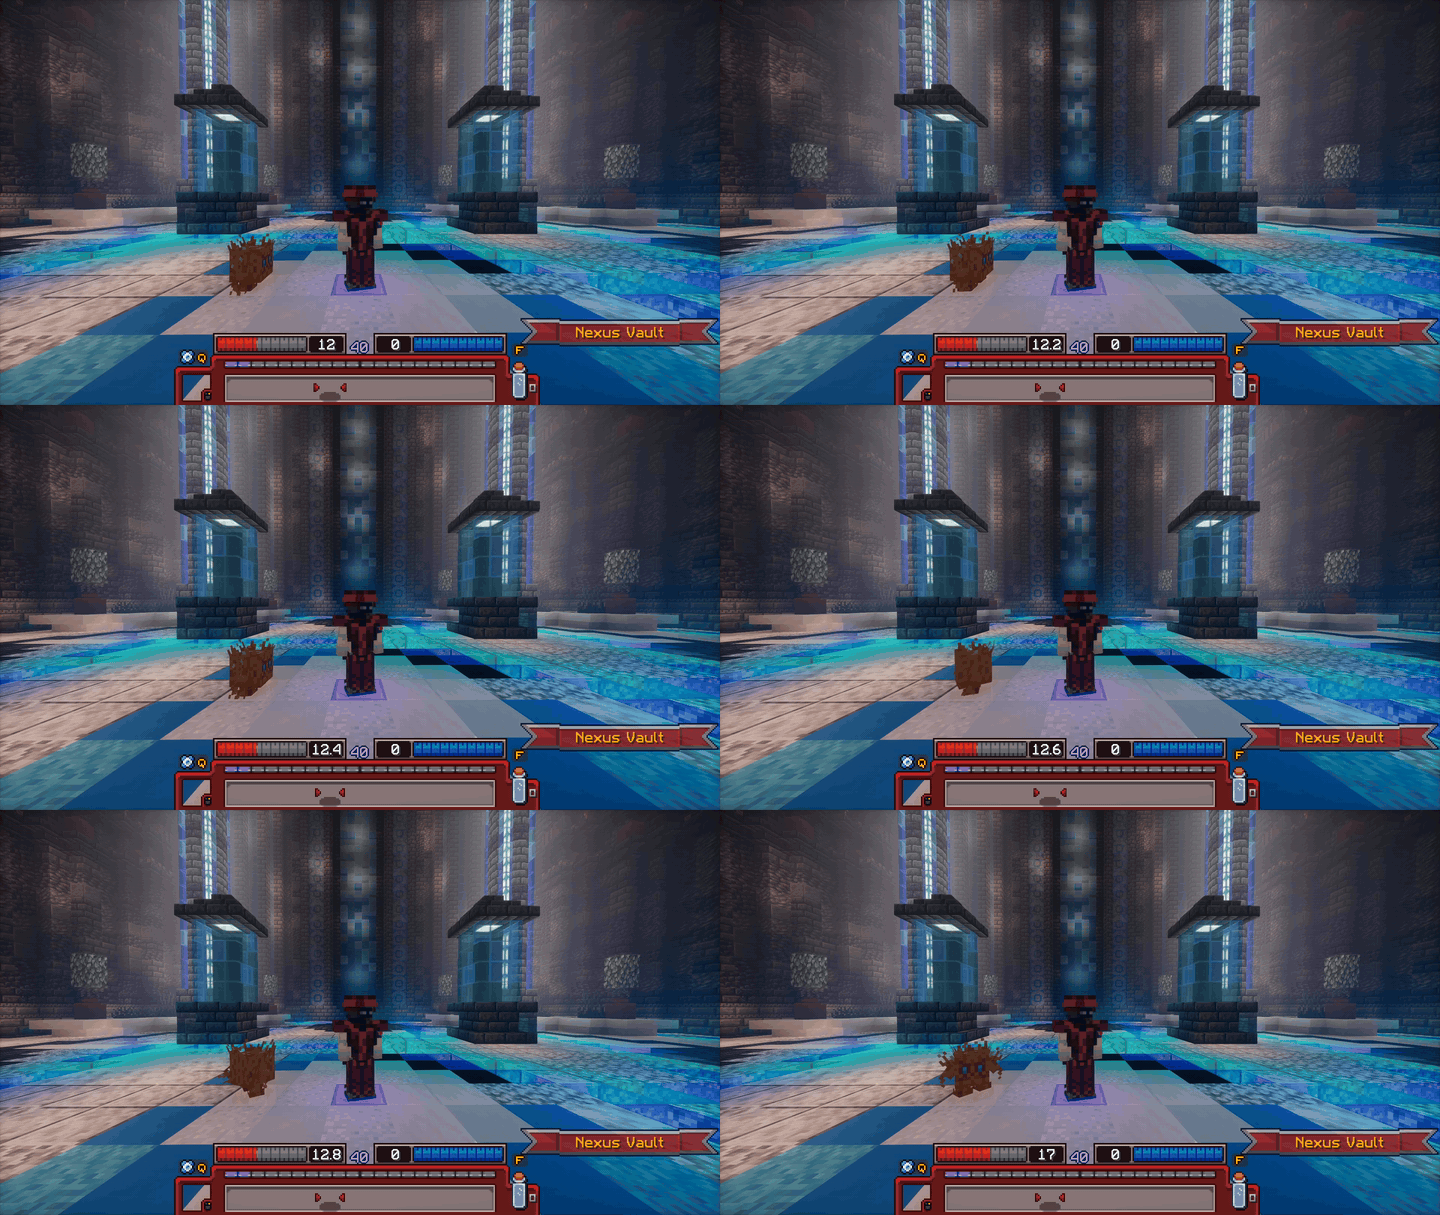
Demonstration of a pet healing the player
 Blacksmith
At the Blacksmith you can upgrade your items by either by rerolling or crafting. Rerolling changes the traits of an item using forge fragments and glory, which might improve the item's ability and/or its stats. Crafting is done with crafting components; this drastically changes the item into a new one. More information on rerolling and crafting individual UT items can be found in the individual tabs of the Loot page.
The UT Reroll Forge is found at the top left and Crafting Stations at the bottom of the GUI.
Depending on the rarity of the item that is being rerolled, it can cost more or less glory to reroll.
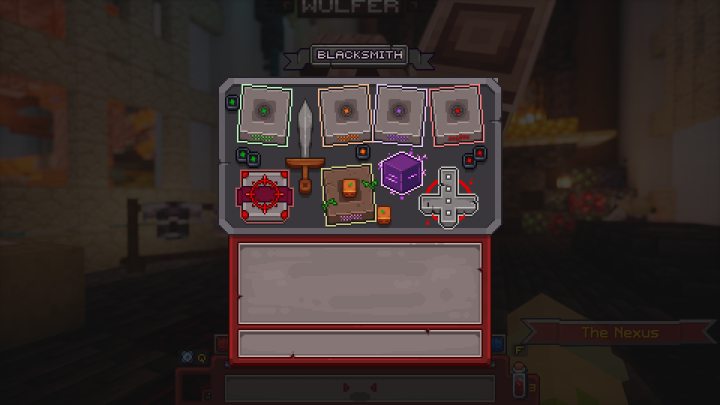
All stations in Wulfer's GUI
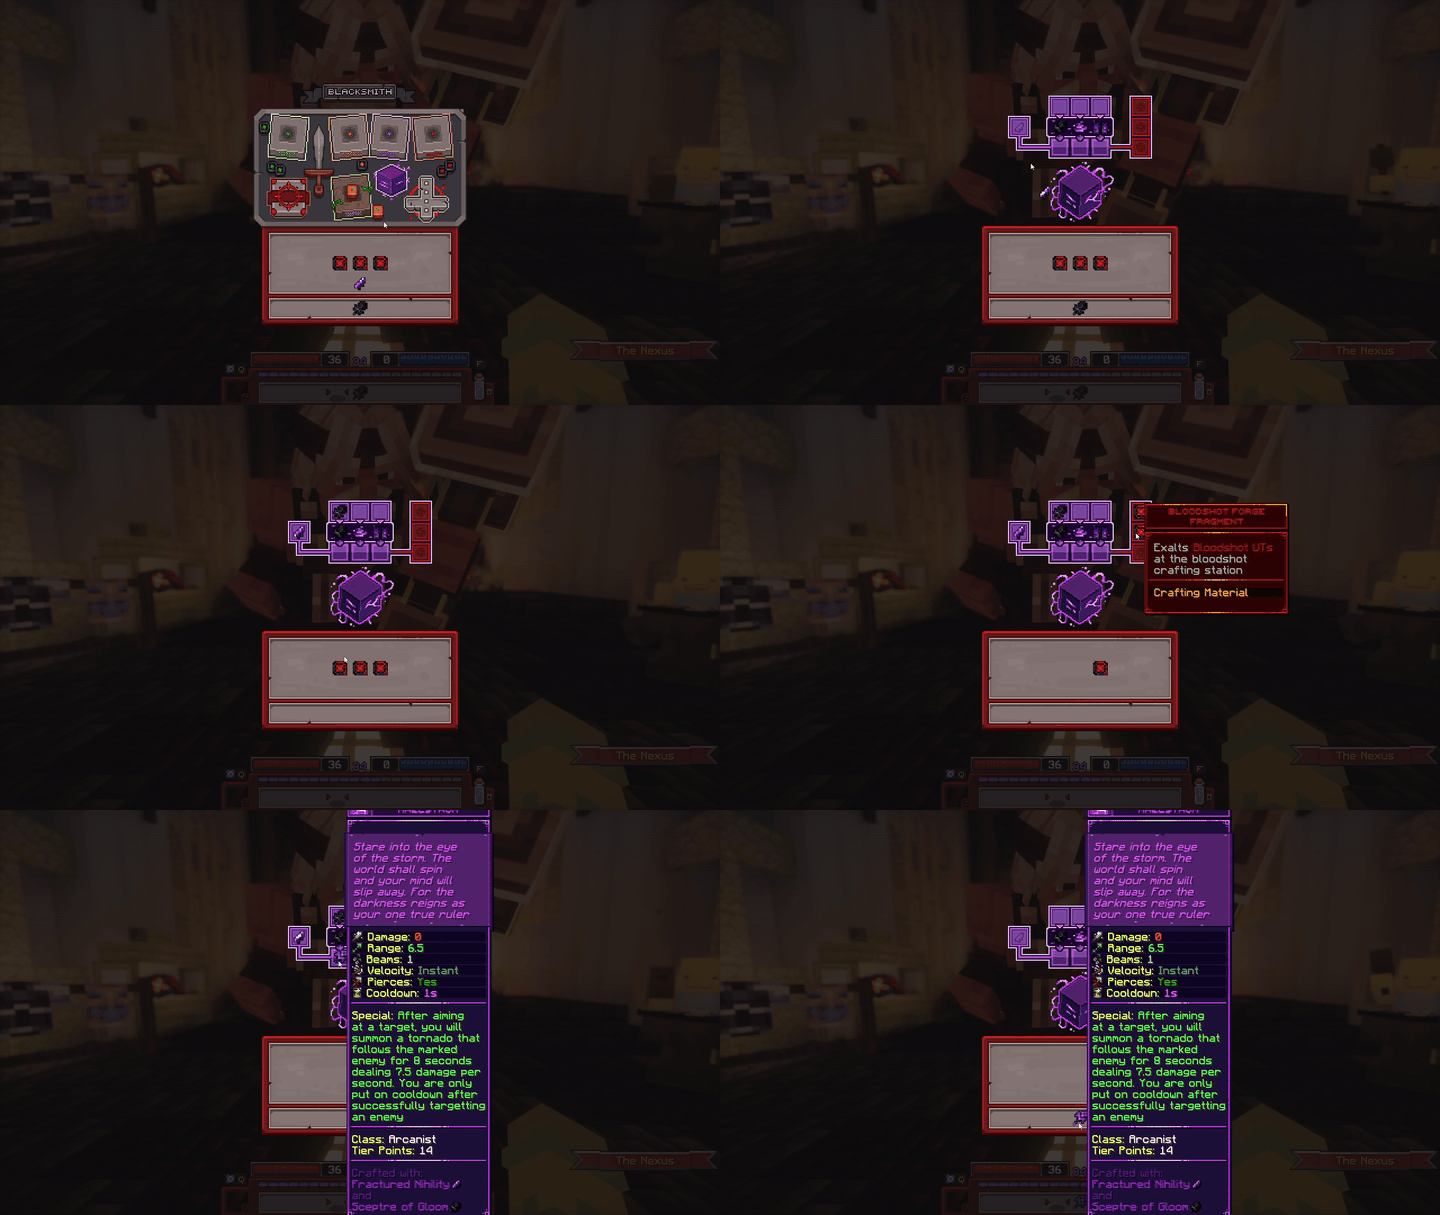
Crafting a Voidbound UT
 Skill Tree
Moloch offers you levels of Transcendence in return for soul points. There are a total of ten levels of transcendence, each costing more and more soul points to unlock. For every level of transcendence you'll also get buffs like an increase in base stats, loot boost, and more! skill points for the Skill Tree are obtained from transcending.
Soul points are earned whenever you gain fame, at a 1:1 ratio which means Fame Boost also affects soul point gain. During the Soulpoint Day your soul point gain will be increased by 25%. The other way to get soul points is via soul point potions which can be acquired from quests, crates, companion rewards, and more.
Skill Tree abilities are called Nodes. When speaking of specific nodes, they are abbreviated in order of: Node (n), Tier (1-6), Position(a/b/c). For Example: n6b, which means the middle node on the highest tier of the Skill Tree. Every skill tree has two rows and six tiers of nodes. The fourth and sixth tier also have middle nodes, and the first tier has only one node making every skill tree have 13 nodes in total.
To view nodes, right-click them, and this will lock the description in place. Right-clicking again will unlock the description. To select a node, left-click while looking at it. To reset your skill tree, press the R button on the floor between the two skill trees.
More information on skill trees can be found in the Skill Trees page.
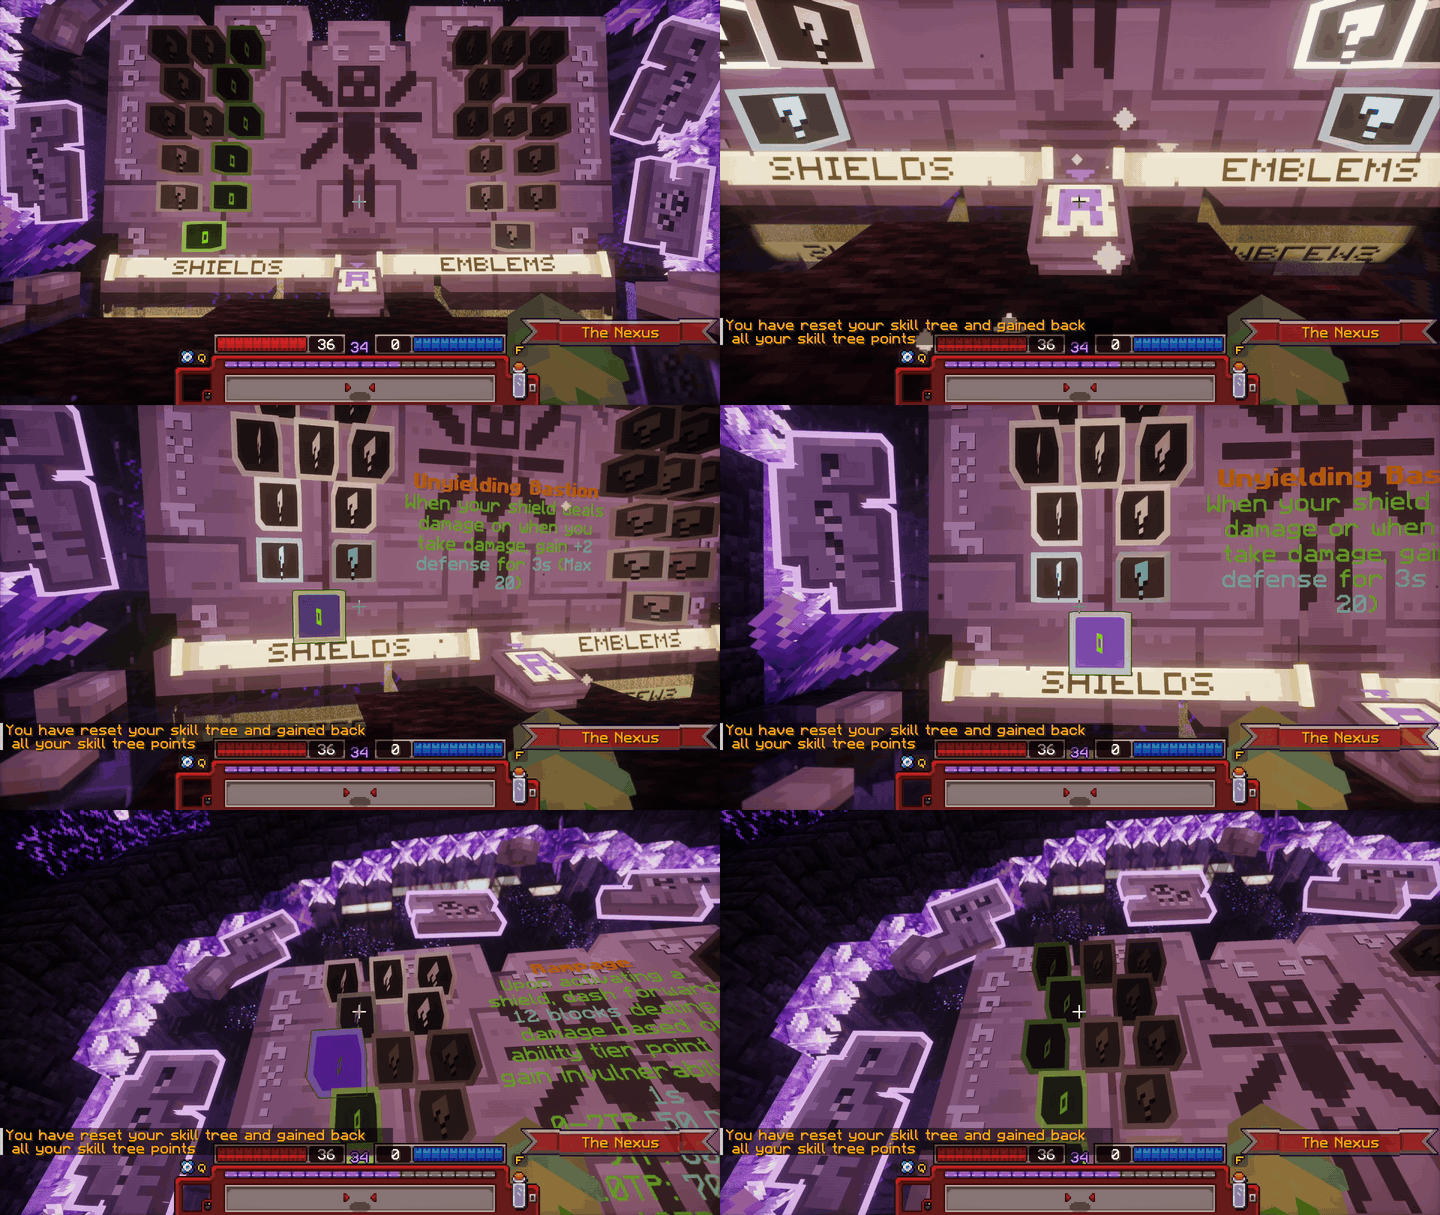
Viewing and selecting nodes in the skill tree
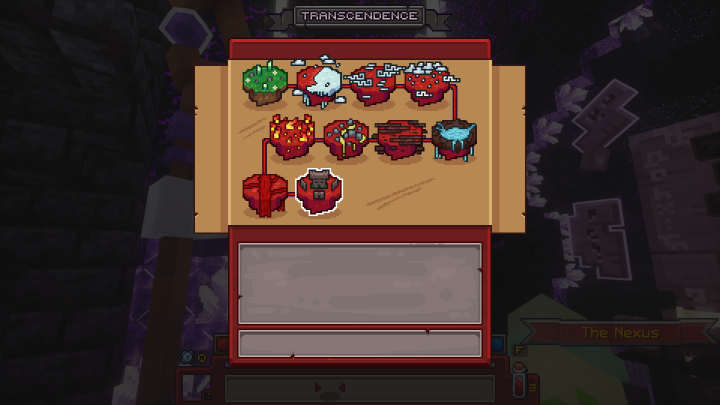
Moloch's Transcendence GUI
 Personal Area
This is the player's permanent storage which is not lost on death. Each stash page has a total of 45 slots. By default the player only has one page; however, more can be obtained by consuming  Stash Page Slots. Stash Page Slots can be obtained from the store, crates, companion rewards, and the Season Pass.
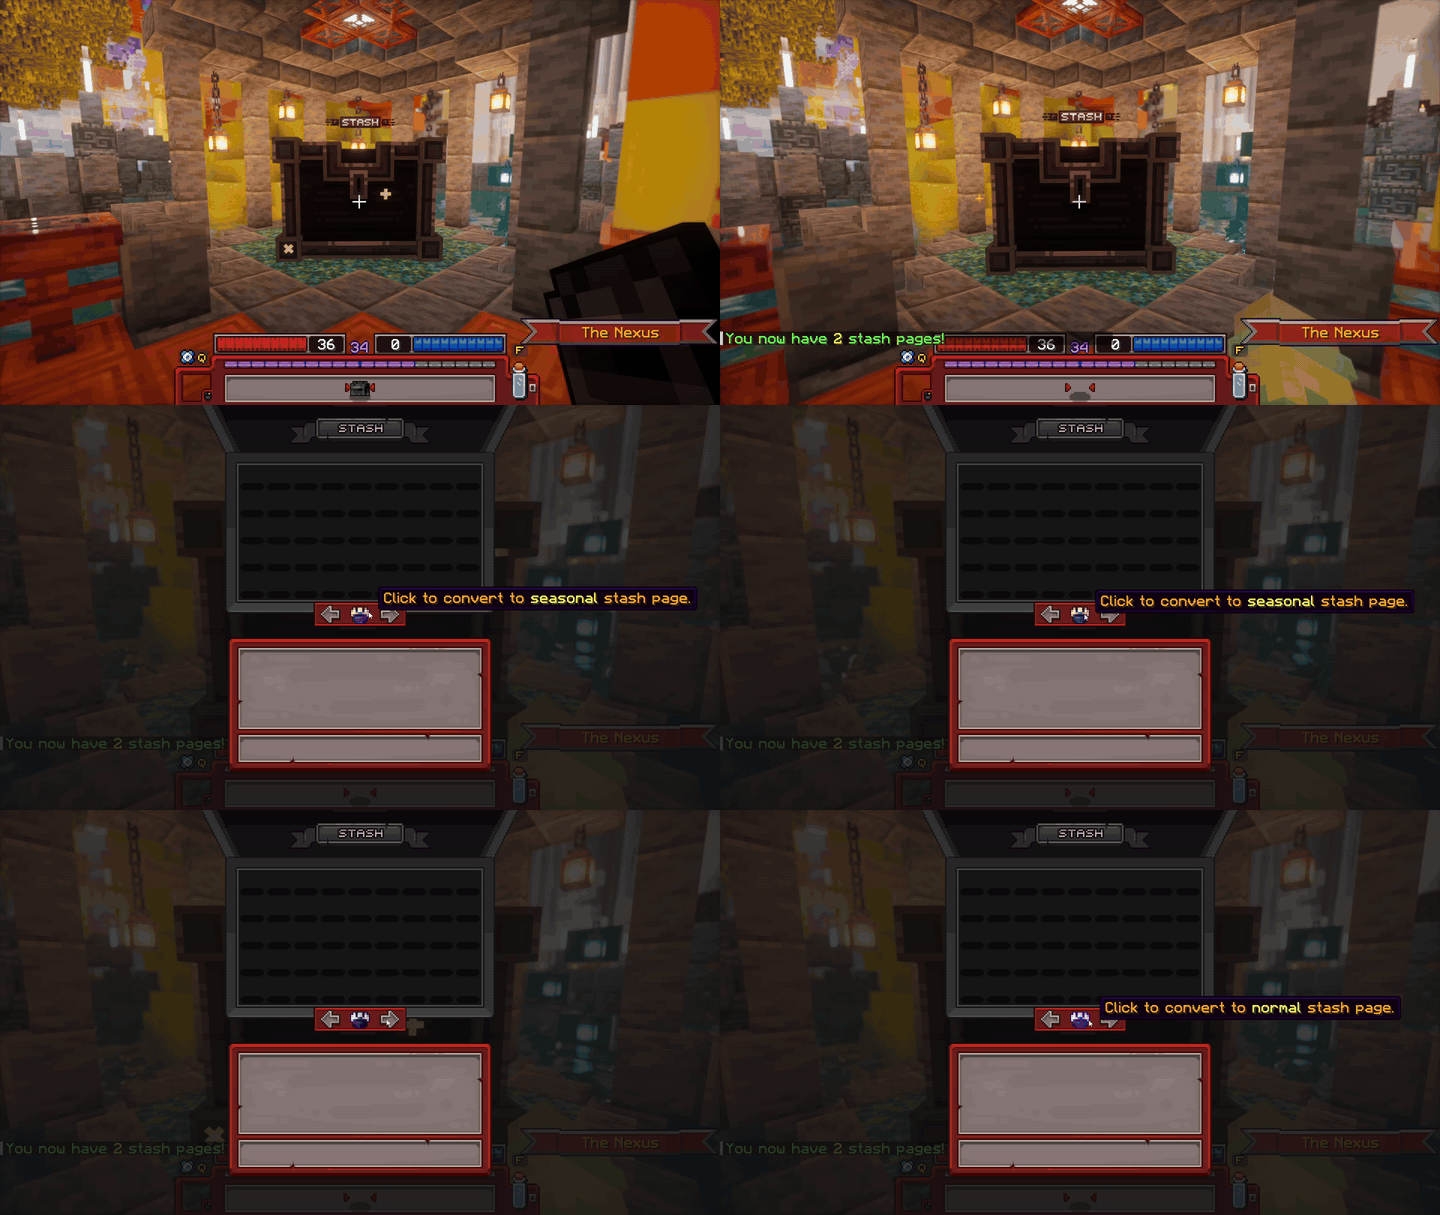
Demonstration of the Stash
Allows the player to view and select characters. To create more characters, the player can click on an empty slot, which will open up the Character Creation GUI. Right-clicking on a character will open up that character's GUI. Deleting a character is done by clicking on the trash-can icon.
By default, 2 character slots are unlocked. More can be obtained by consuming  Character Slots, which can be obtained from the store, crates, companion rewards. and the Season Pass.
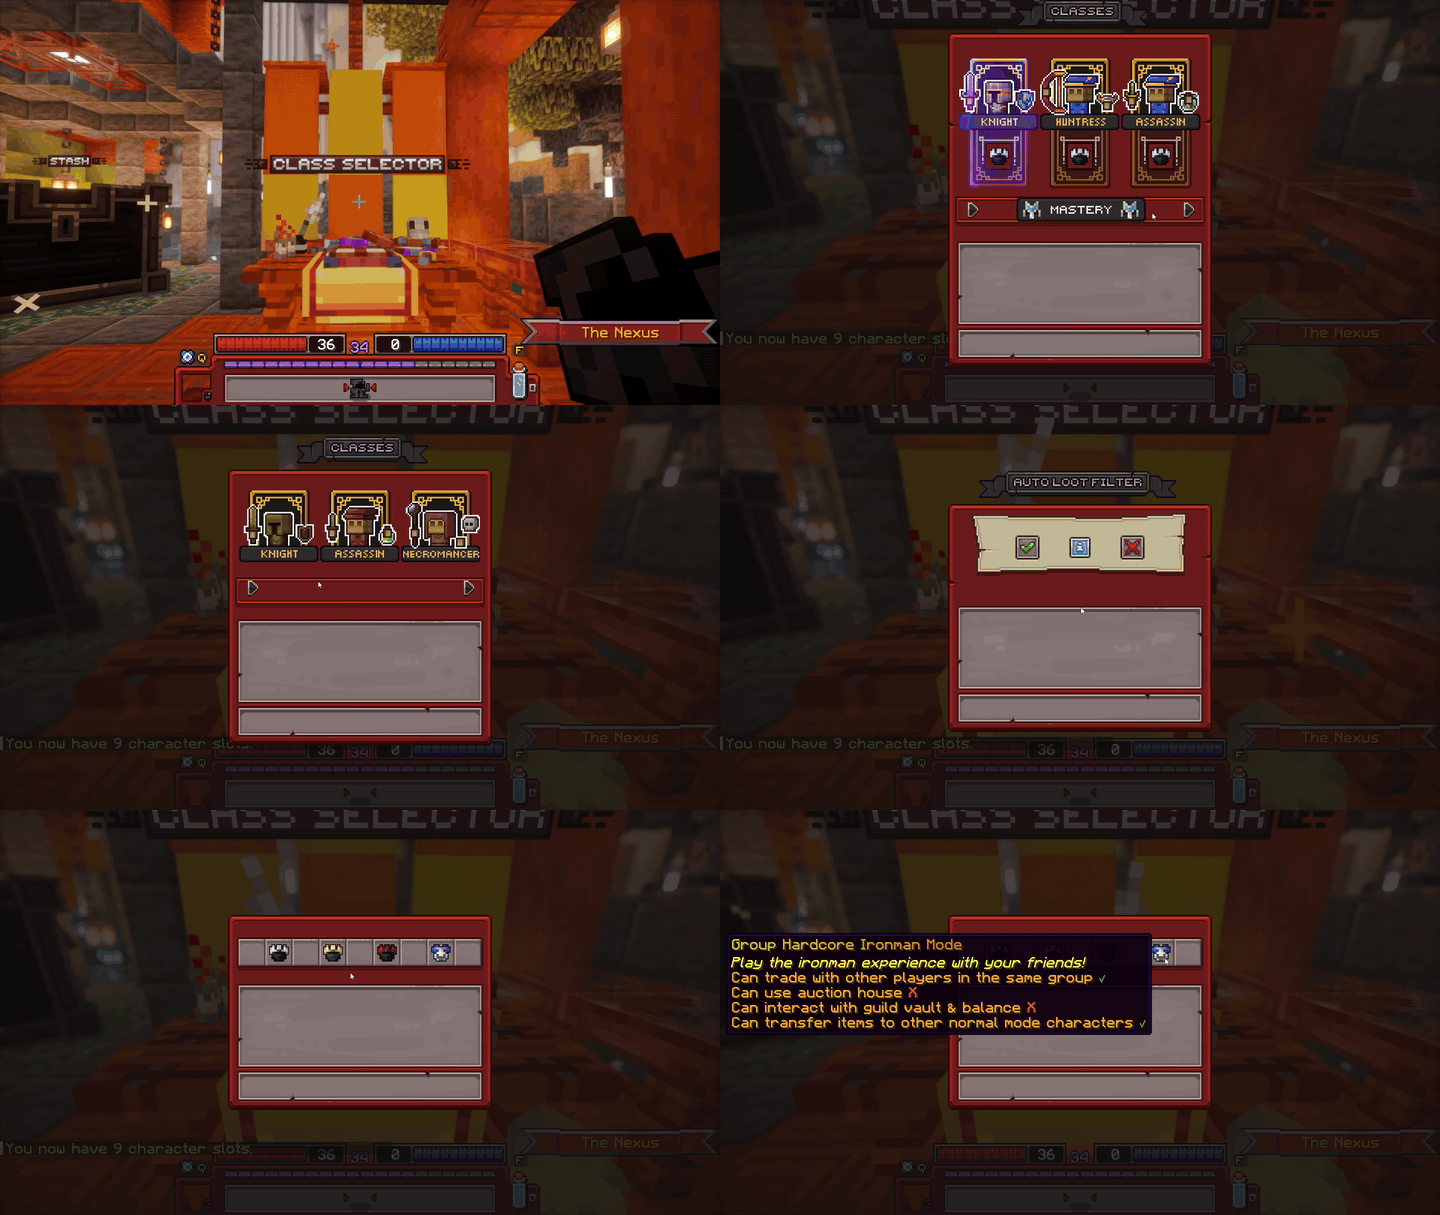
Demonstration of character creation
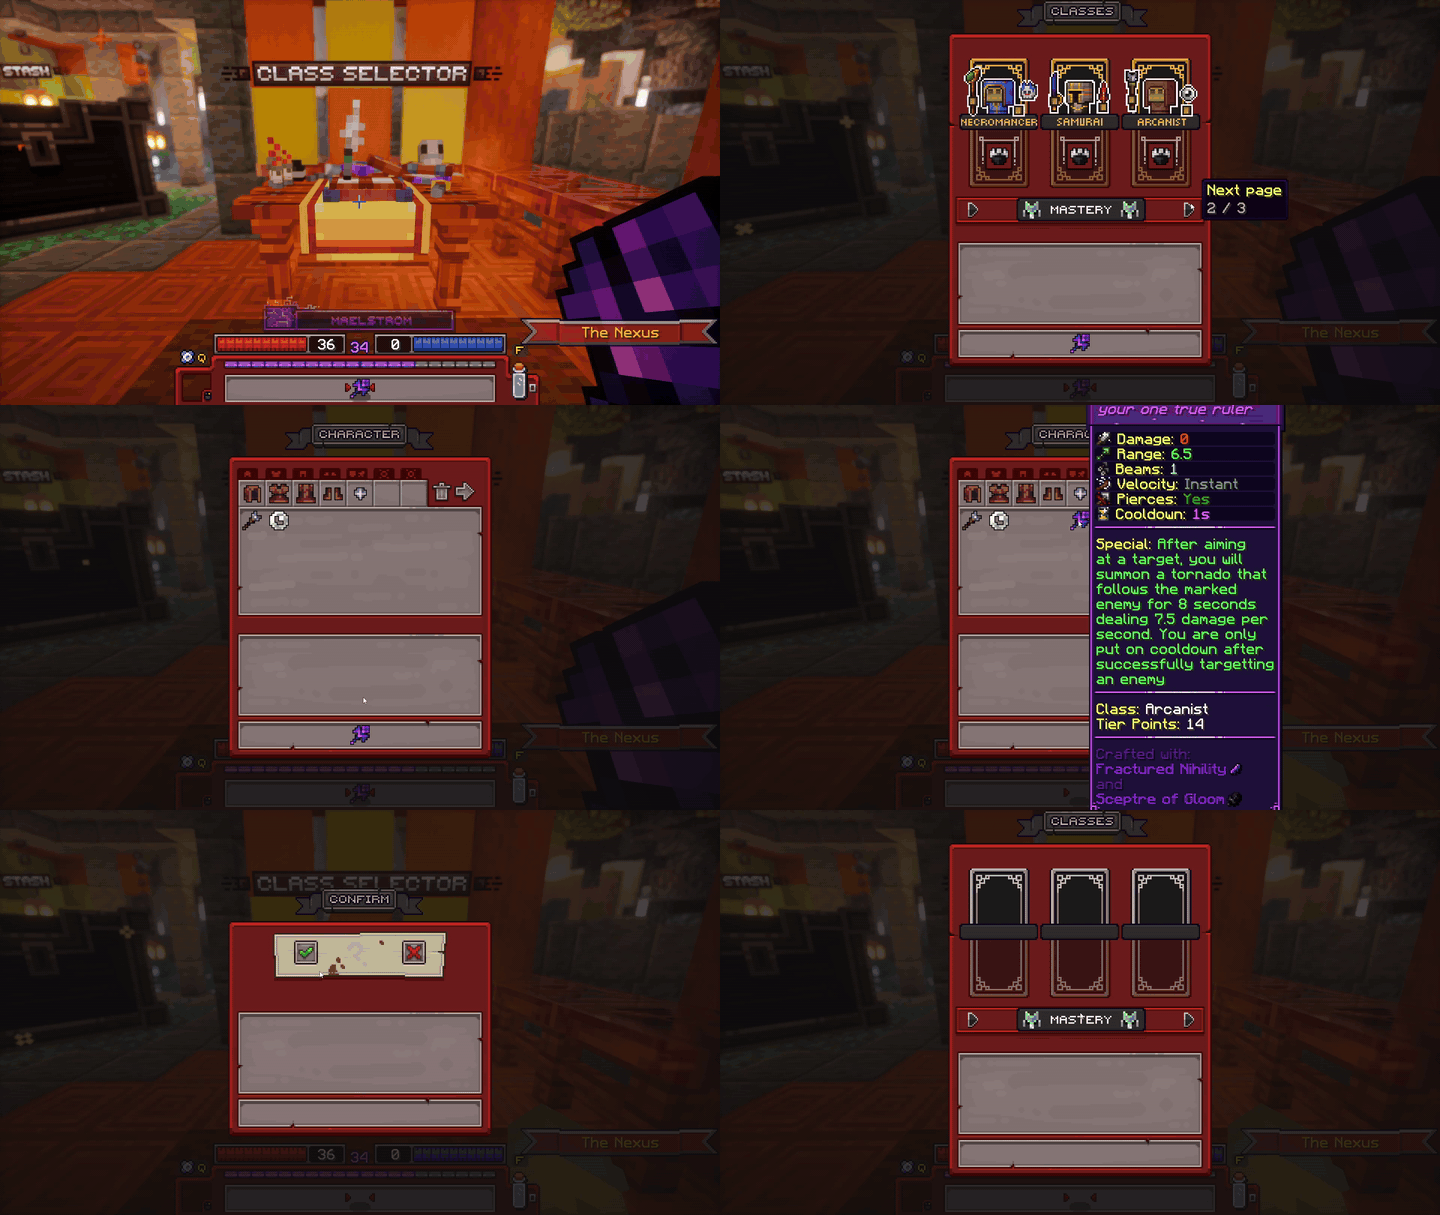
Demonstration of character transfer and deletion
Lets the player choose what drops they can pick up. Do note that this only applies to Tiered gear, as Untiered items will always be picked up. In the Loot Filter GUI, there's an icon for every class, clicking on one will toggle picking up drops for that class. To filter loot even more, click on the +/- buttons. These will either increase or decrease the minimum tier points gear has to be in order to be picked up.
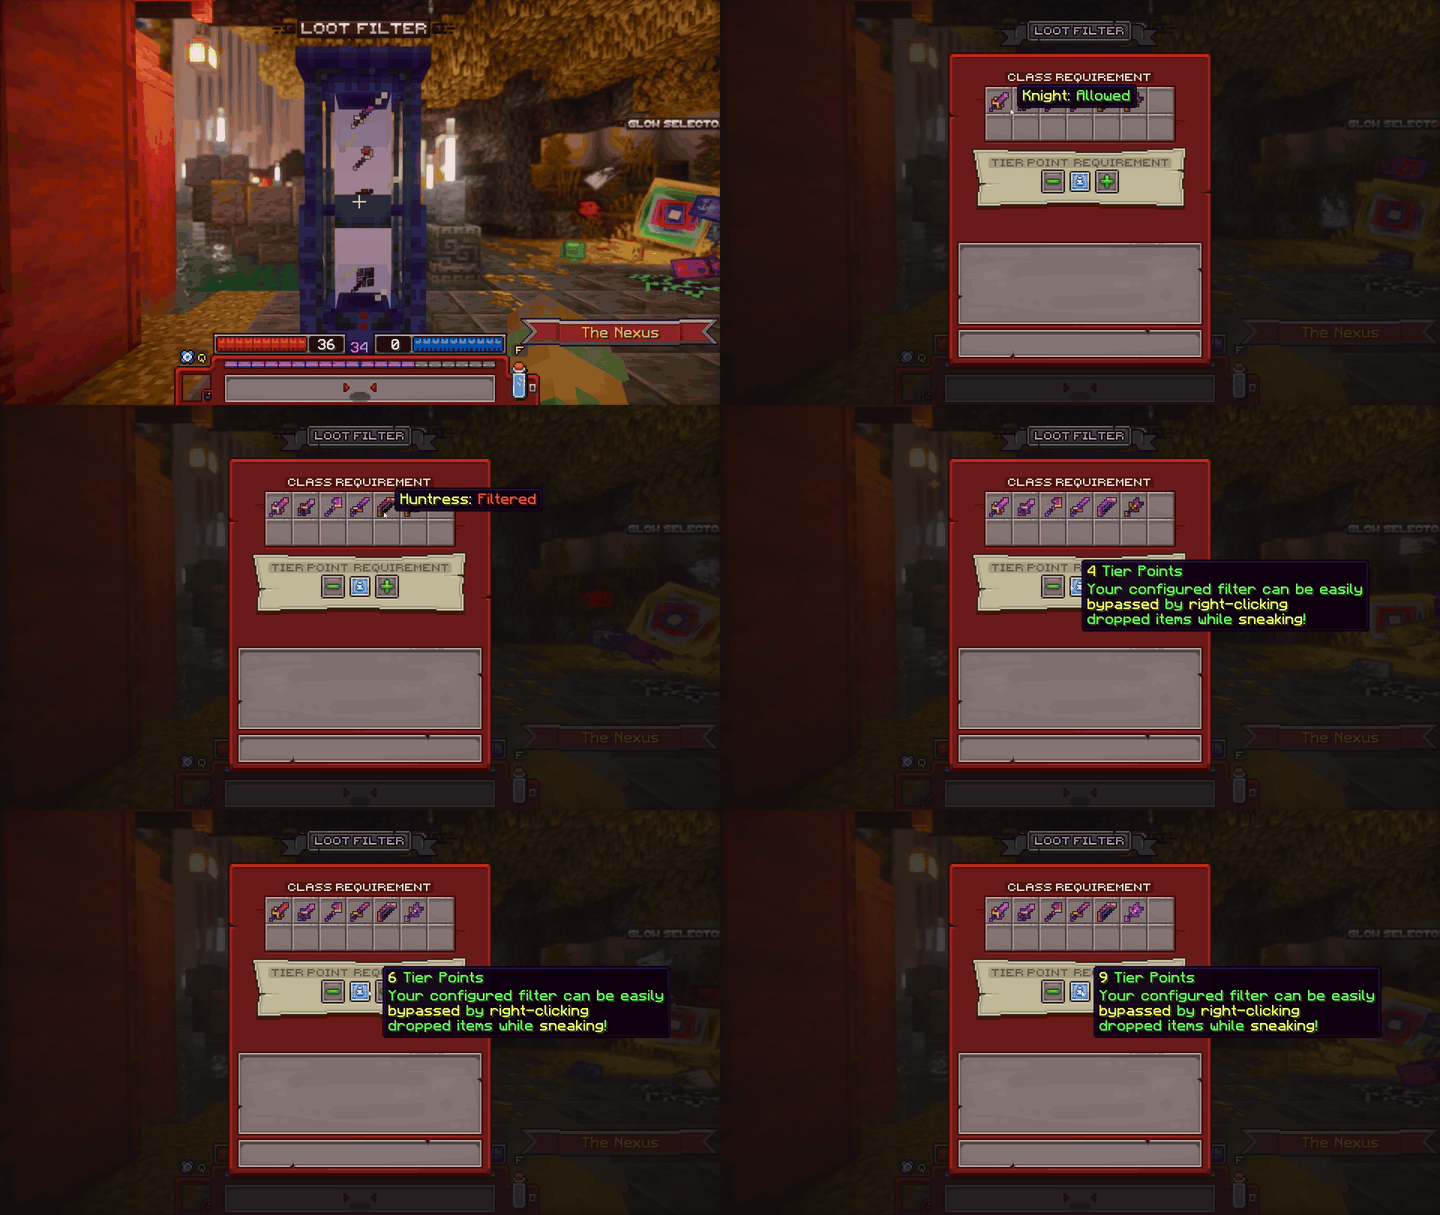
Demonstration of the Loot Filter
This is used to apply glows to a character. Glows are displayed as a coloured outline around the player. Applying a glow can be done by clicking on one of the glow icons. Glows can be earnt from holding leaderboard positions and completing particular achievements, as well as purchasing Supporter.
| Glow | Requirement |
|---|---|
| Lime | Top 5 Default Character. |
| Green | Top 1 Default Character |
| Coral | Top 5 Hardcore Ironman Character |
| Red | Top 1 Hardcore Ironman Character |
| Yellow | Top 5 Seasonal Character |
| Orange | Top 1 Seasonal Character |
| Navy | Top 1 Group Hardcore Ironman Character |
| Blue | Top 3 Group Hardcore Ironman Character |
| Light Blue | Top 3 Guild |
| Cyan | Top 1 Guild |
| Black | All Exotic Mounts Collected |
| White | All Exotic Pets Collected |
| Pink | Max Transcendence on All Classes |
| Purple | Supporter/Supporter+ Subscription |
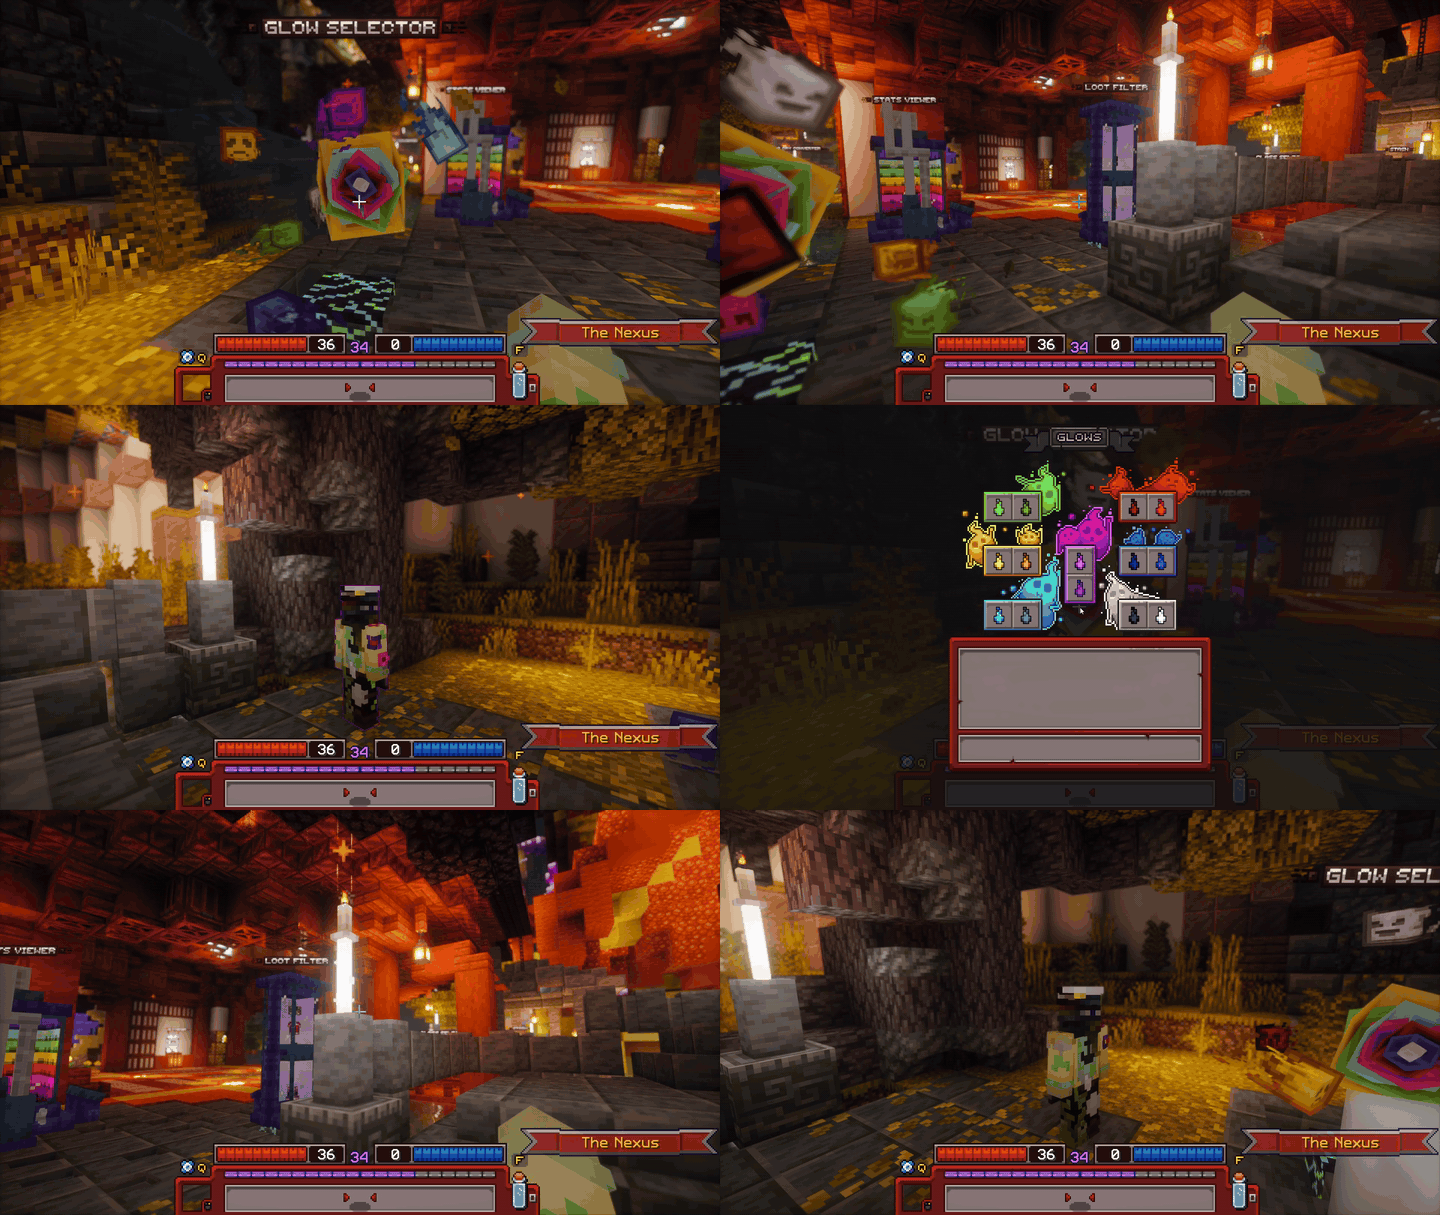
Demonstration of the Glow Selector
Serves as the way to view stat values, where they come from, and their functionality! Stats are gained from transcendence, gear, and guilds. For a detailed breakdown on all of the stats, view the Stats Page.
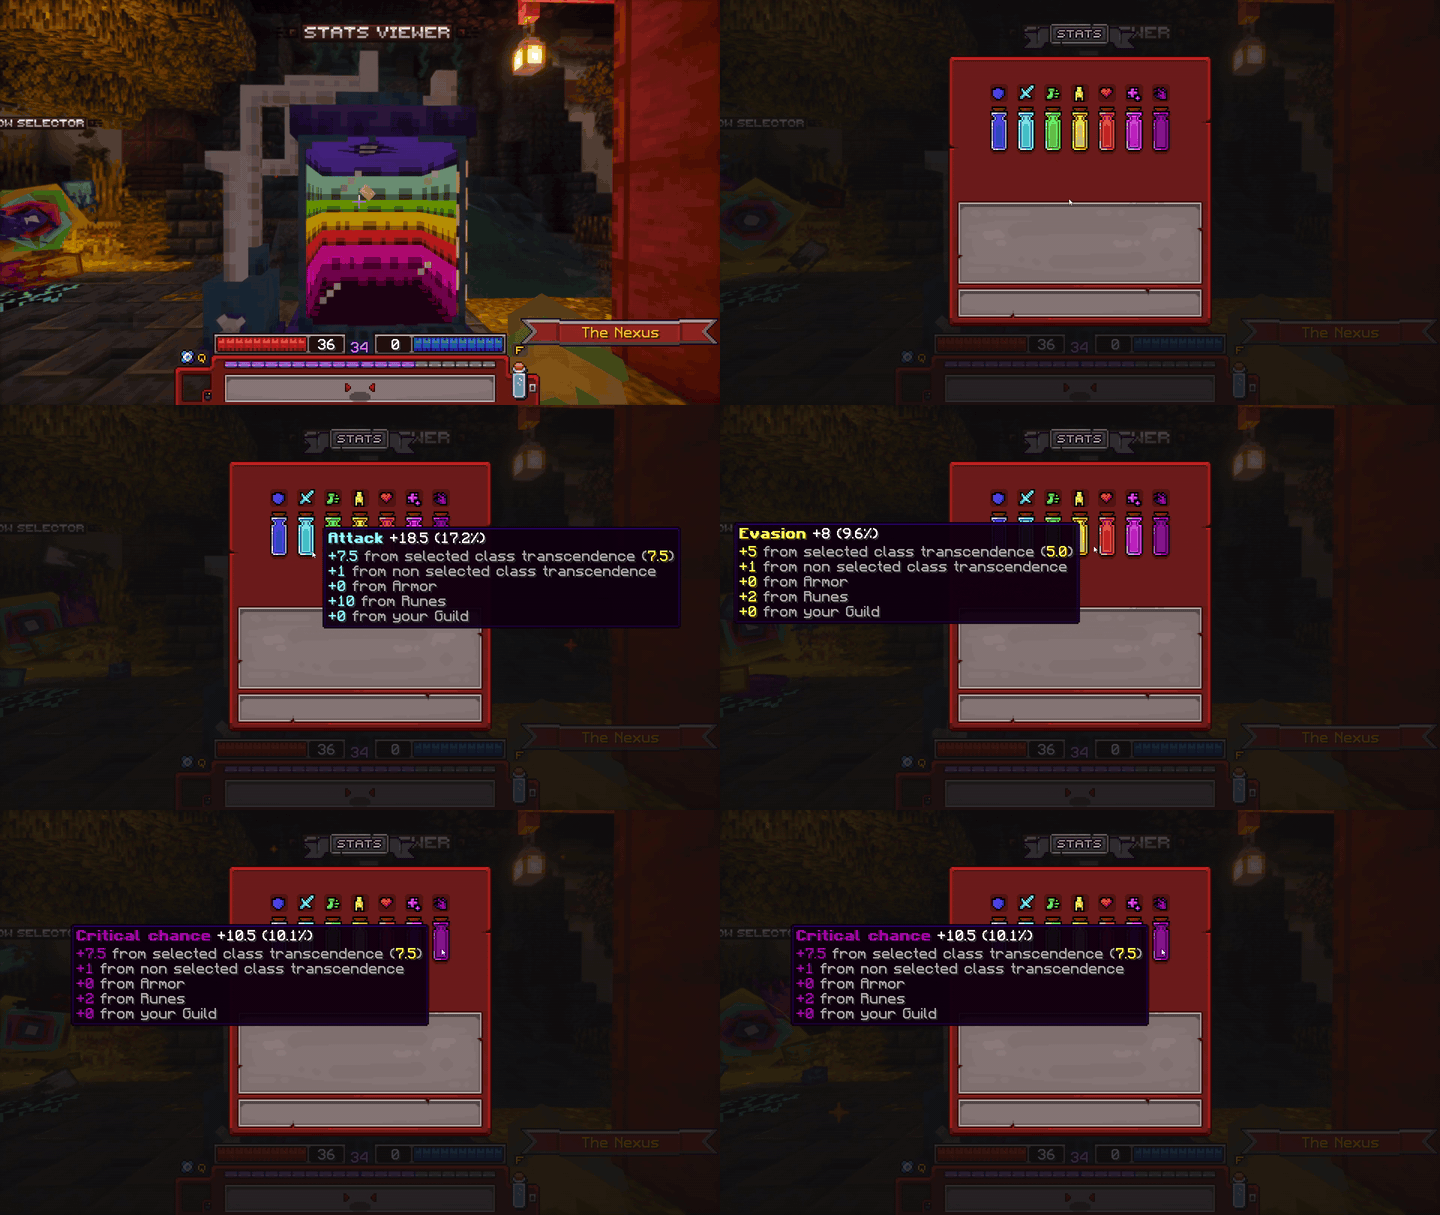
Demonstration of the Stats Viewer
Used to pick what sticker to display from your sticker collection. Stickers are obtained from the Season Pass, Supporter subscription, and the store. Stickers are displayed above the player's head by clicking the smiley button in your inventory's action menu.
| Image | Name | Obtained From |
|---|---|---|
 |
Supporter | Active Supporter Subscription |
 |
Supporter Plus | Active Supporter+ Subscription |
 |
Garen | Store (Currently Unavailable) |
 |
Bobbe | Store (Currently Unavailable) |
 |
Jonkler | Store (Currently Unavailable) |
 |
War Cat | Store (Currently Unavailable) |
 |
hellskitchenwaterphonesoundeffec | Season 1 Pass Tier 23 |
 |
Wilted Rose | Season 1 Pass Tier 34 |
 |
Analysis | Season 2 Pass Tier 23 |
 |
Bleh | Season 2 Pass Tier 40 |
 |
Zamn | Season 3 Pass Tier 28 |
 |
Steamhappy | Season 3 Pass Tier 39 |
 |
Clueless Dog | Season 4 Pass Tier 7 |
 |
Disintegrating Squirrel | Season 4 Pass Tier 13 |
 |
Voided Dog | Season 4 Pass Tier 27 |
 |
Uhhhh Monkey | Season 4 Pass Tier 33 |
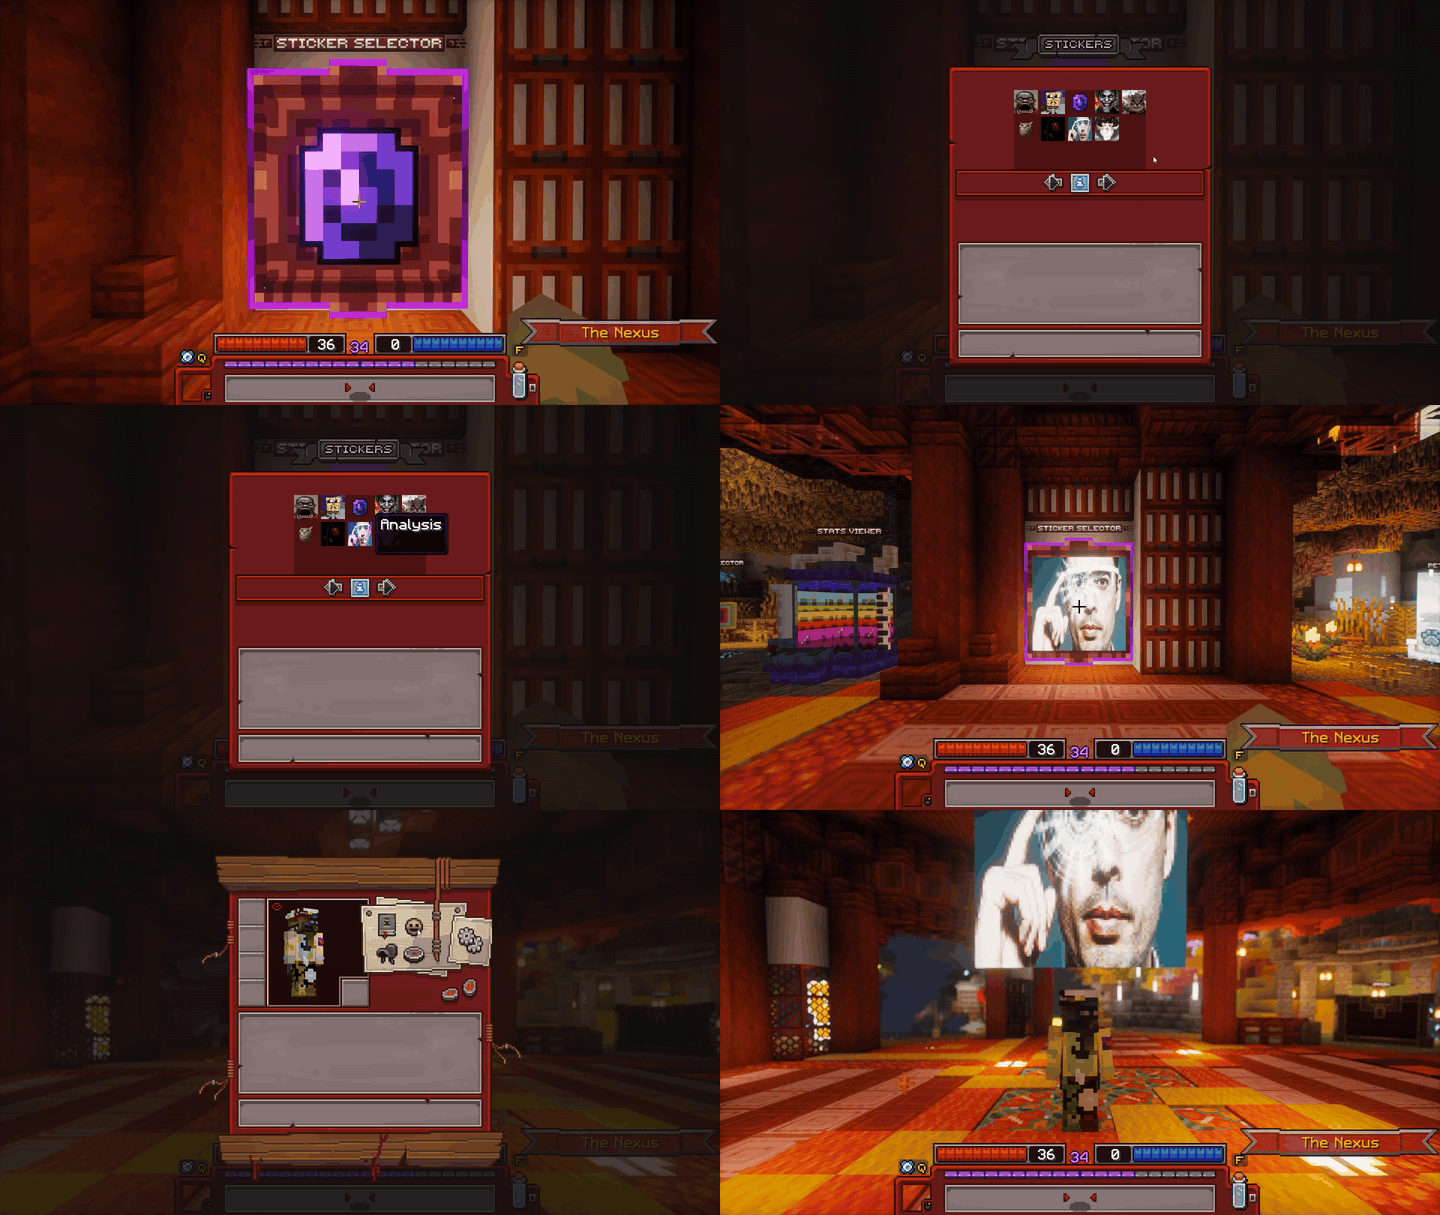
Demonstration of the Sticker Selector
Allows the conversion of seasonal glory into glory at a 1:1 ratio. This is done by inputting the amount of seasonal glory into the textbar, and then by pressing on the confirmation button to finish the process.
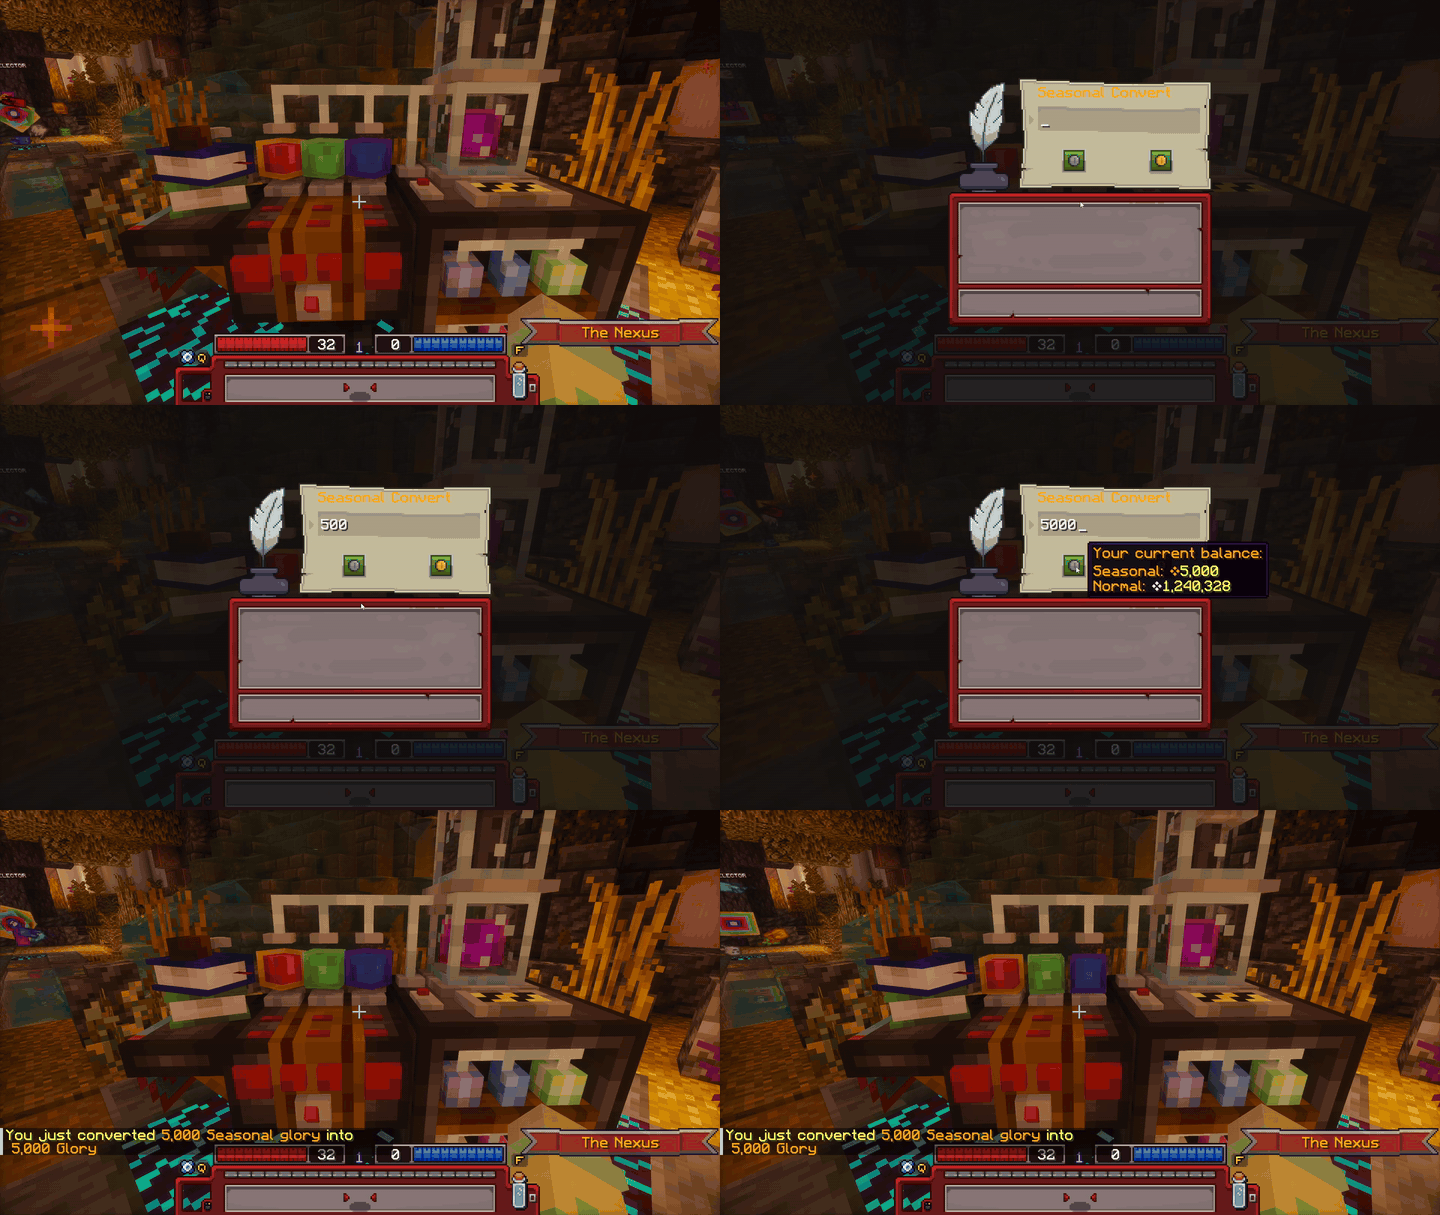
Demonstration of the Seasonal Glory Converter
Your own little companions, how cute! Pets serve as a way to deal extra DPS or heal the player, while mounts are used to traverse the Realm. Selecting companions is done by clicking on the desired one. Companions are obtained from Dungeons at a very low drop rate, with no soft pity. To summon your mount in the realm, click on the saddle in your inventory's actions menu, or in the G-key interface. More information on companions can be found on the Companions Page, and more information on companion bags can be found on the Loot Page.
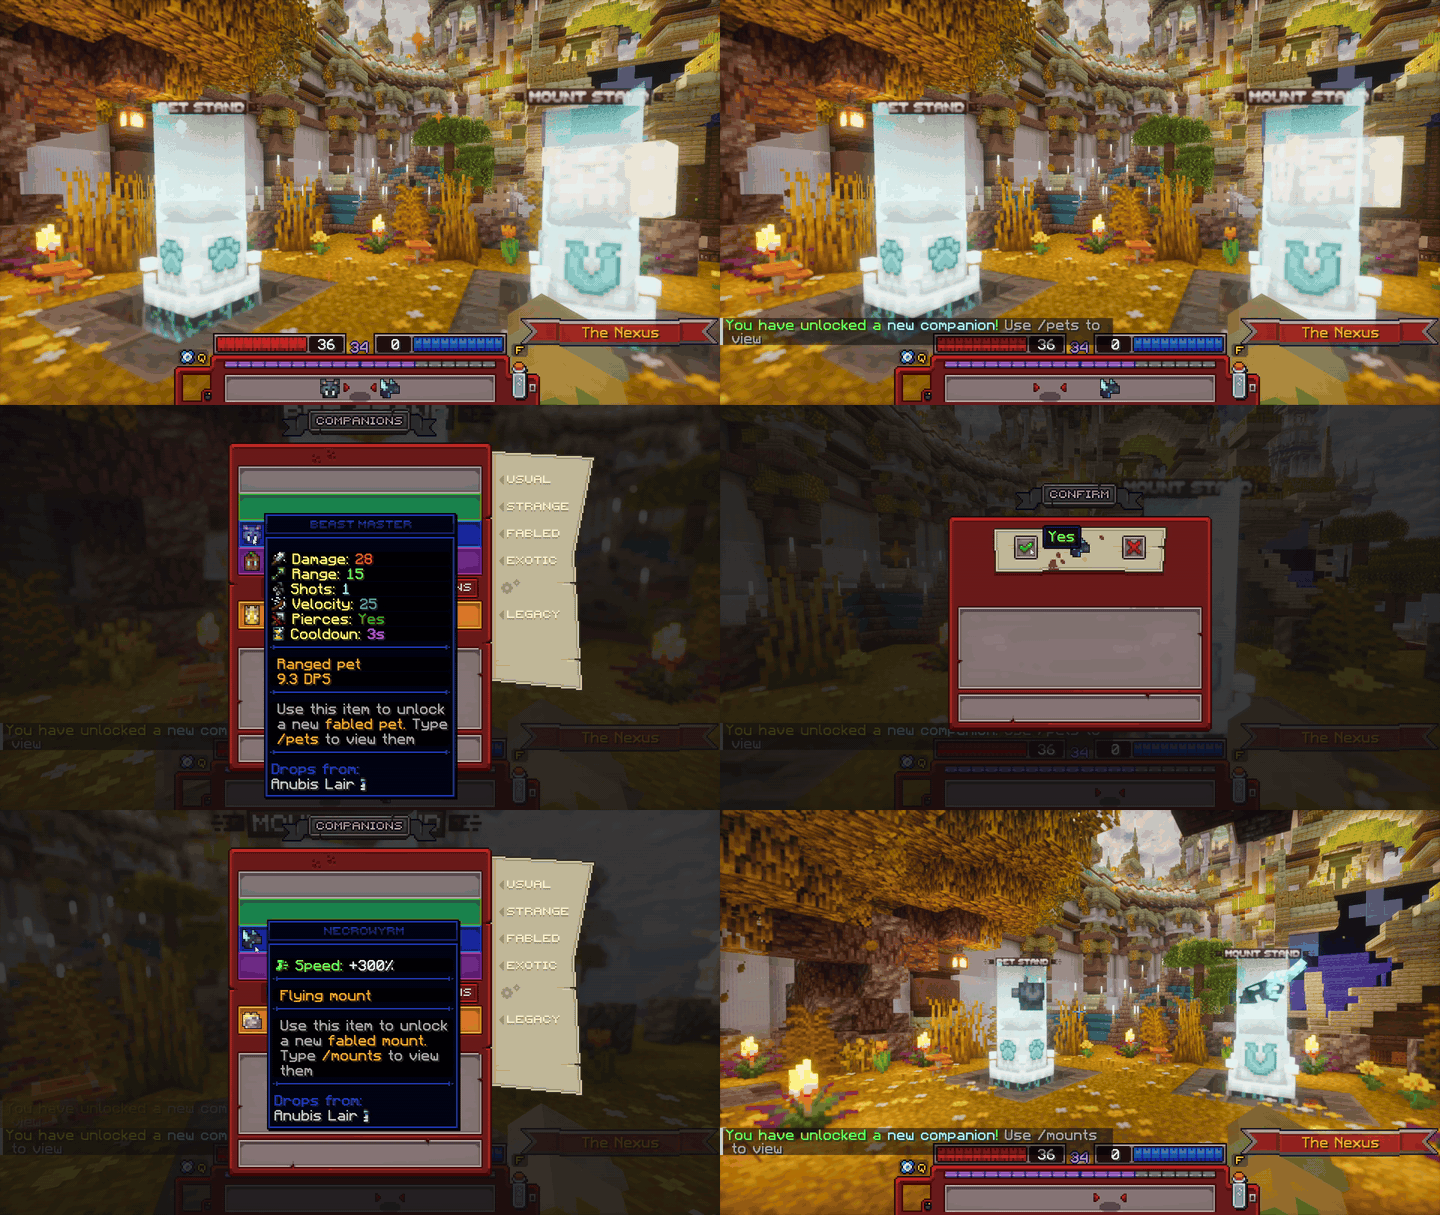
Demonstration of the pet and mount stands
This is the central station for all guild-related features. A guild can be created by paying 10,000 glory. To increase the guild's tier, more glory is required.
To view the member list, click on the player head. In this GUI, you can also invite, kick and promote players. The guild vault is accessed by clicking on the ender chest. It has 45 slots per, and higher ranking members can also convert vaults into seasonal vaults. Additionally, (seasonal) glory can be deposited/withdrawn to the guild. To leave a guild, click on the leave button in the bottom right of the GUI.
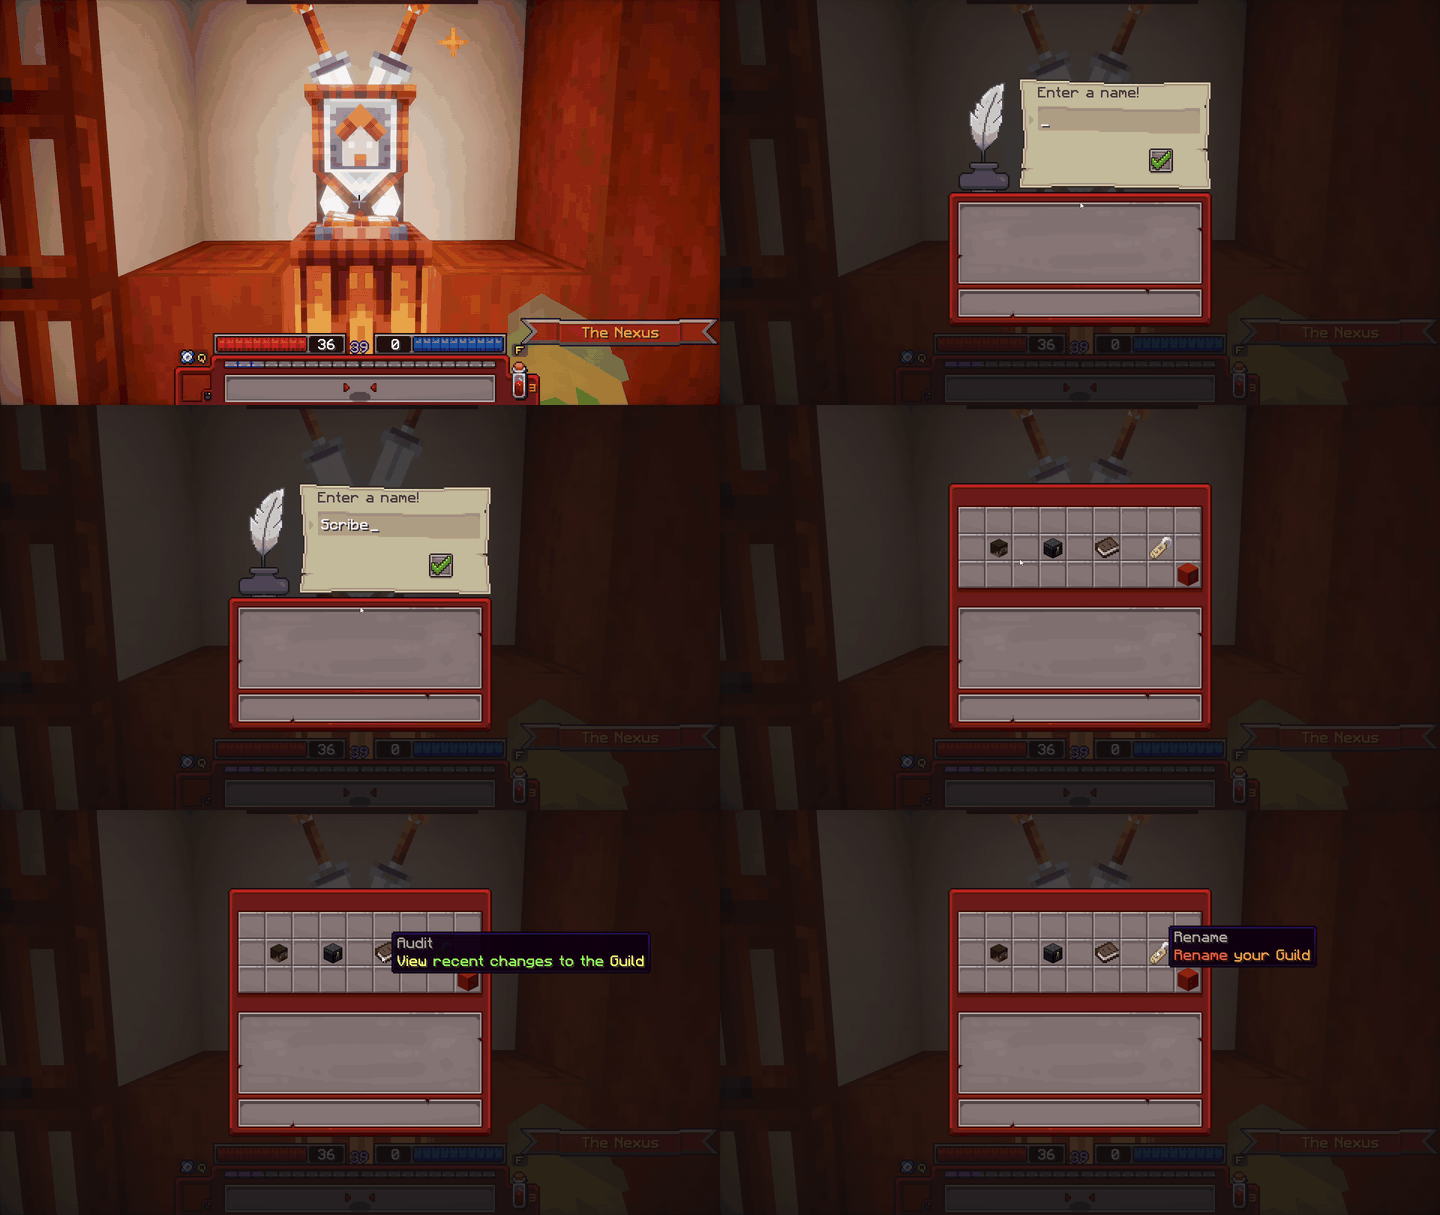
Demonstration of the Guild Viewer
 Graveyard
Various Graves can be found in the Graveyard, these consist of the top 8 most recent global deaths. Grave designs are dependent on rank. More information on this can be found on the Game Mechanics page.
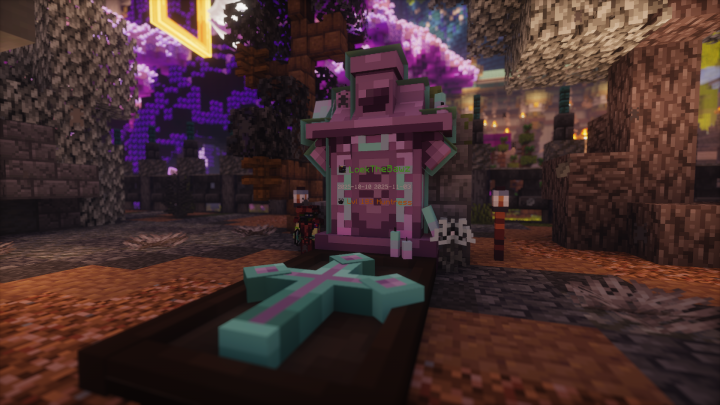
A player being displayed on one of the graves.
 Leaderboards
The physical leaderboard displays the top 5 seasonal characters and their gear. Leaderboard position is calculated with score, which is determined with the formula "log10(sumOf(tierPoints × total item trait level) + 1) × level". Tier points are gained from gear and increase from higher quality items, while fame is obtained by killing enemies. Trait level ranges from 1 to 5 (D->S) per trait. More information on fame can be found on the Economy page, and more information on tier points can be found on the Game Mechanics page.
To view other leaderboards, run the /leaderboards command. You can view your own leaderboard positions at the Oracle Leaderboard!
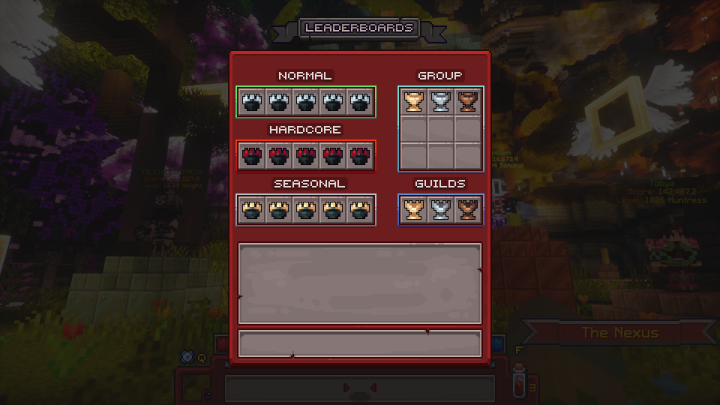
The /leaderboards GUI
 Auction House
The Auction House displays all of the items that players on your ruleset are selling. Glory, the main currency, is generated into the economy from players killing enemies. The glory drop amount is the fame drop amount of the enemy with a random multiplier ranging from -20% to +20%. Scrapjack resides in the corner of the Auction House, buying tiered gear and forge fragments for a fixed glory price.
Information on Auction House details such as buying & selling can be found on the Auction House section of the Economy page.
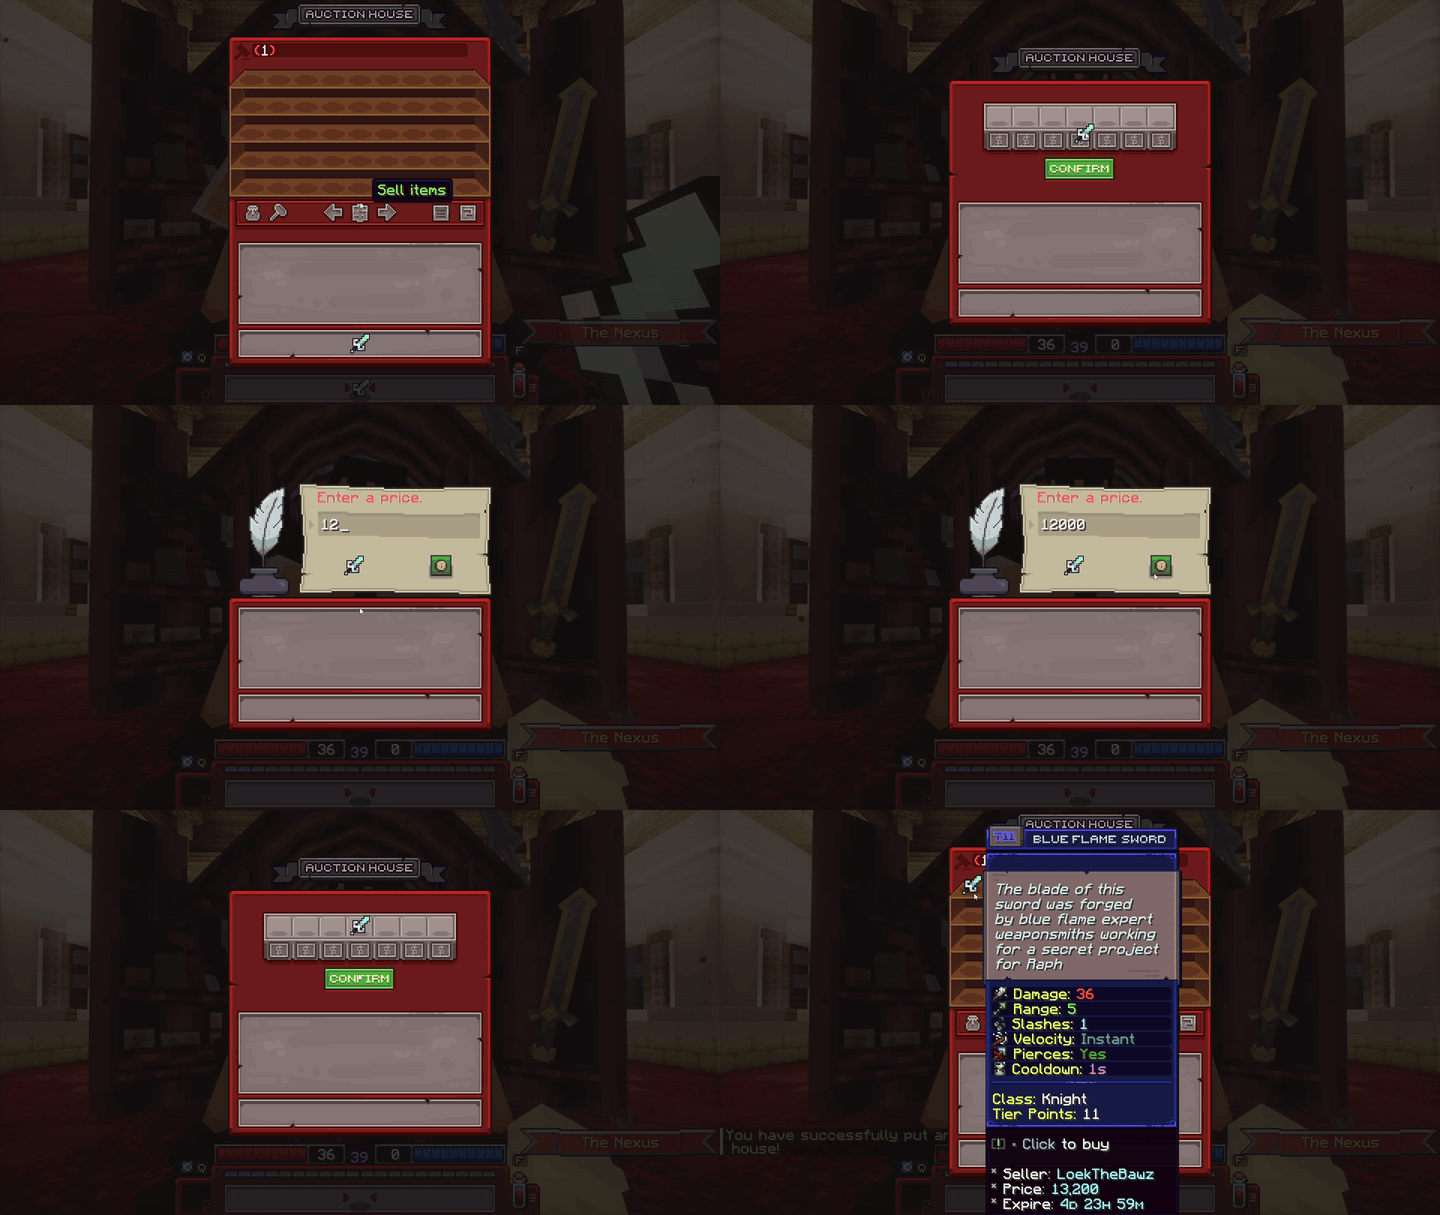
Demonstration of selling an item on the Auction House
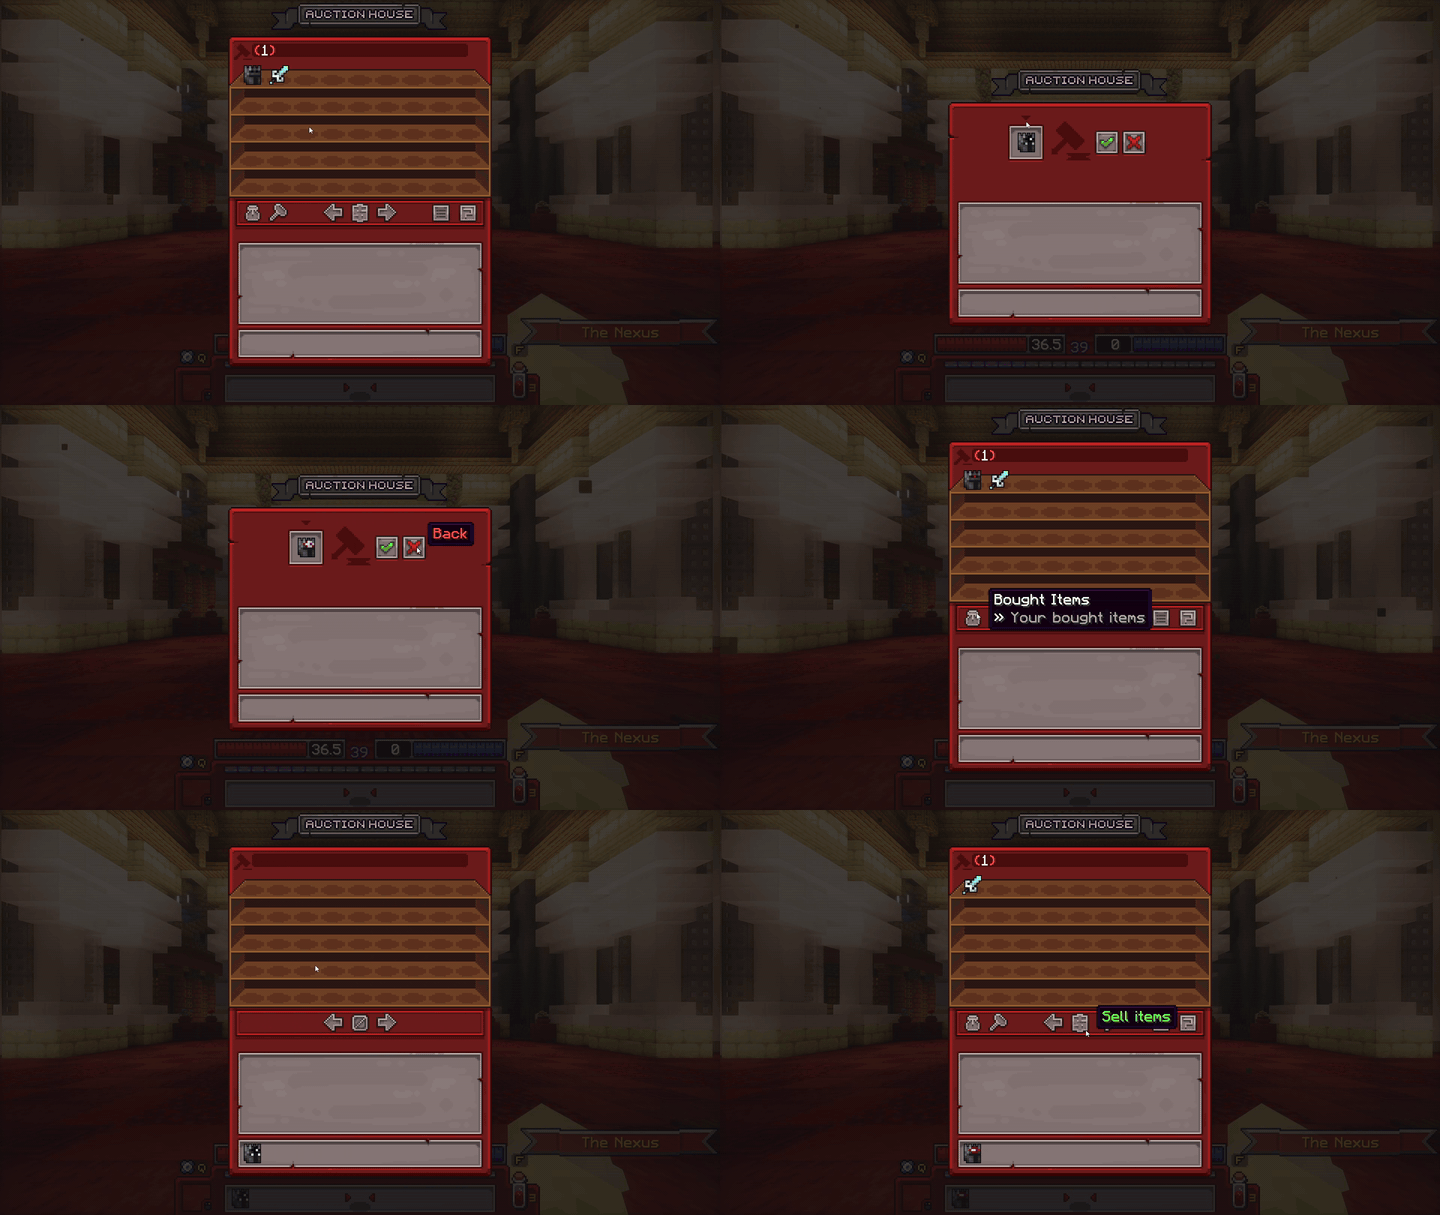
Demonstration of buying an item on the Auction House
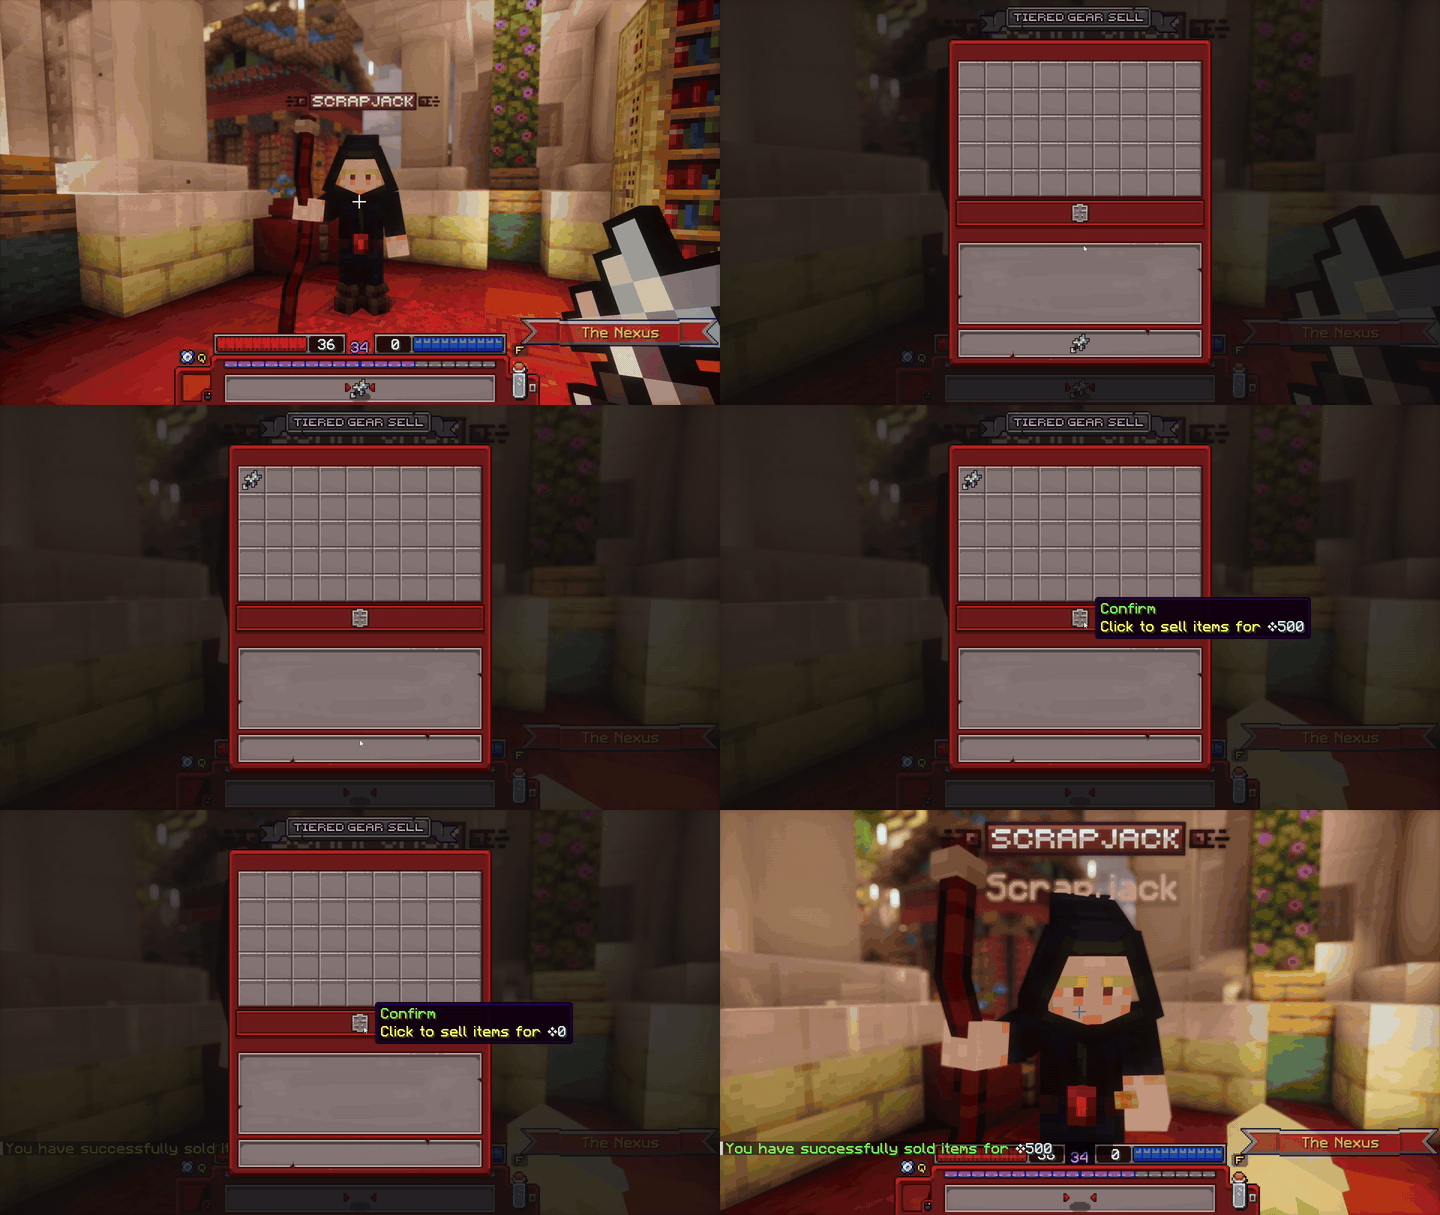
Demonstration of Scrapping tiered gear at Scrapjack
 Quest House
Ragnar is the primary Quest-giving NPC in Telos. He offers weekly quests & daily missions. To claim quest rewards, type /rewards. They will appear in either the character-specific rewards or the account wide rewards section upon completing a quest.
More information on quests and missions can be found in the Quests tab of the Game Mechanics page.
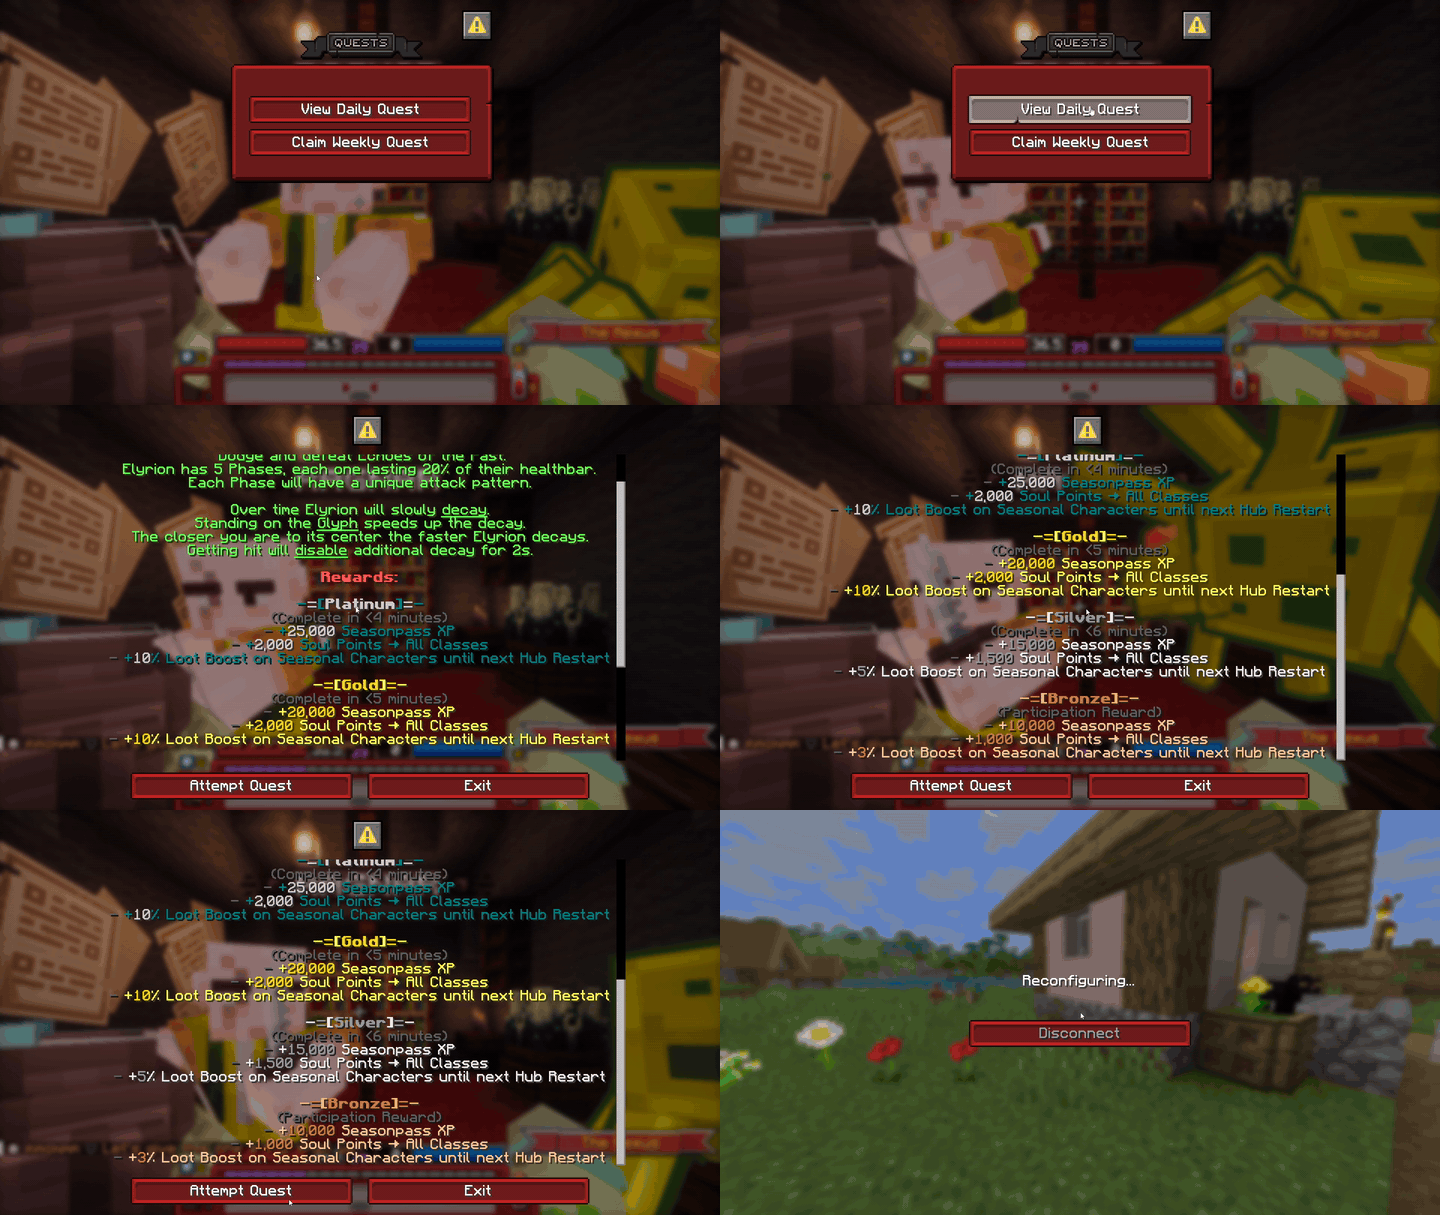
Demonstration of Ragnar's UI