|
|
| (One intermediate revision by one other user not shown) |
| Line 1: |
Line 1: |
| [[File:3DRoseElyrion.png|centre]] | | [[File:Trial-3DRoseElyrion.png|centre]] |
| <div class="hoverbox"> | | <div class="hoverbox"> |
| ==Daily Mission Data== | | ==Daily Trial Data== |
| The Mission of the Day is given to the player by Ragnar in [[The Nexus]]. | | The Mission of the Day is given to the player by Ragnar in [[The Nexus]]. |
|
| |
|
| Line 9: |
Line 9: |
| |+ Trial order | | |+ Trial order |
| |- | | |- |
| ! Day !! Daily Trial | | ! Day !! Trial |
| |- | | |- |
| | Monday || Trial of the Sapphire Flame | | | Monday || Trial of the Sapphire Flame |
| Line 27: |
Line 27: |
| </div> | | </div> |
| {{ButtonHeader | | {{ButtonHeader |
| |type=DailyMission | | |type=DailyTrial |
| |text=Daily Mission Merits | | |text=Daily Trial Merits |
| |img=Icon-SeasonPass | | |img=Icon-SeasonPass |
| |content= | | |content= |
| Line 73: |
Line 73: |
| |type=TrialoftheSwift | | |type=TrialoftheSwift |
| |text=Trial of the Swift | | |text=Trial of the Swift |
| |img=3DTreasureChest | | |img=Trial-3DTreasureChest |
| |content= | | |content= |
| <div class="hoverbox" id="Temple Run"> | | <div class="hoverbox" id="Temple Run"> |
| Line 109: |
Line 109: |
| |type=TrialoftheFlame | | |type=TrialoftheFlame |
| |text=Trial of the Flame | | |text=Trial of the Flame |
| |img=3DSapphireElyrion | | |img=Trial-3DSapphireElyrion |
| |content= | | |content= |
| <div class="hoverbox" id="Echoes of the Past"> | | <div class="hoverbox" id="Echoes of the Past"> |
| Line 121: |
Line 121: |
| <tabber> | | <tabber> |
| Trial of the Sapphire Flame= | | Trial of the Sapphire Flame= |
| [[File:3DSapphireElyrion.png|centre|link=]] | | [[File:Trial-3DSapphireElyrion.png|centre|link=]] |
| <div class="pre-dungeon"> | | <div class="pre-dungeon"> |
| '''(Phase 1)''' {{!}} Light blue projectiles spawn from the centre of the circle and travel outwards at a moderate speed. A blue flame will orbit near the outer edge of the allowed zone, spewing out blue projectiles in all directions. The glyph rotates slightly closer to the centre, in the opposite direction. | | '''(Phase 1)''' {{!}} Light blue projectiles spawn from the centre of the circle and travel outwards at a moderate speed. A blue flame will orbit near the outer edge of the allowed zone, spewing out blue projectiles in all directions. The glyph rotates slightly closer to the centre, in the opposite direction. |
| Line 135: |
Line 135: |
| |-| | | |-| |
| Trial of the Verdant Flame= | | Trial of the Verdant Flame= |
| [[File:3DVerdantElyrion.png|centre|link=]] | | [[File:Trial-3DVerdantElyrion.png|centre|link=]] |
| <div class="pre-dungeon"> | | <div class="pre-dungeon"> |
| '''(Phase 1)''' {{!}} Projectiles of varying directions spawn from two ends of the arena, travelling inwards. The glyph is stationary at the centre of the arena. | | '''(Phase 1)''' {{!}} Projectiles of varying directions spawn from two ends of the arena, travelling inwards. The glyph is stationary at the centre of the arena. |
| Line 149: |
Line 149: |
| |-| | | |-| |
| Trial of the Rose Flame= | | Trial of the Rose Flame= |
| [[File:3DRoseElyrion.png|centre|link=]] | | [[File:Trial-3DRoseElyrion.png|centre|link=]] |
| <div class="pre-dungeon"> | | <div class="pre-dungeon"> |
| '''(Phase 1)''' {{!}} Projectiles spawn from two walls of the arena and travel inwards. An additional smaller zone circle that hits players within it spawns at the centre of the arena, leaving players effectively confined to a “donut” shape. A larger projectile that periodically emits eight fast moving projectiles orbits the centre of the arena, just outside of the outer circle. The glyph orbits the centre of the arena near the edge of the outer circle, in the opposite direction of the larger projectile. | | '''(Phase 1)''' {{!}} Projectiles spawn from two walls of the arena and travel inwards. An additional smaller zone circle that hits players within it spawns at the centre of the arena, leaving players effectively confined to a “donut” shape. A larger projectile that periodically emits eight fast moving projectiles orbits the centre of the arena, just outside of the outer circle. The glyph orbits the centre of the arena near the edge of the outer circle, in the opposite direction of the larger projectile. |
| Line 168: |
Line 168: |
| |type=TrialoftheGuardian | | |type=TrialoftheGuardian |
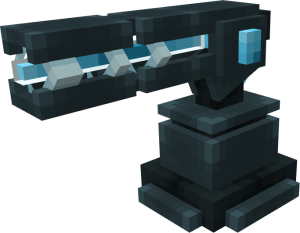
| |text=Trial of the Guardian | | |text=Trial of the Guardian |
| |img=3DRailgunT3 | | |img=Trial-3DRailgunT3 |
| |content= | | |content= |
| <div class="hoverbox" id="Kurvaros' Tower Defense"> | | <div class="hoverbox" id="Kurvaros' Tower Defense"> |
| Line 287: |
Line 287: |
| {{ItemInfobox | | {{ItemInfobox |
| |title=Laser Cannon | | |title=Laser Cannon |
| |images=3DLaserCannonT1.png,T1;3DLaserCannonT2.png,T2;3DLaserCannonT3.png,T3 | | |images=Trial-3DLaserCannonT1.png,T1;Trial-3DLaserCannonT2.png,T2;Trial-3DLaserCannonT3.png,T3 |
| |T1_Desc= Shoots powerful lasers at enemies. | | |T1_Desc= Shoots powerful lasers at enemies. |
| |T2_Desc= Shoots powerful lasers at enemies. | | |T2_Desc= Shoots powerful lasers at enemies. |
| Line 307: |
Line 307: |
| {{ItemInfobox | | {{ItemInfobox |
| |title=Incinerator | | |title=Incinerator |
| |images=3DIncineratorT1.png,T1;3DIncineratorT2.png,T2;3DIncineratorT3.png,T3 | | |images=Trial-3DIncineratorT1.png,T1;Trial-3DIncineratorT2.png,T2;Trial-3DIncineratorT3.png,T3 |
| |T1_Desc= Shoots powerful orbs at the closest enemy. | | |T1_Desc= Shoots powerful orbs at the closest enemy. |
| |T2_Desc= Shoots powerful orbs at the closest enemy. | | |T2_Desc= Shoots powerful orbs at the closest enemy. |
| Line 328: |
Line 328: |
| {{ItemInfobox | | {{ItemInfobox |
| |title=Bombardier | | |title=Bombardier |
| |images=3DBombardierT1.png,T1;3DBombardierT2.png,T2;3DBombardierT3.png,T3 | | |images=Mob-3DBombardierT1.png,T1;Mob-3DBombardierT2.png,T2;Mob-3DBombardierT3.png,T3 |
| |T1_Desc= Fires bombs at the closest enemy. | | |T1_Desc= Fires bombs at the closest enemy. |
| |T2_Desc= Fires bombs at the closest enemy. | | |T2_Desc= Fires bombs at the closest enemy. |
| Line 349: |
Line 349: |
| {{ItemInfobox | | {{ItemInfobox |
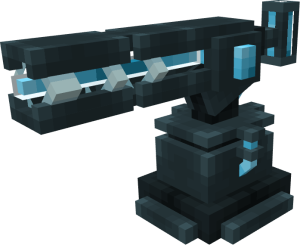
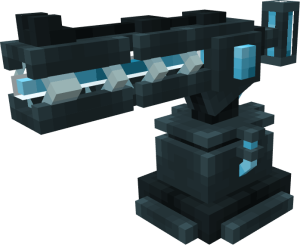
| |title=Railgun | | |title=Railgun |
| |images=3DRailgunT1.png,T1;3DRailgunT2.png,T2;3DRailgunT3.png,T3 | | |images=Trial-3DRailgunT1.png,T1;Trial-3DRailgunT2.png,T2;Trial-3DRailgunT3.png,T3 |
| |T1_Desc= Fires concentrated beams that pierces through enemies. | | |T1_Desc= Fires concentrated beams that pierces through enemies. |
| |T2_Desc= Fires concentrated beams that pierces through enemies. | | |T2_Desc= Fires concentrated beams that pierces through enemies. |
| Line 369: |
Line 369: |
| {{ItemInfobox | | {{ItemInfobox |
| |title=Minigunner | | |title=Minigunner |
| |images=3DMinigunnerT1.png,T1;3DMinigunnerT2.png,T2;3DMinigunnerT3.png,T3 | | |images=Trial-3DMinigunnerT1.png,T1;Trial-3DMinigunnerT2.png,T2;Trial-3DMinigunnerT3.png,T3 |
| |T1_Desc= Firest rapid bursts of projectiles. | | |T1_Desc= Firest rapid bursts of projectiles. |
| |T2_Desc= Firest rapid bursts of projectiles. | | |T2_Desc= Firest rapid bursts of projectiles. |
| Line 390: |
Line 390: |
| {{ItemInfobox | | {{ItemInfobox |
| |title=Alchemist | | |title=Alchemist |
| |images=3DAlchemistT1.png,T1;3DAlchemistT2.png,T2;3DAlchemistT3.png,T3 | | |images=Trial-3DAlchemistT1.png,T1;Trial-3DAlchemistT2.png,T2;Trial-3DAlchemistT3.png,T3 |
| |T1_Desc= Slows enemies and deals minor damage | | |T1_Desc= Slows enemies and deals minor damage |
| |T2_Desc= Slows enemies and deals minor damage | | |T2_Desc= Slows enemies and deals minor damage |
| Line 413: |
Line 413: |
| {{ItemInfobox | | {{ItemInfobox |
| |title= Eddie | | |title= Eddie |
| |images=3DEddie.png,Regular;3DEddie.png,Crystal | | |images=Boss-3DEddie.png,Regular;Boss-3DEddie.png,Crystal |
| |Desc= Silly Pirate from Beach here to ruin your day! | | |Desc= Silly Pirate from Beach here to ruin your day! |
| |Regular_Velocity= 4 | | |Regular_Velocity= 4 |
| Line 423: |
Line 423: |
| {{ItemInfobox | | {{ItemInfobox |
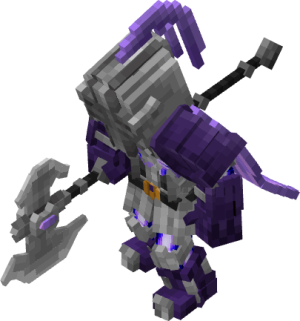
| |title= Ashenclaw | | |title= Ashenclaw |
| |images=3DAshenclaw.png,Regular;3DAshenclaw.png,Crystal | | |images=Boss-3DAshenclaw.png,Regular;Boss-3DAshenclaw.png,Crystal |
| |Desc= Silly Kobold from Crimson Forest here to ruin your day! | | |Desc= Silly Kobold from Crimson Forest here to ruin your day! |
| |Regular_Velocity= 5 | | |Regular_Velocity= 5 |
| Line 433: |
Line 433: |
| {{ItemInfobox | | {{ItemInfobox |
| |title= Astaroth | | |title= Astaroth |
| |images=3DAstaroth.png,Regular;3DAstaroth.png,Crystal | | |images=Boss-3DAstaroth.png,Regular;Boss-3DAstaroth.png,Crystal |
| |Desc= Silly Guy from Crimson Cathedral here to ruin your day! | | |Desc= Silly Guy from Crimson Cathedral here to ruin your day! |
| |Regular_Velocity= 12 | | |Regular_Velocity= 12 |
| Line 443: |
Line 443: |
| {{ItemInfobox | | {{ItemInfobox |
| |title= Nebula | | |title= Nebula |
| |images=3DNebula.png,Regular;3DNebula.png,Crystal | | |images=Boss-3DNebula.png,Regular;Boss-3DNebula.png,Crystal |
| |Desc= Silly Archmage from Rustborn Kingdom here to ruin your day! | | |Desc= Silly Archmage from Rustborn Kingdom here to ruin your day! |
| |Regular_Velocity= 4 | | |Regular_Velocity= 4 |
| Line 453: |
Line 453: |
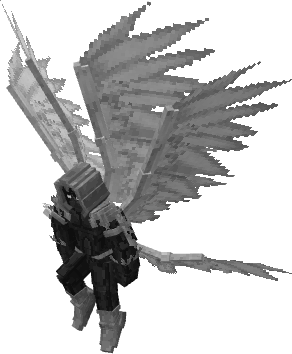
| {{ItemInfobox | | {{ItemInfobox |
| |title= Seraphim | | |title= Seraphim |
| |images=3DSeraphim.png,Regular;3DSeraphim.png,Crystal | | |images=Boss-3DSeraphim.png,Regular;Boss-3DSeraphim.png,Crystal |
| |Desc= Silly Celestial from ??? here to ruin your day! | | |Desc= Silly Celestial from ??? here to ruin your day! |
| |Regular_Velocity= 3 | | |Regular_Velocity= 3 |