|
|
| (22 intermediate revisions by 9 users not shown) |
| Line 1: |
Line 1: |
| {{Dungeon Boss | | __NOTOC__ |
| | title = Ashenclaw | | <div class="dungeon-page"> |
| | | {{NPCInfobox |
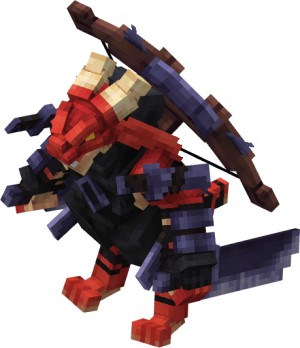
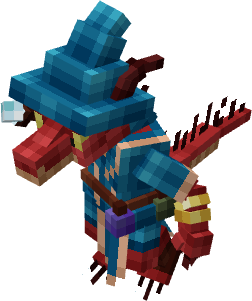
| Kobold Assassin | | | title = Ashenclaw;Kobold Assasin |
| | image = [[File:Ashenclaw.png|968px]] | | | image = Boss-3DAshenclaw.png;Bossbar-Ashenclaw |
| | Health = 850 | | | Health = 1100 |
| | Treasure = Yes | | | Fame = 200 |
| | | | Glory = 200 |
| <!--TIERED SECTION START-->
| | | Tiered = 6-7 |
| | | | Companion = Pets;Blade;Pet-2DBlade.png;1, |
| | Tiered = [[Loot | T6 Equipment]][[File:T6HeavyChestplate.png|30px]]<br> | | Mounts;Fireclaw;Mount-2DFireclaw.png;1 |
| | | | Gilded = Weapons;Emberheart Staff;Ut-EmberheartStaff.png;10, |
| [[Loot | T7 Equipment]][[File:T7HeavyChestplate.png|30px]]
| | Abilities;Venomfang Serum;Ut-VenomfangSerum.png;10, |
| | | Armours;Lizardskin Spellcoat;Ut-LizardskinSpellcoat.png;10 |
| <!--TIERED SECTION END-->
| | | Frag = Royal;5,Gilded;150 |
| <!--COMPANION SECTION START-->
| | | Required = 30 |
| | CChance = 1/150
| | | Solo = 30 |
| | Companion = [[Pets | Blade]][[File:Blade.png|30px]]<br> | |
| | |
| [[Mounts | Fireclaw]][[File:Fireclaw.png|30px]]
| |
| | |
| <!--COMPANION SECTION END-->
| |
| <!--ROYAL SECTION START-->
| |
| | |
| | RChance = 1/40
| |
| | Royal = [[Weapons | Emberheart Staff]][[File:EmberheartStaff.png|30px]]<br> | |
| | |
| [[Abilities | ]][[File:.png|30px]]
| |
| | |
| [[Armours | ]][[File:.png|30px]]
| |
| | |
| <!--ROYAL SECTION END-->
| |
| | |
| | TP = 30 TP | |
| | SoloTP = 30 TP | |
| | |
| <!--FRAGMENT & TIER POINT SECTION END-->
| |
| | |
| }} | | }} |
|
| |
|
| <!-------------------------------------Short Dungeon Description Below-----------------------------------> | | <div class="hoverbox"> |
| | The '''Kobold's Den''' is a 30 [[Game Mechanics#Tier Points|Tier Point]] [[Dungeons|dungeon]] — Ashenclaw's loyal minions protect the path to her domain, although Ashenclaw's mastery of the shadows proves to be more than enough, ruled by '''Ashenclaw, the Kobold Assasin'''. |
|
| |
|
| Ashenclaw's loyal minions protect the path to her domain, although Ashenclaw's mastery of the shadows proves to be more than enough.
| | This dungeon is dropped by [[Kobold Halberdier]], [[Kobold Wizard]] and [[Kobold Archer]] in the [[Crimson Forest]]. |
| | </div> |
|
| |
|
| ==Ashenclaw, Kobold Assassin==
| | <div class="hoverbox"> |
| <div style="width: 100%;"> | | <div class="dungeon-clear"> |
| <div style="float: left;"> | | == Dungeon Clear == |
| | * Go through the dungeon while clearing the rooms until you find the entrance to the boss arena, which is a hole in the ground. |
| | * This dungeon has a chance to spawn a highlighted chest, which gives you the chance to drop all the same items that the boss drops. |
| | </div> |
| </div> | | </div> |
| <div style="float: left; margin-left: 2%; width: 40%;">
| |
|
| |
|
| ==Boss Patterns== <!------------------Make sure to indent a space for each pattern------------> | | <div class="hoverbox"> |
| | <div class="pre-dungeon"> |
| | == Boss Behaviour == |
| | <!------------------Make sure to indent a space for each pattern------------> |
| | '''(Attack 1)''' | Ashenclaw drives both of her daggers into the ground, summoning bear traps across the arena that deal damage to the player if caught in them. |
|
| |
|
| Ashenclaw summons bear traps around the area.
| | '''(Attack 2)''' | Ashenclaw leaps behind the player, striking down upon landing and dealing AoE damage in a small radius. |
|
| |
|
| Ashenclaw jumps behind the player and deals AoE damage in a small area.
| | '''(Attack 3)''' | Ashenclaw performs a spinning slash, sending out five sharp projectiles in all directions that deal damage on contact. |
|
| |
|
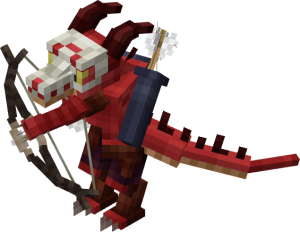
| | '''(Attack 4)''' | Ashenclaw draws her crossbow and fires a bolt directly at the player. |
|
| |
|
| Ashenclaw does a spin slash, slashing the air and creating projectiles in all directions.
| | '''(Attack 5)''' | Ashenclaw tosses a small bouncing bomb that detonates after a short delay, dealing AoE damage in its blast radius. |
|
| |
|
| Ashenclaw fires a crossbow bolt at the player.
| | '''(Attack 6)''' | Ashenclaw engages the player in close combat, executing a swift dagger combo and delivering heavy knockback with the final strike. |
|
| |
|
| Ashenclaw lobs a bouncing bomb that explodes after a few seconds.
| | '''100% to 33% (Phase 1)''' | Ashenclaw cycles through her main attacks listed above in order to damage the player. |
| | |
| Ashenclaw deals melee damage upon close contact.
| |
| | |
| ===Boss Phases===
| |
| | |
| 66% | Invincibility Phase
| |
| | |
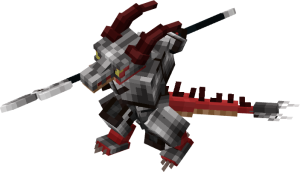
| 33% | Ashenclaw puts on her hood and becomes exalted, gaining a chance to dodge attacks and becoming faster.
| |
|
| |
|
| | '''33% to 0% (Phase 2)''' | Ashenclaw puts on her hood, exalting herself. Her movements quicken, and she gains the ability to occasionally dodge incoming attacks. She continues cycling through her main attacks listed above in order to damage the player. |
| </div> | | </div> |
| </div> | | </div> |
|
| |
|
| <div style="float: left; width: 100%;"> | | <div class="hoverbox"> |
| ==Dungeon Enemies== | | == Dungeon Enemies == |
| | | <div class="dungeon-enemies"> |
| <div style="float: left;"> | | {{NPCInfobox |
| {{Dungeon Enemy | | | title = Kobold Soldier |
| | | image = Mob-3DKoboldSoldier.png |
| | | Health = 149 |
| | | Fame = 40 |
| | | Glory = 40 |
| | | Attack = Rushes toward the player, executing a three-hit melee combo. |
| | }} |
| | {{NPCInfobox |
| | | title = Kobold Halberdier |
| | | image = Mob-3DKoboldHalberdier.png |
| | | Health = 88 |
| | | Fame = 20 |
| | | Glory = 20 |
| | | Attack = Impales the player or performs a double-spin attack, dealing damage within its radius. |
| | }} |
| | {{NPCInfobox |
| | | title = Kobold Archer |
| | | image = Mob-3DKoboldArcher.png |
| | | Health = 77 |
| | | Fame = 20 |
| | | Glory = 20 |
| | | Attack = Fires three arrows simultaneously toward the player. |
| | }} |
| | {{NPCInfobox |
| | title = Kobold Wizard | | | title = Kobold Wizard |
| | image = KoboldWizard.png | | | image = Mob-3DKoboldWizard.png |
| | Attack = | | | Health = 72 |
| | Health = | | | Fame = 20 |
| | | Glory = 20 |
| | | Attack = Shoots a single flame projectile or two waves of magic projectiles, and retreats if the player gets too close. |
| }} | | }} |
| </div> | | </div> |
| <div style="float: left;"> | | </div> |
| {{Dungeon Enemy | | |
| | title = Kobold Halbierder | | <div class="hoverbox"> |
| | image = KoboldHalbierder.png | | <div class="lore"> |
| | Attack = | | == Lore == |
| | Health = | | <!------------------Do not touch unless authorized by lorers------------> |
| | {{DLog||Ashenclaw|???}} |
| | |
| | <!--Boss Dialogue Drop Down--> |
| | {{ButtonHeader |
| | |type=Dialogue |
| | |text=Boss & Dungeon Dialogue |
| | |img= |
| | |content= |
| | <tabber> |
| | English Dialogue= |
| | {| class="wikitable" |
| | |+ Clear |
| | |- |
| | ! Trigger !! Dialogue |
| | |- |
| | | Approaching a Chest || [Kobold Chest] "Let's see what you will find inside!" |
| | |} |
| | {| class="wikitable" |
| | |+ Bossfight |
| | |- |
| | ! Trigger !! Dialogue |
| | |- |
| | | Arrival || [Ashenclaw] "The land of the kobolds shall remain free!" |
| | |- |
| | | 66% Boss HP || [Ashenclaw] "You monsters hunt us kobolds for our skin and claws; justice will serve you all!" |
| | |- |
| | | Phase 1 End || [Ashenclaw] "ENOUGH!" |
| | |} |
| | </tabber> |
| }} | | }} |
| </div> | | </div> |
| <div style="float: left;">
| |
| {{Dungeon Enemy
| |
| | title = Kobold Soldier
| |
| | image = KoboldSoldier.png
| |
| | Attack =
| |
| | Health =
| |
| }}
| |
| </div> | | </div> |
|
| |
|
| | </div> |
|
| |
|
| <div style="float: left; width: 100%;">
| | {{Dungeon Navbox}} |
| | |
| {{Navbox | |
| | name = Dungeon Navbox
| |
| | title = Dungeons
| |
| | listclass = hlist
| |
| | state = {{{state|collapsed}}}
| |
| | |
| | group1 = 6 Tier Points
| |
| | list1 = [[Pirate Cove]]
| |
| | |
| | group2 = 12 Tier Points
| |
| | list2 = [[Thornwood Wargrove]] • [[Goblin Lair]]
| |
| | |
| | group3 = 18 Tier Points
| |
| | list3 = [[Sakura Shrine]] • [[Secluded Woodland]] • [[Desert Temple]]
| |
| | |
| | group4 = 24 Tier Points
| |
| | list4 = [[Abyss Of Demons]] • [[Dwarven Frostkeep]] • [[Undead Lair]] • [[Treasure Cave]] • [[Ice Cave]]
| |
| | |
| | group5 = 30 Tier Points
| |
| | list5 = [[Depths Of Purgatory]] • [[Peaks Of Purgatory]] • [[Kobold's Den]] • [[Corvus Crypt]]
| |
| | |
| | group6 = 40 Tier Points
| |
| | list6 = [[Omnipotent's Citadel]] • [[Corsair's Conductorium]] • [[Fungal Cavern]] • [[Onyx's Castle]]
| |
| | |
| | group7 = 45 Tier Points
| |
| | list7 = [[Freddy's Pizzeria]] • [[Anubis Lair]] • [[Chronos]]
| |
| | |
| | group8 = 52 Tier Points
| |
| | list8 = [[Cultist's Hideout]] • [[Void]] • [[Illarius' Hideout]]
| |
| | |
| | group9 = 60 Tier Points
| |
| | list9 = [[Shattered Kingdom: Part 1]] • [[Onyx's Chamber]] • [[Shattered Kingdom: Part 2]]
| |
| | |
| | group10 = 60 Tier Points
| |
| | list10 = [[Celestial's Province]] • [[Shattered Kingdom: Part 3]]
| |
| | |
| | below = [[Main Page | Home]]
| |
| }} | |