|
|
| (2 intermediate revisions by 2 users not shown) |
| Line 1: |
Line 1: |
| | __NOTOC__ |
| | <div class="dungeon-page"> |
| {{NPCInfobox | | {{NPCInfobox |
| | title = Prismara;Crystal Worm Mother | | | title = Prismara;Crystal Worm Mother |
| | image = 3DPrismara.png;PrismaraBossBar | | | image = Boss-3DPrismara.png;Bossbar-Prismara |
| | Health = 2530 | | | Health = 2530 |
| | Fame = 400 | | | Fame = 400 |
| | Glory = 400 | | | Glory = 400 |
| | Tiered = 7-8 | | | Tiered = 7-8 |
| | Companion = Pets;Minobi;2DMinobi.png;0.4, | | | Companion = Pets;Minobi;Pet-2DMinobi.png;0.4, |
| Mounts;Mycohawk;2DMycohawk.png;0.4 | | Mounts;Mycohawk;Mount-2DMycohawk.png;0.4 |
| | Bloodshot = Weapons;Amethyst Wormpiercer;Ut-AmethystWormpiercer.png;0.4 | | | Bloodshot = Weapons;Amethyst Wormpiercer;Ut-AmethystWormpiercer.png;0.4 |
| | Royal = Abilities;Crystal Shield;Ut-CrystalShield.png;2, | | | Royal = Abilities;Crystal Shield;Ut-CrystalShield.png;2, |
| Line 13: |
Line 15: |
| Armours;Crystal Boots;Ut-CrystalBoots.png;2 | | Armours;Crystal Boots;Ut-CrystalBoots.png;2 |
| | Frag = Royal;50 | | | Frag = Royal;50 |
| | Required = 40 | | | Required = 42 |
| | Solo = 54 | | | Solo = 48 |
| }} | | }} |
|
| |
|
| <div class="hoverbox"> | | <div class="hoverbox"> |
| == Dungeon Data ==
| | The '''Fungal Cavern''' is a 42 [[Game Mechanics#Tier Points|Tier Point]] [[Dungeons|dungeon]] — a deep roaring cavern where Prismara activates her crystals that prevent intruders from entering her domain, ruled by '''Prismara, the Crystal Worm Mother'''. |
| A deep roaring sound fills the cavern as Prismara activates her crystals that prevent intruders from entering her domain.
| |
|
| |
|
| This dungeon is dropped by [[Glumi]] in the [[Swamp]]. | | This dungeon is dropped by [[Glumi]] in the [[Swamp]]. |
| Line 53: |
Line 54: |
| {{NPCInfobox | | {{NPCInfobox |
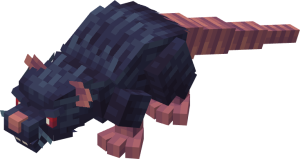
| | title = Fungal Rat | | | title = Fungal Rat |
| | image = 3DFungalRat.png | | | image = Mob-3DFungalRat.png |
| | Health = 110 | | | Health = 110 |
| | Fame = 30 | | | Fame = 30 |
| Line 61: |
Line 62: |
| {{NPCInfobox | | {{NPCInfobox |
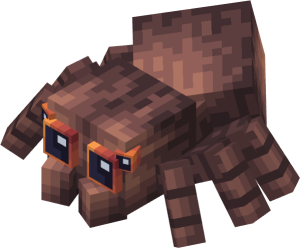
| | title = Fungal Spider | | | title = Fungal Spider |
| | image = 3DFungalSpider.png | | | image = Mob-3DFungalSpider.png |
| | Health = 110 | | | Health = 110 |
| | Fame = 30 | | | Fame = 30 |
| Line 69: |
Line 70: |
| {{NPCInfobox | | {{NPCInfobox |
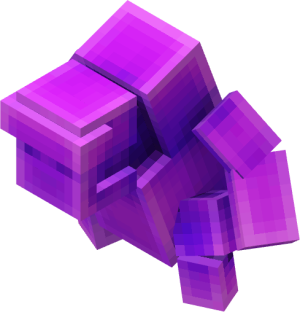
| | title = Amethyst Shardling | | | title = Amethyst Shardling |
| | image = 3DAmethystShardling.png | | | image = Mob-3DAmethystShardling.png |
| | Health = 94 | | | Health = 94 |
| | Fame = 30 | | | Fame = 30 |
| Line 77: |
Line 78: |
| {{NPCInfobox | | {{NPCInfobox |
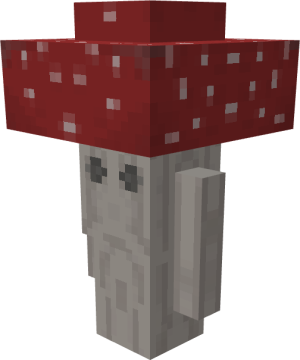
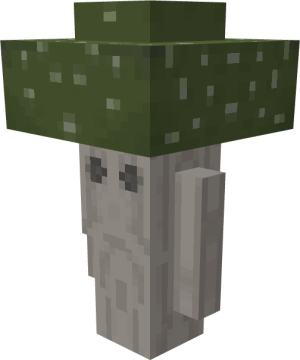
| | title = Live Shroom (Red) | | | title = Live Shroom (Red) |
| | image = 3DRLiveShroom.png | | | image = Mob-3DRLiveShroom.png |
| | Health = 105 | | | Health = 105 |
| | Fame = 30 | | | Fame = 30 |
| Line 85: |
Line 86: |
| {{NPCInfobox | | {{NPCInfobox |
| | title = Live Shroom (Green) | | | title = Live Shroom (Green) |
| | image = 3DGLiveShroom.png | | | image = Mob-3DGLiveShroom.png |
| | Health = 105 | | | Health = 105 |
| | Fame = 30 | | | Fame = 30 |
| Line 93: |
Line 94: |
| {{NPCInfobox | | {{NPCInfobox |
| | title = Live Shroom (Blue) | | | title = Live Shroom (Blue) |
| | image = 3DBLiveShroom.png | | | image = Mob-3DBLiveShroom.png |
| | Health = 105 | | | Health = 105 |
| | Fame = 30 | | | Fame = 30 |
| Line 101: |
Line 102: |
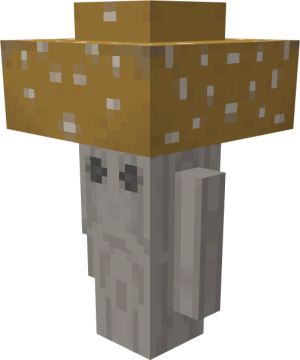
| {{NPCInfobox | | {{NPCInfobox |
| | title = Live Shroom (Yellow) | | | title = Live Shroom (Yellow) |
| | image = 3DYLiveShroom.png | | | image = Mob-3DYLiveShroom.png |
| | Health = 105 | | | Health = 105 |
| | Fame = 30 | | | Fame = 30 |
| Line 158: |
Line 159: |
| * During Prismara's burrowing stage, you need to hit the last segment to break it. | | * During Prismara's burrowing stage, you need to hit the last segment to break it. |
| </div> | | </div> |
| | </div> |
| | |
| </div> | | </div> |
|
| |
|
| {{Dungeon Navbox}} | | {{Dungeon Navbox}} |