|
|
| (19 intermediate revisions by 8 users not shown) |
| Line 1: |
Line 1: |
| {{Dungeon Boss | | __NOTOC__ |
| | title = FILL | | <div class="dungeon-page"> |
| | image = [[File:.png|968px]] | | {{NPCInfobox |
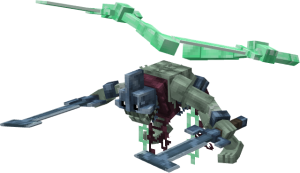
| | Health = FILL | | | title = Heptavius;Undead Ghoul |
| | Treasure = FILL | | | image = Boss-3DHeptavius.png;Bossbar-Heptavius |
| | | | Health = 935 |
| <!--TIERED SECTION START-->
| | | Fame = 150 |
| | | | Glory = 150 |
| | Tiered = [[Loot | T Equipment]][[File:.png|30px]]<br> | | | Tiered = 5-7 |
| | | | Companion = Pets;Dark Knight;Pet-2DDarkKnight.png;1, |
| [[Loot | T Equipment]][[File:.png|30px]]
| | Mounts;Necrofox;Mount-2DNecrofox.png;1 |
| | | | Gilded = Weapons;Doom Bow;Ut-DoomBow.png;10, |
| <!--TIERED SECTION END-->
| | Weapons;Doom Katana;Ut-DoomKatana.png;10, |
| <!--COMPANION SECTION START-->
| | Abilities;Hat Of Lost Souls;Ut-HatOfLostSouls.png;10 |
| | CChance = 1/FILL
| | | Frag = Gilded;75 |
| | Companion = [[Pets | ]][[File:.png|30px]]<br> | | | Required = 24 |
| | | | Solo = 24 |
| [[Mounts | ]][[File:.png|30px]]
| |
| | |
| <!--COMPANION SECTION END-->
| |
| <!--IRRADIATED SECTION START-->
| |
| | |
| | IChance = 1/FILL
| |
| | Irradiated = [[Weapons | ]][[File:.png|30px]]<br> | |
| | |
| [[Abilities | ]][[File:.png|30px]]
| |
| | |
| [[Armours | ]][[File:.png|30px]]
| |
| | |
| <!--IRRADIATED SECTION END-->
| |
| <!--ROYAL SECTION START-->
| |
| | |
| | RChance = 1/FILL
| |
| | Royal = [[Weapons | ]][[File:.png|30px]]<br>
| |
| | |
| [[Abilities | ]][[File:.png|30px]]
| |
| | |
| [[Armours | ]][[File:.png|30px]]
| |
| | |
| <!--ROYAL SECTION END-->
| |
| <!--BLOODSHOT SECTION START-->
| |
| | |
| | BChance = 1/FILL
| |
| | Bloodshot = [[Weapons | ]][[File:.png|30px]]<br>
| |
| | |
| [[Abilities | ]][[File:.png|30px]]
| |
| | |
| [[Armours | ]][[File:.png|30px]]
| |
| | |
| <!--BLOODSHOT SECTION END-->
| |
| <!--FRAGMENT & TIER POINT SECTION START--><!----------------------------------------------------------------- PICK THE CORRECT FRAG TYPE IF APPLICABLE ----------------------------->
| |
| | |
| | Fragment = [[Exalting | Irradiated Forge Fragment]][[File:Forge3.png|30px]] [[Exalting | Bloodshot Forge Fragment]][[File:Forge2.png|30px]] [[Exalting | Royal Forge Fragment]][[File:Forge1.png|30px]]
| |
| | |
| | TP = FILL TP | |
| | SoloTP = FILL TP | |
| | |
| <!--FRAGMENT & TIER POINT SECTION END-->
| |
| | |
| }} | | }} |
|
| |
|
| <!-------------------------------------Short Dungeon Description Below-----------------------------------> | | <div class="hoverbox"> |
| | The '''Undead Lair''' is a 24 [[Game Mechanics#Tier Points|Tier Point]] [[Dungeons|dungeon]] — ghastly-born, Heptavius rules the undead hall in which he resides, ruled by '''Heptavius, the Undead Ghoul'''. |
|
| |
|
| DUNGEON DESCRIPTION
| | This dungeon is dropped by [[Wraith]] and [[Snitch]] in [[Necropolis]]. |
| | </div> |
|
| |
|
| ==BOSS NAME==
| | <div class="hoverbox"> |
| <div style="width: 100%;"> | | <div class="dungeon-clear"> |
| <div style="float: left;"> | | == Dungeon Clear == |
| | * Go through the dungeon while clearing the rooms until you find the entrance to the boss arena, which is a hole in the ground. |
| | * This dungeon has a chance to spawn a highlighted chest, which gives you the chance to drop all the same items that the boss drops. |
| | </div> |
| </div> | | </div> |
| <div style="float: left; margin-left: 2%; width: 40%;">
| |
| BOSS DESCRIPTION
| |
|
| |
|
| ==Boss Patterns== <!------------------Make sure to indent a space for each pattern------------> | | <div class="hoverbox"> |
| | <div class="pre-dungeon"> |
| | == Boss Behaviour == |
| | <!------------------Make sure to indent a space for each pattern------------> |
| | '''(Attack 1)''' | Heptavius exhales a stream of toxic fumes that linger in the air, leaving behind a cloud of poisonous gas that deals damage when touched. |
|
| |
|
| PATTERN
| | '''(Attack 2)''' | Heptavius slashes the air, conjuring ghastly bullets that shoot toward the player, each dealing damage on impact. |
|
| |
|
| PATTERN
| | '''(Attack 3)''' | Heptavius leaps behind the player and slashes if close, dealing melee damage. If the player is out of range, he slams the ground instead, creating a large shockwave that deals AoE damage. |
|
| |
|
| PATTERN
| | '''100% to 33% (Phase 1)''' | Heptavius cycles through his main attacks listed above in order to damage the player. |
|
| |
|
| | '''66% to 33% (Phase 2)''' | Heptavius summons two of his undead minions to aid him in battle. He then cycles through his main attacks listed above in order to damage the player. |
| | |
| | '''33% to 0% (Phase 3)''' | Heptavius manifests a pair of ghastly arms that act independently. These arms deal melee damage and can spew toxic fumes across the arena. Heptavius continues cycling through his main attacks listed above in order to damage the player. |
| </div> | | </div> |
| </div> | | </div> |
|
| |
|
| <div style="float: left; width: 100%;"> | | <div class="hoverbox"> |
| ==Dungeon Enemies== | | == Dungeon Enemies == |
| | | <div class="dungeon-enemies"> |
| <div style="float: left;"> | | {{NPCInfobox |
| {{Dungeon Enemy | | | title = Wraith |
| | title = | | | image = Mob-3DWraith.png |
| | image = .png | | | Health = 77 |
| | Attack = | | | Fame = 12 |
| | Health = | | | Glory = 12 |
| | | Attack = Strikes the player with a melee attack that deals damage on hit. |
| | }} |
| | {{NPCInfobox |
| | | title = Snitch |
| | | image = Mob-3DSnitch.png |
| | | Health = 66 |
| | | Fame = 12 |
| | | Glory = 12 |
| | | Attack = Fires two projectiles toward the player, then releases a burst of toxic fumes that deal damage over time. |
| | }} |
| | {{NPCInfobox |
| | | title = Lost Spirit |
| | | image = Mob-3DLostSpirit.png |
| | | Health = 99 |
| | | Fame = 30 |
| | | Glory = 30 |
| | | Attack = Fires a barrage of five projectiles at the player, each dealing damage on contact. |
| | | Frag = Gilded;10 |
| }} | | }} |
| </div>
| | {{NPCInfobox |
| <div style="float: left;">
| | | title = Bomb Trap |
| {{Dungeon Enemy | | | image = Mob-3DBombTrap.png |
| | title = | | | Health = N/A |
| | image = .png | | | Fame = 0 |
| | Attack = | | | Attack = Explodes in a circular radius when approached, dealing AoE damage. |
| | Health = | |
| }} | | }} |
| </div> | | </div> |
| <div style="float: left;">
| |
| {{Dungeon Enemy
| |
| | title =
| |
| | image = .png
| |
| | Attack =
| |
| | Health =
| |
| }}
| |
| </div> | | </div> |
|
| |
|
| | <div class="hoverbox"> |
| | <div class="lore"> |
| | == Lore == |
| | <!------------------Do not touch unless authorized by lorers------------> |
| | {{DLog||Heptavius|???}} |
|
| |
|
| <div style="float: left; width: 100%;"> | | <!--Boss Dialogue Drop Down--> |
| | {{ButtonHeader |
| | |type=Dialogue |
| | |text=Boss & Dungeon Dialogue |
| | |img= |
| | |content= |
| | <tabber> |
| | English Dialogue= |
| | {| class="wikitable" |
| | |+ Clear |
| | |- |
| | ! Trigger !! Dialogue |
| | |- |
| | | Approaching a Chest || [Undead Chest] "Let's see what you will find inside!" |
| | |} |
| | {| class="wikitable" |
| | |+ Bossfight |
| | |- |
| | ! Trigger !! Dialogue |
| | |- |
| | | Arrival || [Heptavius] "You dare challenge me...?" |
| | |- |
| | | Phase 1 End || [Heptavius] "Awaken my spirits!" |
| | |- |
| | | Phase 2 End || [Heptavius] "I will sacrifice your souls to the a̷̰̰͕̩͍͛̅f̷̡̪̹͓̉̊͆̈̉̏͜u̴̩̦̰̣̜̮̬̗͉͌̅̄͑̔̏̀̊̈̓ͅę̷͚͙̺͒̑͒͘͘͝ͅn̸̡̢͈̟͔̝̰̕s̸̢̝͓͖̱̝͇̄̐̈!" |
| | |} |
| | </tabber> |
| | }} |
| | </div> |
| | </div> |
|
| |
|
| {{Navbox
| | </div> |
| | name = Dungeon Navbox
| |
| | title = Dungeons
| |
| | listclass = hlist
| |
| | state = {{{state|collapsed}}}
| |
| | |
| | group1 = 6 Tier Points
| |
| | list1 = [[Pirate Cove]]
| |
| | |
| | group2 = 12 Tier Points
| |
| | list2 = [[Thornwood Wargrove]] • [[Goblin Lair]]
| |
| | |
| | group3 = 18 Tier Points
| |
| | list3 = [[Sakura Shrine]] • [[Secluded Woodland]] • [[Desert Temple]]
| |
| | |
| | group4 = 24 Tier Points
| |
| | list4 = [[Abyss Of Demons]] • [[Dwarven Frostkeep]] • [[Undead Lair]] • [[Treasure Cave]] • [[Ice Cave]]
| |
|
| |
|
| | group5 = 30 Tier Points
| | {{Dungeon Navbox}} |
| | list5 = [[Depths Of Purgatory]] • [[Peaks Of Purgatory]] • [[Kobold's Den]] • [[Corvus Crypt]]
| |
| | |
| | group6 = 40 Tier Points
| |
| | list6 = [[Omnipotent's Citadel]] • [[Corsair's Conductorium]] • [[Fungal Cavern]] • [[Onyx's Castle]]
| |
| | |
| | group7 = 45 Tier Points
| |
| | list7 = [[Freddy's Pizzeria]] • [[Anubis Lair]] • [[Chronos]]
| |
| | |
| | group8 = 52 Tier Points
| |
| | list8 = [[Cultist's Hideout]] • [[Void]] • [[Illarius' Hideout]]
| |
| | |
| | group9 = 60 Tier Points
| |
| | list9 = [[Shattered Kingdom: Part 1]] • [[Onyx's Chamber]] • [[Shattered Kingdom: Part 2]]
| |
| | |
| | group10 = 60 Tier Points
| |
| | list10 = [[Celestial's Province]] • [[Shattered Kingdom: Part 3]]
| |
| | |
| | below = [[Main Page | Home]]
| |
| }} | |


