|
|
| (30 intermediate revisions by 9 users not shown) |
| Line 1: |
Line 1: |
| {{Dungeon Boss | | __NOTOC__ |
| | title = Shadowflare | | <div class="dungeon-page"> |
| | | {{NPCInfobox |
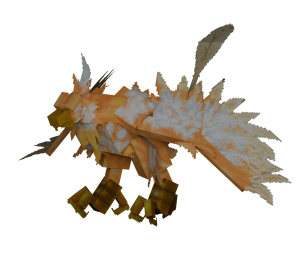
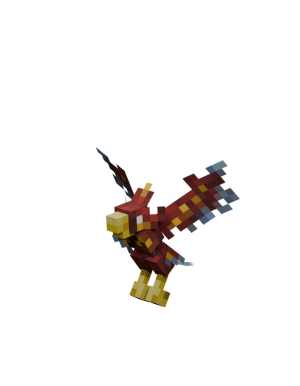
| Voided Phoenix | | | title = Solarflare;Voided Phoenix |
| | image = [[File:Shadowflare.png|968px]] | | | image = Boss-3DSolarflare.png;Bossbar-Solarflare |
| | Health = 5200 | | | Health = 5885 |
| | Treasure = No | | | Fame = 600 |
| | | | Glory = 600 |
| <!--TIERED SECTION START-->
| | | Tiered = 9-10 |
| | | | Companion = Pets;Dragon Warrior;Pet-2DDragonWarrior.png;0.2, |
| | Tiered = [[Loot | T9 Equipment]][[File:T9HeavyChestplate.png|30px]]<br> | | Mounts;Sunflare;Mount-2DSunflare.png;0.2 |
| | | | Bloodshot = Abilities;Resurgence;Ut-Resurgence.png;0.4 |
| [[Loot | T10 Equipment]][[File:T10HeavyChestplate.png|30px]]
| | | Royal = Abilities;Orb Of Purity;Ut-OrbOfPurity.png;2, |
| | | Weapons;Aerial Staff;Ut-AerialStaff.png;2, |
| <!--TIERED SECTION END-->
| | Armours;Phoenix Plate;Ut-PhoenixPlate.png;2 |
| <!--COMPANION SECTION START-->
| | | Frag = Bloodshot;5,Royal;120 |
| | CChance = 1/600
| | | Required = 54 |
| | Companion = [[Pets | Dragon Warrior]][[File:Dragon Warrior.png|30px]]<br> | | | Solo = 60 |
| | |
| [[Mounts | Sunflare]][[File:Sunflare.png|30px]]
| |
| | |
| <!--COMPANION SECTION END-->
| |
| <!--ROYAL SECTION START-->
| |
| | |
| | RChance = 1/80 | |
| | Royal = [[Weapons | Voided Staff]][[File:VoidedStaff.png|30px]]<br> | |
| | |
| [[Abilities | Breastplate Of New Life]][[File:BreastplateOfNewLife.png|30px]]
| |
| | |
| [[Armours | Void Hat]][[File:VoidHat.png|30px]]
| |
| | |
| <!--ROYAL SECTION END-->
| |
| <!--BLOODSHOT SECTION START-->
| |
| | |
| | BChance = 1/300
| |
| | Bloodshot = [[Abilities | Void Star]][[File:VoidStar.png|30px]]
| |
| | |
| | |
| | |
| <!--BLOODSHOT SECTION END-->
| |
| <!--FRAGMENT & TIER POINT SECTION START--><!----------------------------------------------------------------- PICK THE CORRECT FRAG TYPE IF APPLICABLE ----------------------------->
| |
| | |
| | Fragment = [[Exalting | Royal Forge Fragment]][[File:Forge1.png|30px]] [[Exalting | Bloodshot Forge Fragment]][[File:Forge2.png|30px]] | |
| | |
| | TP = 52 TP | |
| | SoloTP = 66 TP | |
| | |
| <!--FRAGMENT & TIER POINT SECTION END-->
| |
| | |
| }} | | }} |
|
| |
|
| <!-------------------------------------Short Dungeon Description Below-----------------------------------> | | <div class="hoverbox"> |
| | The '''The Aviary''' is a 54 [[Game Mechanics#Tier Points|Tier Point]] [[Dungeons|dungeon]] — where corrupted by the isle's power, Solarflare fights the player in her domain, ruled by '''Solarflare, Voided Phoenix'''. |
|
| |
|
| Corrupted by the void's power, Shadowflare fights the player in her domain.
| | This dungeon is dropped by [[Spear Harpy]], [[Talon Harpy]], and [[Diving Harpy]] in the [[Radiant Isles]]. |
| | </div> |
|
| |
|
| ==Shadowflare, Voided Phoenix==
| | <div class="hoverbox"> |
| <div style="width: 100%;"> | | == Dungeon Clear == |
| <div style="float: left;">
| | * After entering the dungeon, the player needs to go to all three smaller islands connected to the main one by ziplines. |
| | * Upon reaching each island, the player must destroy the egg in the centre. While there are enemies present around the egg, it takes reduced damage. |
| </div> | | </div> |
| <div style="float: left; margin-left: 2%; width: 40%;">
| |
|
| |
|
| ==Boss Patterns== <!------------------Make sure to indent a space for each pattern------------> | | <div class="pre-dungeon"> |
| | <div class="hoverbox"> |
| | == Boss Behaviour == |
| | <!------------------Make sure to indent a space for each pattern------------> |
| | '''(Arena Hazard)''' | Throughout the battle, flamelets continuously hatch from their eggs in the four corners of the arena. |
|
| |
|
| Shadowflare rises into the air and expels a stream of fire breath. The player chosen to receive this attack gains a particle aura.
| | '''(Attack 1)''' | Solarflare ascends into the air and breathes out a stream of fire toward a marked player. The chosen target is highlighted by a glowing aura and warned by a message before the attack begins. |
|
| |
|
| Shadowflare rises and slams into the ground, firing fragments of the void in all directions.
| | '''(Attack 2)''' | Solarflare takes flight, then slams into the ground, unleashing shards of radiance that are shot outward in every direction, dealing contact damage. |
|
| |
|
| Shadowflare rises into the air, chasing the player with arcing beams and dealing AoE damage periodically.
| | '''(Attack 3)''' | Solarflare hovers above the arena, channeling arcing beams of radiance that chase a targeted player. Every time she hops, she deals AoE damage in a medium radius. |
|
| |
|
| Throughout the battle, flamelets spawn from their eggs in the four corners of the arena.
| | '''(Attack 4)''' | Solarflare pursues the player across the ground, releasing multiple radiant fragments in three directions, each fragment dealing damage on impact. |
|
| |
|
| Shadowflare chases the player on the ground, releasing a wave of void fragments in all directions after jumping.
| | '''100% to 0% (Phase 1)''' | Solarflare cycles through her main attacks listed above in order to damage the player. |
|
| |
|
| ===Boss Phases===
| | '''50% to 0% (Phase 2)''' | Solarflare exalts herself by channeling the isle’s pure energy. Her attacks now unleash additional projectiles and deal increased damage. |
| | | </div> |
| 50% | Shadowflare calls upon the void’s power to exalt herself. All attacks gain added projectiles and more damage. The arena transforms and now contains voided blocks, which deal damage on contact.
| | </div> |
|
| |
|
| | <div class="hoverbox"> |
| | == Dungeon Enemies == |
| | <div class="dungeon-enemies"> |
| | {{NPCInfobox |
| | | title = Aviary Egg |
| | | image = Mob-3DEgg.png |
| | | SpecialInfo = Three of these must be cracked open in order to initiate the boss fight against Solarflare. |
| | | Health = 330 |
| | | Fame = 0 |
| | | Glory = 0 |
| | | Frag = Royal;3 |
| | }} |
| | {{NPCInfobox |
| | | title = (Spear) Harpy |
| | | image = Mob-3DSpearHarpy.png |
| | | Health = 143 |
| | | Fame = 35 |
| | | Glory = 35 |
| | | Attack = Throws a spear at the player. Occassionally, the spear releases projectiles while in its path, indicating it will cause a small AoE explosion on contact. |
| | | Frag = Royal;3 |
| | }} |
| | {{NPCInfobox |
| | | title = (Talon) Harpy |
| | | image = Mob-3DTalonHarpy.png |
| | | Health = 176 |
| | | Fame = 35 |
| | | Glory = 35 |
| | | Attack = Slashes the player with their talons, or levitates into the air before releasing a beam into the ground, dealing AoE damage in a small radius. |
| | | Frag = Royal;3 |
| | }} |
| | {{NPCInfobox |
| | | title = (Diving) Harpy |
| | | image = Mob-3DDivingHarpy.png |
| | | Health = 143 |
| | | Fame = 35 |
| | | Glory = 35dr |
| | | Attack = Shoots a set of six feathers at the player, or begins flying through the player, dealing damage on contact. |
| | | Frag = Royal;3 |
| | }} |
| | {{NPCInfobox |
| | | title = Flamelet |
| | | image = Mob-3DFlamelet.png |
| | | Health = 143 |
| | | Fame = 0 |
| | | Glory = 0 |
| | | Attack = Shoots bursts of flame toward the player or dashes forward, causing AoE damage in a small area upon impact. |
| | | Frag = Royal;2 |
| | }} |
| </div> | | </div> |
| </div> | | </div> |
|
| |
|
| <div style="float: left; width: 100%;"> | | <div class="hoverbox"> |
| ==Dungeon Enemies== | | <div class="lore"> |
| | == Lore == |
| | <!------------------Do not touch unless authorized by lorers------------> |
| | {{DLog||Shadowflare|???}} |
|
| |
|
| <div style="float: left;"> | | <!--Boss Dialogue Drop Down--> |
| {{Dungeon Enemy | | {{ButtonHeader |
| | title = Flamelet | | |type=Dialogue |
| | image = Flamelet.png | | |text=Dialogue |
| | Attack = | | |content= |
| | Health = | | <tabber> |
| | English Dialogue= |
| | {| class="wikitable" |
| | |+ Bossfight |
| | |- |
| | ! Trigger !! Dialogue |
| | |- |
| | | Arrival || [Solarflare] "Enough! You have rekindled the sun." <br />[Solarflare] "I will burn you to a crisp!" |
| | |- |
| | | Phase 1 End || [Solarflare] "No... I cannot..." <br />[Shadowflare] [Solarflare] "Witness true radiance!" |
| | |- |
| | | 25% Boss HP || [Solarflare] "Your incarnations will incinerate into ASH!" |
| | |} |
| | </tabber> |
| }} | | }} |
| | </div> |
| </div> | | </div> |
|
| |
|
| | <div class="hoverbox"> |
| | ==Tips and Tricks== |
| | <div class="tipstricks"> |
| | * When Solarflare performs the attack where she shoots radiant fragments in four directions, you can dodge it by standing in the areas where she previously fired the fragments. Continue moving in this pattern until the phase ends to avoid taking damage. |
| | * Do not stand too far from the center of the arena; if you do, Flamelets will start aggroing on you, and they can be very annoying to deal with. |
| | </div> |
| | </div> |
|
| |
|
| <div style="float: left; width: 100%;"> | | </div> |
|
| |
|
| {{Dungeon Navbox}} | | {{Dungeon Navbox}} |