|
|
| (22 intermediate revisions by 8 users not shown) |
| Line 1: |
Line 1: |
| {{Dungeon Boss | | __NOTOC__ |
| | title = FILL | | <div class="dungeon-page"> |
| | image = [[File:.png|968px]] | | {{NPCInfobox |
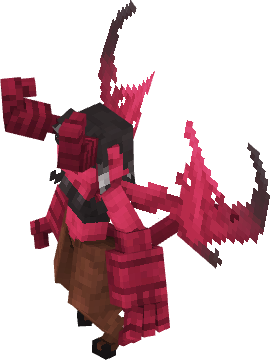
| | Health = FILL | | | title = Malfas;Succubus |
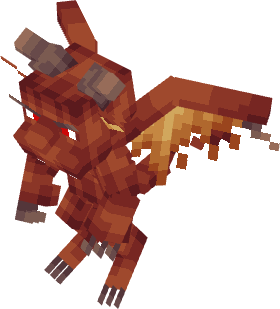
| | Treasure = FILL | | | image = Boss-3DMalfas.png;Bossbar-Malfas |
| | | Health = 825 |
| | | Fame = 150 |
| | | Glory = 150 |
| | | Tiered = 5-7 |
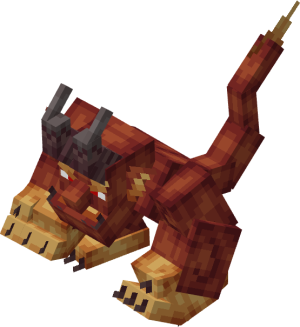
| | | Companion = Pets;Blazey;Pet-2DBlazey.png;1, |
| | Mounts;Magma Runner;Mount-2DMagmaRunner.png;1 |
| | | Gilded = Weapons;Demonic Blade;Ut-DemonicBlade.png;10, |
| | Weapons;Demonic Dagger;Ut-DemonicDagger.png;10, |
| | Abilities;Magma Infused Scripture;Ut-MagmaInfusedScripture.png;10 |
| | | Frag = Gilded;75 |
| | | Required = 24 |
| | | Solo = 24 |
| | }} |
|
| |
|
| <!--TIERED SECTION START--> | | <div class="hoverbox"> |
| | The '''Abyss Of Demons''' is a 24 [[Game Mechanics#Tier Points|Tier Point]] [[Dungeons|dungeon]] — an enchantress' dungeon, the sweet whispers of the walls entice the victims to meet their doom in malfas' throne, ruled by '''Malfas, the Succubus'''. |
|
| |
|
| | Tiered = [[Loot | T Equipment]][[File:.png|30px]]<br>
| | This dungeon is dropped by [[Lava Impling]] and [[Lava Imp]] in the [[Crimson Forest]]. |
| | </div> |
|
| |
|
| [[Loot | T Equipment]][[File:.png|30px]]
| | <div class="hoverbox"> |
| | <div class="dungeon-clear"> |
| | ==Dungeon Clear== |
| | * Go through the dungeon while clearing the rooms until you find the entrance to the boss arena, which is a hole in the ground. |
| | * This dungeon has a chance to spawn a highlighted chest, which gives you the chance to drop all the same items that the boss drops. |
| | </div> |
| | </div> |
|
| |
|
| <!--TIERED SECTION END--> | | <div class="hoverbox"> |
| <!--COMPANION SECTION START-->
| | <div class="pre-dungeon"> |
| | CChance = 1/FILL
| | ==Boss Behaviour== |
| | Companion = [[Pets | ]][[File:.png|30px]]<br> | | <!------------------Make sure to indent a space for each pattern------------> |
| | '''(Set 1, Attack 1)''' | Malfas conjures a tornado and circles around it, launching bursts of flame in all directions. Each flame deals contact damage. |
|
| |
|
| [[Mounts | ]][[File:.png|30px]]
| | '''(Set 1, Attack 2)''' | Malfas hurls a hellfire boomerang that arcs through the air before returning to her. The projectile deals damage and inflicts fire damage on hit. |
|
| |
|
| <!--COMPANION SECTION END-->
| | '''(Set 1, Attack 3)''' | Malfas releases four waves of flaming slashes toward the player, followed by a fifth wave sent outward in all directions. Each slash deals damage on contact. |
| <!--IRRADIATED SECTION START-->
| |
|
| |
|
| | IChance = 1/FILL
| | '''(Set 1, Attack 4)''' | Malfas dashes forward in a swift burst, dealing contact damage to the player on impact. |
| | Irradiated = [[Weapons | ]][[File:.png|30px]]<br> | |
|
| |
|
| [[Abilities | ]][[File:.png|30px]]
| | '''(Set 1, Attack 5)''' | Malfas detaches her tail, commanding it to strike independently while she performs another attack. The tail's strikes deal contact damage. |
|
| |
|
| [[Armours | ]][[File:.png|30px]]
| | '''(Set 2, Attack 1)''' | Malfas swings her sword with immense force, dealing contact damage and knockback to the player. |
|
| |
|
| <!--IRRADIATED SECTION END-->
| | '''(Set 2, Attack 2)''' | Malfas teleports to the center of the arena and unleashes a barrage of projectiles in a radial pattern around herself, each dealing damage on contact. |
| <!--ROYAL SECTION START-->
| |
|
| |
|
| | RChance = 1/FILL
| | '''100% to 66% (Phase 1)''' | Malfas cycles through her first set of attacks listed above in order to damage the player. |
| | Royal = [[Weapons | ]][[File:.png|30px]]<br> | |
|
| |
|
| [[Abilities | ]][[File:.png|30px]]
| | '''66% to 33% (Phase 2)''' | Malfas summons two of her minions to aid her while continuing to cycle through her first set of attacks. |
|
| |
|
| [[Armours | ]][[File:.png|30px]]
| | '''33% to 0% (Phase 3)''' | Malfas summons her sword from the ground and dashes toward the player, dealing contact damage. She now cycles through both sets of attacks listed above in order to damage the player. |
| | | </div> |
| <!--ROYAL SECTION END--> | | </div> |
| <!--BLOODSHOT SECTION START--> | |
| | |
| | BChance = 1/FILL
| |
| | Bloodshot = [[Weapons | ]][[File:.png|30px]]<br>
| |
| | |
| [[Abilities | ]][[File:.png|30px]]
| |
| | |
| [[Armours | ]][[File:.png|30px]]
| |
| | |
| <!--BLOODSHOT SECTION END-->
| |
| <!--FRAGMENT & TIER POINT SECTION START--><!----------------------------------------------------------------- PICK THE CORRECT FRAG TYPE IF APPLICABLE ----------------------------->
| |
| | |
| | Fragment = [[Exalting | Irradiated Forge Fragment]][[File:Forge3.png|30px]] [[Exalting | Bloodshot Forge Fragment]][[File:Forge2.png|30px]] [[Exalting | Royal Forge Fragment]][[File:Forge1.png|30px]]
| |
| | |
| | TP = FILL TP
| |
| | SoloTP = FILL TP
| |
| | |
| <!--FRAGMENT & TIER POINT SECTION END-->
| |
|
| |
|
| | <div class="hoverbox"> |
| | == Dungeon Enemies == |
| | <div class="dungeon-enemies"> |
| | {{NPCInfobox |
| | | title = Lava Imp |
| | | image = Mob-3DLavaImp.png |
| | | Health = 83 |
| | | Fame = 12 |
| | | Glory = 12 |
| | | Attack = Strikes the air, sending out rings in every direction that deal damage on contact. |
| | }} |
| | {{NPCInfobox |
| | | title = Ember Hound |
| | | image = Mob-3DEmberHound.png |
| | | Health = 99 |
| | | Fame = 30 |
| | | Glory = 30 |
| | | Attack = Shoots five flames toward the player, each dealing contact damage. |
| | | Frag = Gilded;10 |
| | }} |
| | {{NPCInfobox |
| | | title = Ember Shroom |
| | | image = Mob-3DEmberShroom.png |
| | | Health = 61 |
| | | Fame = 12 |
| | | Glory = 12 |
| | | Attack = Periodically releases an AoE burst that deals damage in a wide radius. |
| | }} |
| | {{NPCInfobox |
| | | title = Lava Impling |
| | | image = Mob-3DLavaImpling.png |
| | | Health = 55 |
| | | Fame = 12 |
| | | Glory = 12 |
| | | Attack = Flies toward the player and performs a melee strike that deals damage. |
| }} | | }} |
|
| |
| <!-------------------------------------Short Dungeon Description Below----------------------------------->
| |
|
| |
| DUNGEON DESCRIPTION
| |
|
| |
| ==BOSS NAME==
| |
| <div style="width: 100%;">
| |
| <div style="float: left;">
| |
| </div>
| |
| <div style="float: left; margin-left: 2%; width: 40%;">
| |
| BOSS DESCRIPTION
| |
|
| |
| ==Boss Patterns== <!------------------Make sure to indent a space for each pattern------------>
| |
|
| |
| PATTERN
| |
|
| |
| PATTERN
| |
|
| |
| PATTERN
| |
|
| |
| </div> | | </div> |
| </div> | | </div> |
|
| |
|
| <div style="float: left; width: 100%;"> | | <div class="hoverbox"> |
| ==Dungeon Enemies== | | <div class="lore"> |
| | == Lore == |
| | <!------------------Do not touch unless authorized by lorers------------> |
| | {{DLog||Malfas|???}} |
|
| |
|
| <div style="float: left;"> | | <!--Boss Dialogue Drop Down--> |
| {{Dungeon Enemy | | {{ButtonHeader |
| | title = | | |type=Dialogue |
| | image = .png | | |text=Boss & Dungeon Dialogue |
| | Attack = | | |img= |
| | Health = | | |content= |
| | <tabber> |
| | English Dialogue= |
| | {| class="wikitable" |
| | |+ Clear |
| | |- |
| | ! Trigger !! Dialogue |
| | |- |
| | | Approaching a Chest || [Abyssal Chest] "Let's see what you will find inside!" |
| | |} |
| | {| class="wikitable" |
| | |+ Bossfight |
| | |- |
| | ! Trigger !! Dialogue |
| | |- |
| | | Arrival || [Malfas] "Leave my hell world!" |
| | |- |
| | | Phase 1 End || [Malfas] "Awaken, my minions!" |
| | |- |
| | | Phase 2 End || [Malfas] "Really? You think you can take down the leader of the abyss?" <br />[Malfas] "Your life ends here!" |
| | |} |
| | </tabber> |
| }} | | }} |
| </div> | | </div> |
| <div style="float: left;">
| |
| {{Dungeon Enemy
| |
| | title =
| |
| | image = .png
| |
| | Attack =
| |
| | Health =
| |
| }}
| |
| </div> | | </div> |
| <div style="float: left;">
| | |
| {{Dungeon Enemy
| |
| | title =
| |
| | image = .png
| |
| | Attack =
| |
| | Health =
| |
| }}
| |
| </div> | | </div> |
|
| |
|
| | | {{Dungeon Navbox}} |
| <div style="float: left; width: 100%;">
| |
| | |
| {{Navbox | |
| | name = Dungeon Navbox
| |
| | title = Dungeons
| |
| | listclass = hlist
| |
| | state = {{{state|collapsed}}}
| |
| | |
| | group1 = 6 Tier Points
| |
| | list1 = [[Pirate Cove]]
| |
| | |
| | group2 = 12 Tier Points
| |
| | list2 = [[Thornwood Wargrove]] • [[Goblin Lair]]
| |
| | |
| | group3 = 18 Tier Points
| |
| | list3 = [[Sakura Shrine]] • [[Secluded Woodland]] • [[Desert Temple]]
| |
| | |
| | group4 = 24 Tier Points
| |
| | list4 = [[Abyss Of Demons]] • [[Dwarven Frostkeep]] • [[Undead Lair]] • [[Treasure Cave]] • [[Ice Cave]]
| |
| | |
| | group5 = 30 Tier Points
| |
| | list5 = [[Depths Of Purgatory]] • [[Peaks Of Purgatory]] • [[Kobold's Den]] • [[Corvus Crypt]]
| |
| | |
| | group6 = 40 Tier Points
| |
| | list6 = [[Omnipotent's Citadel]] • [[Corsair's Conductorium]] • [[Fungal Cavern]] • [[Onyx's Castle]]
| |
| | |
| | group7 = 45 Tier Points
| |
| | list7 = [[Freddy's Pizzeria]] • [[Anubis Lair]] • [[Chronos]]
| |
| | |
| | group8 = 52 Tier Points
| |
| | list8 = [[Cultist's Hideout]] • [[Void]] • [[Illarius' Hideout]]
| |
| | |
| | group9 = 60 Tier Points
| |
| | list9 = [[Shattered Kingdom: Part 1]] • [[Onyx's Chamber]] • [[Shattered Kingdom: Part 2]]
| |
| | |
| | group10 = 60 Tier Points
| |
| | list10 = [[Celestial's Province]] • [[Shattered Kingdom: Part 3]]
| |
| | |
| | below = [[Main Page | Home]]
| |
| }} | |
