


| Trigger | Dialogue |
|---|---|
| Arrival | [] |
| Phase 1 End | |
| Phase 2 End | |
| Phase 3 End | |
| Phase 4 End | |
| 10% Boss HP | |
| 5% Boss HP | |
| Boss Death |
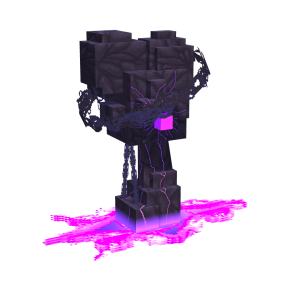
The Valley of the Lost is a 60 Tier Point dungeon, ruled by Oblivion, Void Amalgamation.
This dungeon is accessed by defeating 15 Voided Citizens
(Phase 1: The Wall) | Oblivion starts far away and closes in on the player. During this phase, a beam of light periodically targets the player, spawning a purple circle underneath them. After a short delay, the circle erupts and highlights lines across the floor that send out spikes in that direction. That explosion also releases a purple ring that must be jumped over. Throughout this phase, blue and purple beams sweep across the arena from Oblivion's direction, and gray bar projectiles close in from the sides, forcing players to navigate through the gaps, jump over the blue beams, and crouch under the purple beams while dodging the spikes sent outward by the explosions. Players must break 3 sets of voided vines by damaging it and enter a tunnel to escape. A leading purple laser moves forward into the tunnel to guide the way, eventually disappearing once Oblivion reaches the tunnel to trigger the next part.
100% to 60% (Phase 2: From Below) | Once the leading laser disappears and the path opens, the "From Below" text appears as Oblivion starts rising from the bottom of the pit, instantly killing any player caught by it. Players must use the jump pads, indicated by white particles, to parkour upward. Along the way, players must attack five purple cubes to send them downward to damage Oblivion. Once five cubes are successfully sent down, the "From Above" text appears, signaling players to jump back down into the arena to begin the next phase.
(Arena Hazard) | Permanent zone indicator around the arena.
(Attack 1) | Oblivion moves around the arena, surrounded by a zone indicator that deals contact damage. Small projectiles are fired in from the sides of the arena alongside small flame projectiles arriving diagonally in a repeating pattern, all dealing damage on contact.
(Attack 2) | Oblivion stays in the center while red circles appear across the floor, which after a short delay erupt in an outward explosion of four red projectiles. Dashed lines also appear, sending heads along them in the direction they point. Throughout this phase, Oblivion releases expanding rings of purple cubes from the center with gaps between them, all dealing damage on contact.
(Attack 3) | Oblivion moves around the arena while purple cubes spawn in a ring around the player. After a brief delay, two cubes are highlighted red and fire at the player. The remaining cubes stay in place until the next ring spawns, after which they converge on the player when the next pair of cubes are highlighted. Throughout this phase, beams sweep across the arena, where blue beams must be jumped over and purple beams must be avoided by crouching.
60% to 20% (Phase 3) | Oblivion cycles through his main attacks listed above in order to damage the player and repeats this process until his health reaches 20%
20% to 0% (Phase 4: Desperation) | Oblivion stays at the center, periodically releasing a light blue ring outward from himself that players must jump over to avoid damage. Throughout this phase, streaks of projectiles fly in across the arena, dealing damage on contact. A set of purple beams rotates around the arena, dealing damage to any player they touch. Large purple circles also appear on the ground, and after a brief delay, each one erupts into a burst of spikes that deals damage to anyone still standing inside it.
[D̷̛͖̲̜̤̭̤̬̏͑́̌̇̽͛̊́̕̚͜'s LOG: Oblivion] BYPASS STATE: ???
| Trigger | Dialogue |
|---|---|
| Arrival | [] |
| Phase 1 End | |
| Phase 2 End | |
| Phase 3 End | |
| Phase 4 End | |
| 10% Boss HP | |
| 5% Boss HP | |
| Boss Death |